This is my updated post-install checklist for Ubuntu Server. A lot has changed since I put together my original 2022 version — the SSH config approach has improved, systemd handles time sync out of the box now, and there are a couple of security additions I’ve worked into my standard setup that I wasn’t running before. Whether you’re on a VM, a physical box, or a Raspberry Pi, this picks up right where the OS installer leaves off.
One thing that hasn’t changed: I don’t expose SSH externally and I use password authentication for convenience when switching between accounts in PuTTY. If your setup is different, some of the SSH recommendations will look a little different for you.
Go through these steps in order — I’ve grouped reboots to keep things efficient.
Update the Server
Before anything else, get the system up to date. This takes care of any packages the installer missed and gets you on the latest kernel before we start locking things down.
sudo apt update && sudo apt upgrade -y
Don’t reboot yet — we’ll do that after SSH and UFW are configured.
Harden SSH
Ubuntu 22.04 and later support drop-in config files for SSH, which means instead of editing the main sshd_config directly, you drop a small file into /etc/ssh/sshd_config.d/ and it gets picked up automatically. This keeps your customizations clean and separate from the defaults.
Create the drop-in file:
sudo nano /etc/ssh/sshd_config.d/10-custom.conf
Add the following two lines, replacing the port with whatever you want to use:
Port 2222
PermitRootLogin no
PermitRootLogin no blocks root from logging in over SSH entirely. You can still access root from a local console, but not remotely. Don’t restart SSH yet — do that after UFW is configured so you don’t lose your session.
Enable UFW Firewall
UFW ships with Ubuntu and just needs to be turned on. Before enabling it, add your new SSH port so you don’t lock yourself out:
sudo ufw allow in {your-ssh-port}
sudo ufw default deny incoming
sudo ufw default allow outgoing
sudo ufw enable
Press y to confirm. Now reboot so the SSH changes take effect along with any updated packages:
sudo reboot now
When the server comes back up, reconnect using your new SSH port.
Configure Unattended Updates
For servers that don’t need scheduled maintenance windows, I let unattended-upgrades handle updates automatically in the background. Install it if it isn’t already:
sudo apt install unattended-upgrades -y
sudo dpkg-reconfigure --priority=low unattended-upgrades
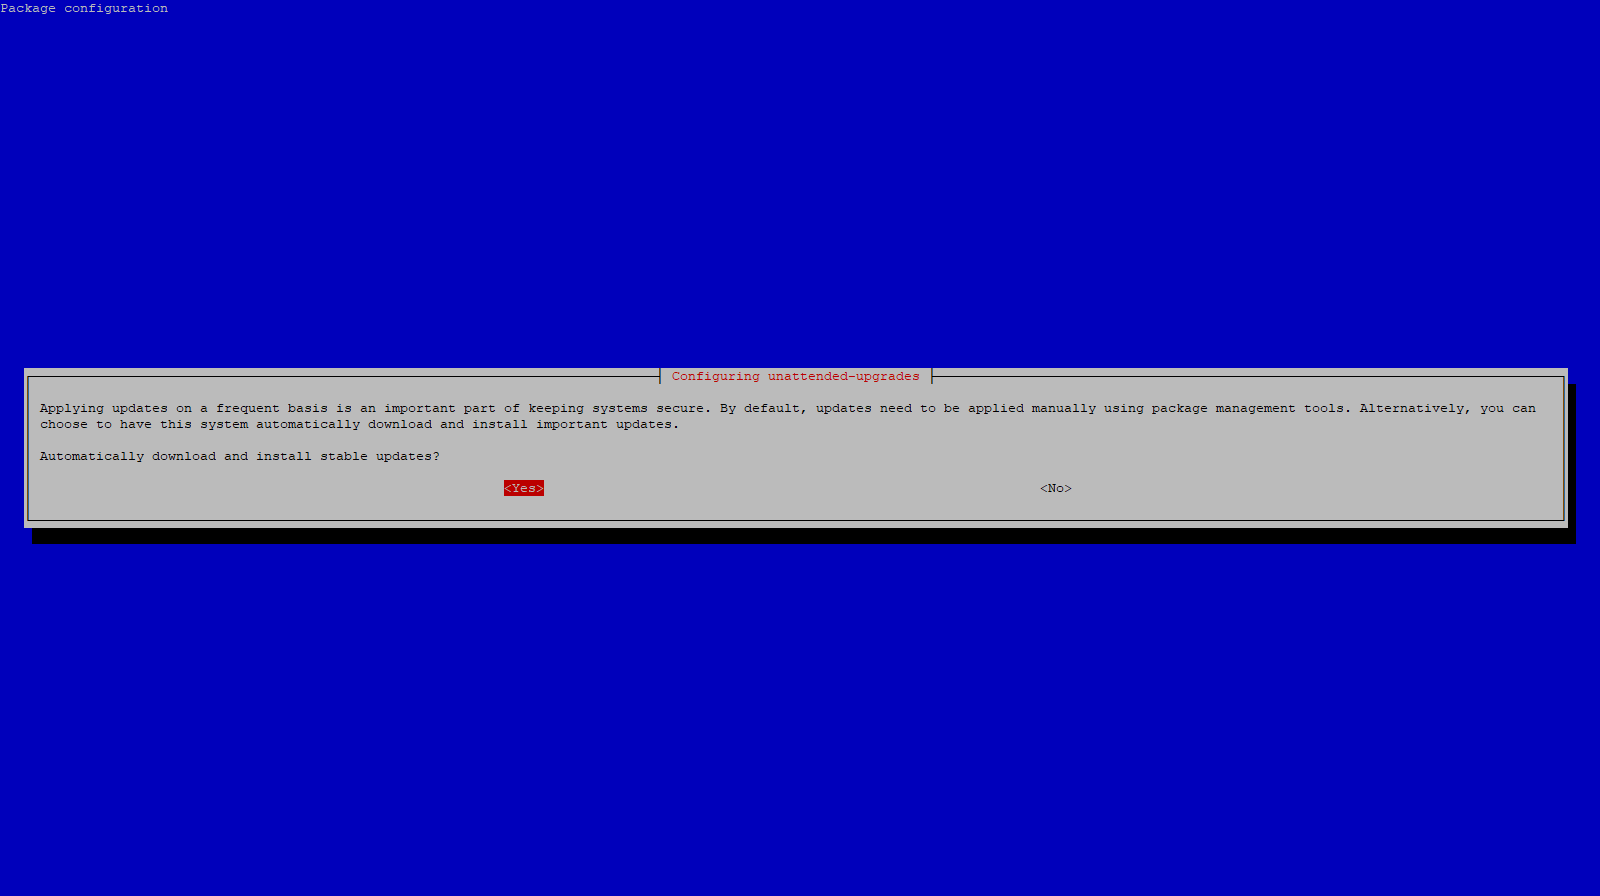
Press Enter to confirm, then open the config file to tune it:
sudo nano /etc/apt/apt.conf.d/50unattended-upgrades
These are the lines I uncomment and change:
- Uncomment
"${distro_id}:${distro_codename}-updates";— adds general (non-security) package updates on top of the default security-only updates. See the note below before enabling this. - Uncomment
"${distro_id}:${distro_codename}-backports";— includes backported packages, which are newer software versions ported back to the current LTS release. Also see the note below. - Uncomment
Unattended-Upgrade::MinimalSteps "true";— checkpoints the upgrade process between each package so if something interrupts mid-run the system is less likely to end up in a broken state. - Uncomment
Unattended-Upgrade::Remove-Unused-Kernel-Packages "true";— automatically removes old kernel versions after a new one is installed so they don’t pile up on disk. - Uncomment
Unattended-Upgrade::Remove-New-Unused-Dependencies "true";— removes dependencies that were pulled in by a package upgrade but are no longer needed after it completes. - Uncomment and set
Unattended-Upgrade::Remove-Unused-Dependencies "true";— cleans up any pre-existing unused dependencies already on the system, not just ones introduced by new upgrades. - Uncomment and set
Unattended-Upgrade::Automatic-Reboot "true";— automatically reboots the server when a kernel or other core package update requires it. - Uncomment and set
Unattended-Upgrade::Automatic-Reboot-WithUsers "false";— prevents the server from rebooting while you have an active SSH session. It skips the reboot and retries the following night instead. - Uncomment
Unattended-Upgrade::Automatic-Reboot-Time "02:00";— sets the time the automatic reboot happens. Change this to whatever works for your environment.
A quick note on the -updates and -backports sources — enabling these means non-security package updates and newer software versions install automatically, not just security patches. This is more aggressive than the default and can occasionally introduce regressions, particularly with backports. I’d only recommend this on non-critical servers where stability isn’t a hard requirement. If you’re running something that needs to be rock solid, leave those two lines commented out and let it stick to security updates only.
With kernel cleanup enabled here, you don’t need a separate cron job for autoremove — unattended-upgrades handles it. If you’re running paired servers make sure the reboot times are staggered so they don’t both go offline at the same time.
Change the Root Password
Simple but easy to skip:
sudo passwd root
Configure Time Zone
Ubuntu 26.04 ships with systemd-timesyncd enabled by default, so there’s no need to install a separate NTP package — time sync is already running. All we need to do is set the correct time zone and verify it’s working:
sudo timedatectl set-timezone America/Los_Angeles
timedatectl status
Check that System clock synchronized: yes appears in the output. If you need to find your time zone, timedatectl list-timezones will give you the full list.
Install fail2ban
fail2ban watches your auth logs and automatically bans IPs that rack up too many failed login attempts. Even on an internal network it’s worth having — if something else on your network gets compromised, it limits how far SSH brute-forcing can get.
sudo apt install fail2ban -y
fail2ban doesn’t use jail.conf directly — you’re supposed to create a local override file so your settings survive package updates:
sudo nano /etc/fail2ban/jail.local
Add:
[DEFAULT]
bantime = 1h
findtime = 10m
maxretry = 5

[sshd]
enabled = true
port = {your-ssh-port}
Enable and start it:
sudo systemctl enable --now fail2ban
You can check the current state of the SSH jail at any time with:
sudo fail2ban-client status sshd
Run a Lynis Security Audit
Lynis is an open-source security auditing tool that scans your system and gives you a hardening score along with specific recommendations. I run it once after initial setup to catch anything I missed:
sudo apt install lynis -y
sudo lynis audit system
The scan takes a couple of minutes. When it finishes you’ll see a summary at the bottom with a Hardening Index score and a list of suggestions organized by priority. It’ll flag things like weak file permissions, kernel parameters worth tightening, or services you might want to disable.
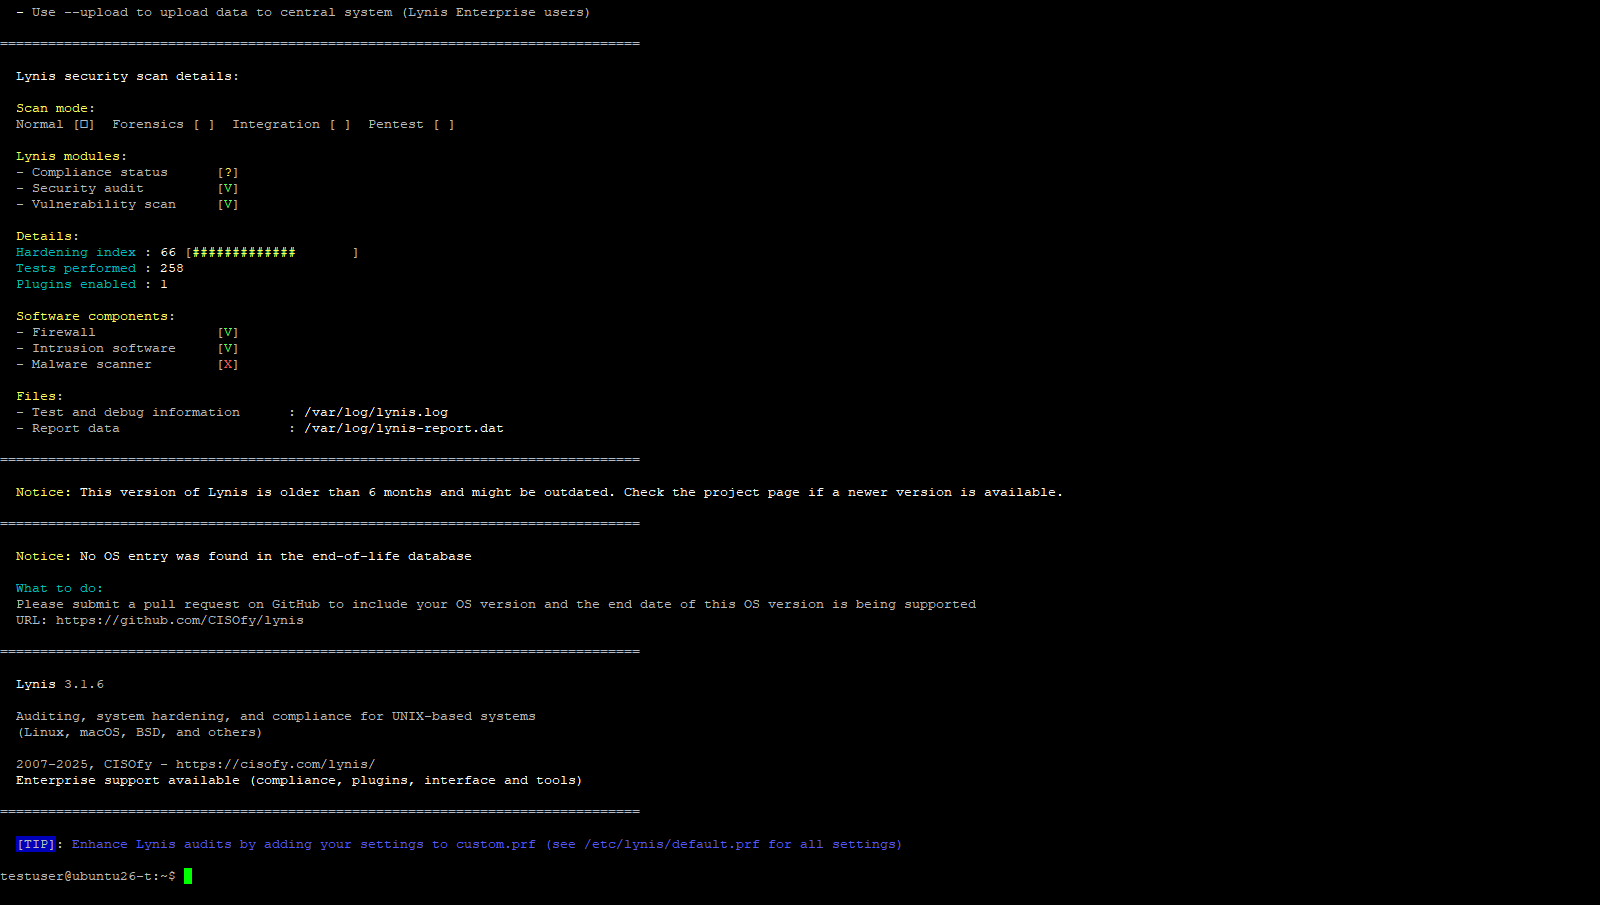
Don’t stress about chasing a perfect score — some of the suggestions are aggressive for a homelab environment. Focus on anything flagged as a Warning first, then work through the suggestions from there. The full report is saved to /var/log/lynis.log and /var/log/lynis-report.dat if you want to reference it later or track improvements over time.
That covers my current baseline for a fresh Ubuntu Server install. It’s not exhaustive, but it gives you a solid, hardened starting point before you start deploying services. From here I usually move on to setting up Docker or whatever specific role the server is going to fill.
If you’re looking for more guides and content around Ubuntu Server 26.04, check out my Ubuntu Server 26.04 LTS — My Content Hub article where I’ll be rounding up everything I’m publishing on 26.04 this week.