Back in 2022 I posted a combined guide covering Docker, Docker Compose, and Portainer all in one article. I’ve since split those out into separate posts — the Docker and Compose installation has its own updated guide now, and this post is focused entirely on Portainer. It’s been a few years and a few versions since I wrote that original article, so I wanted to put out something current.
Portainer CE is a lightweight, web-based GUI for managing Docker environments. I’ve been running it on every Docker host I have because it makes day-to-day container management so much easier — you can see all your containers, images, volumes, and stacks in one place without needing to SSH into the server every time. It also has first-class support for Docker Compose stacks, which is how I deploy most of my services.
One thing that changed between my old post and now is the default port. The previous recommended port for the web UI was 9000 over HTTP. Portainer now defaults to 9443 over HTTPS with a self-signed certificate. It’s a minor change but worth noting if you’re following along from an older guide.
Prerequisites
- Docker and Docker Compose installed and running — see my updated Docker install guide
- A user with permission to run Docker commands (added to the
dockergroup)
Creating the Data Volume
Portainer stores its configuration, users, and settings in a named Docker volume. The first step is creating that volume so the data persists across container restarts or upgrades.
docker volume create portainer_data
This creates a volume called portainer_data that Docker manages on the host. You don’t need to do anything else with it — Portainer will handle its own data inside it.
Running the Portainer Container
With the volume in place, a single docker run command pulls the image and starts the service.
docker run -d \
  -p 8000:8000 \
  -p 8001:9443 \
  --name portainer \
  --restart=always \
  -v /var/run/docker.sock:/var/run/docker.sock \
  -v portainer_data:/data \
  portainer/portainer-ce:latest
Breaking down the flags:
-d— runs the container in detached (background) mode-p 8001:9443— exposes the HTTPS web UI on port 9443; change the left number if you want to use a different host port-p 8000:8000— used for the Edge agent tunnel; keep this if you plan to manage remote hosts (covered below)--restart=always— ensures Portainer comes back up automatically after a reboot or Docker restart-v /var/run/docker.sock:/var/run/docker.sock— gives Portainer access to the Docker daemon so it can manage containers-v portainer_data:/data— mounts the volume we created for persistent storage
First-Time Setup
Once the container is running, open a browser and navigate to:
https://{your server IP or hostname}:8001
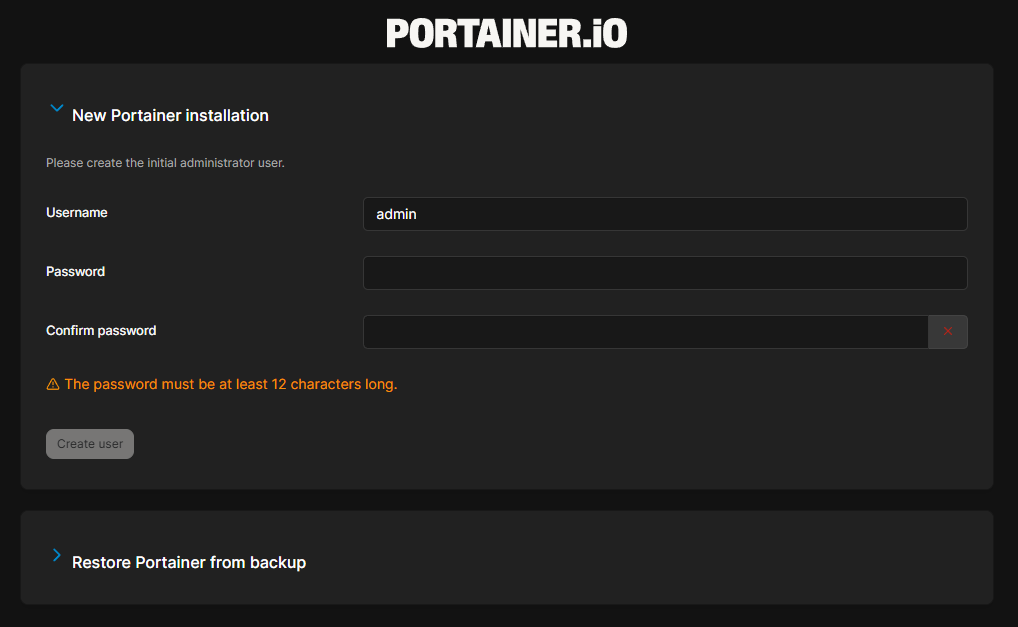
Your browser will warn you about the self-signed certificate — that’s expected. Accept the exception and continue. You’ll land on the initial setup screen.
Create your admin username and password here. Make it strong — this is the account that controls everything. After that, Portainer will ask you to configure your first environment.
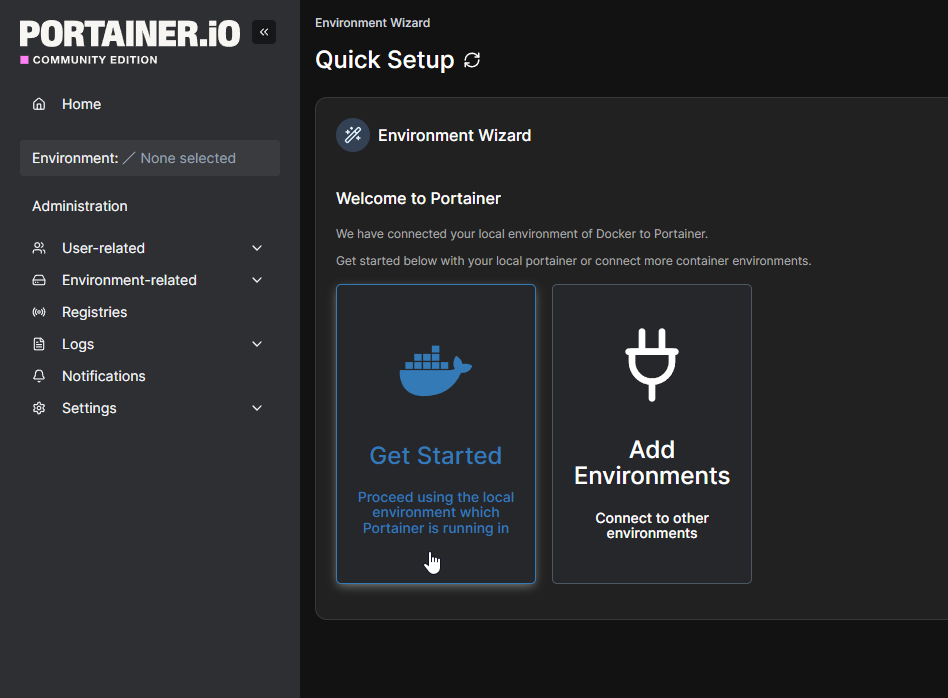
Since it’s running on the same host as Docker, select Get Started and connect using the local socket. Portainer will detect it automatically.
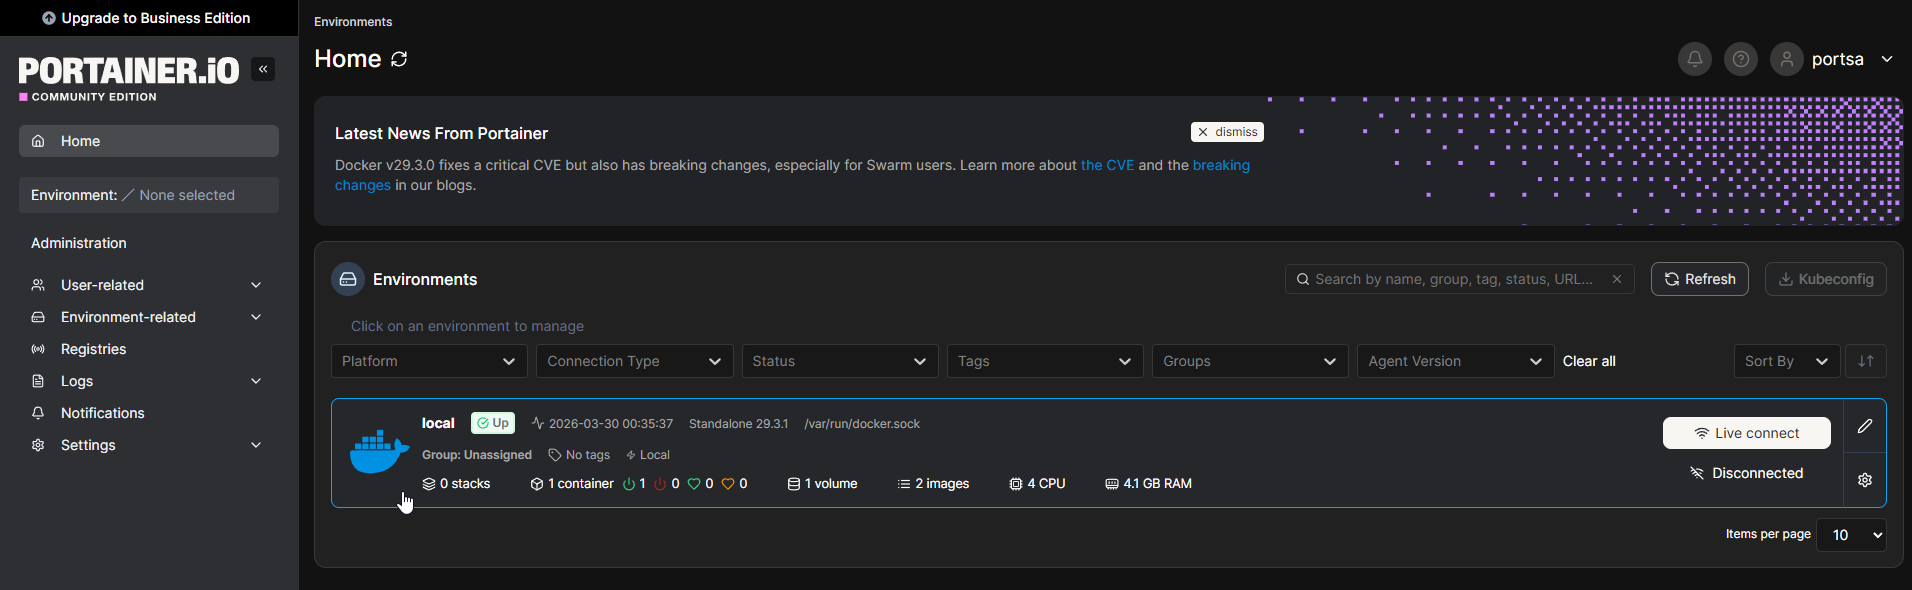
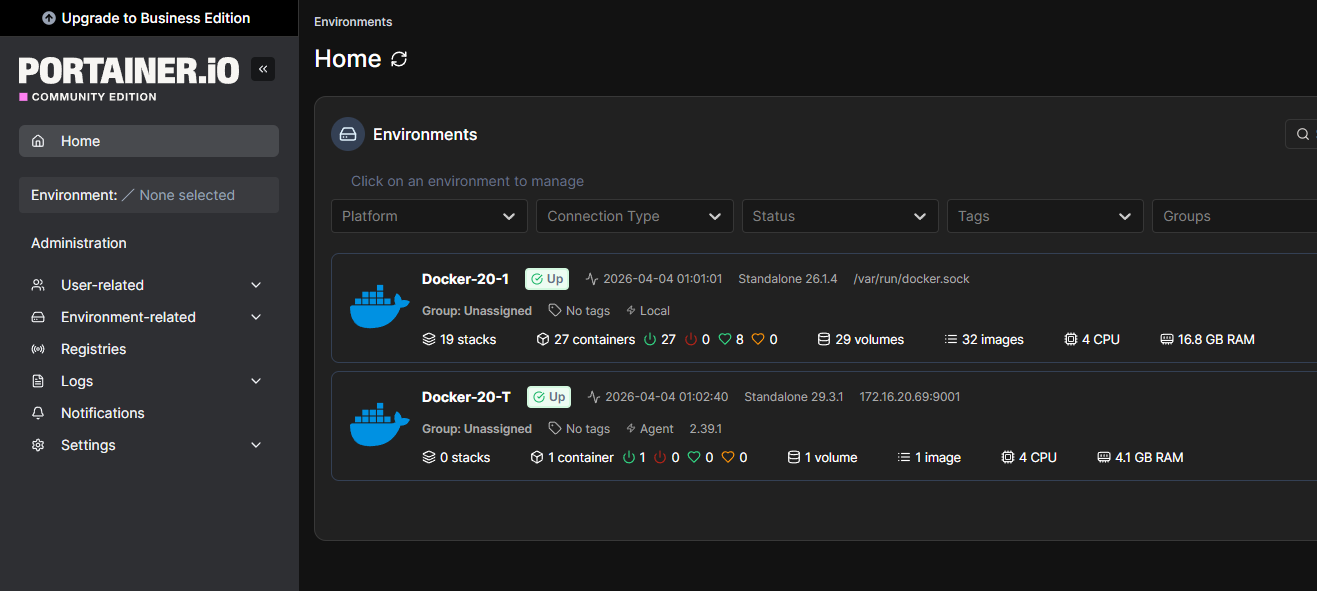
Once connected, you’ll be taken into the main dashboard where you can see all your containers, volumes, images, and networks.
Optional: Managing Multiple Docker Hosts
One of the features I use heavily is connecting multiple Docker hosts to a single Portainer instance. Rather than logging into a separate Portainer install on each server, I have one central Portainer that I use to manage everything. This is done using the Portainer Agent — a lightweight container you deploy on each remote host.
Deploying the Agent on Each Remote Host
On every host you want to manage (not the one running Portainer itself), run the following:
docker run -d \
  -p 9001:9001 \
  --name portainer_agent \
  --restart=always \
  -v /var/run/docker.sock:/var/run/docker.sock \
  -v portainer_data:/var/lib/docker/volumes \
  portainer/agent:latest
-p 9001:9001— the port Portainer uses to communicate with the agent; make sure this is reachable from your Portainer host- The two volume mounts give the agent access to the Docker daemon and volume data on that host
Adding the Remote Host to Portainer
Back in the Portainer web UI, navigate to Environment-related → Environments → Add Environment. Choose Docker Standalone and select Agent as the connection type.
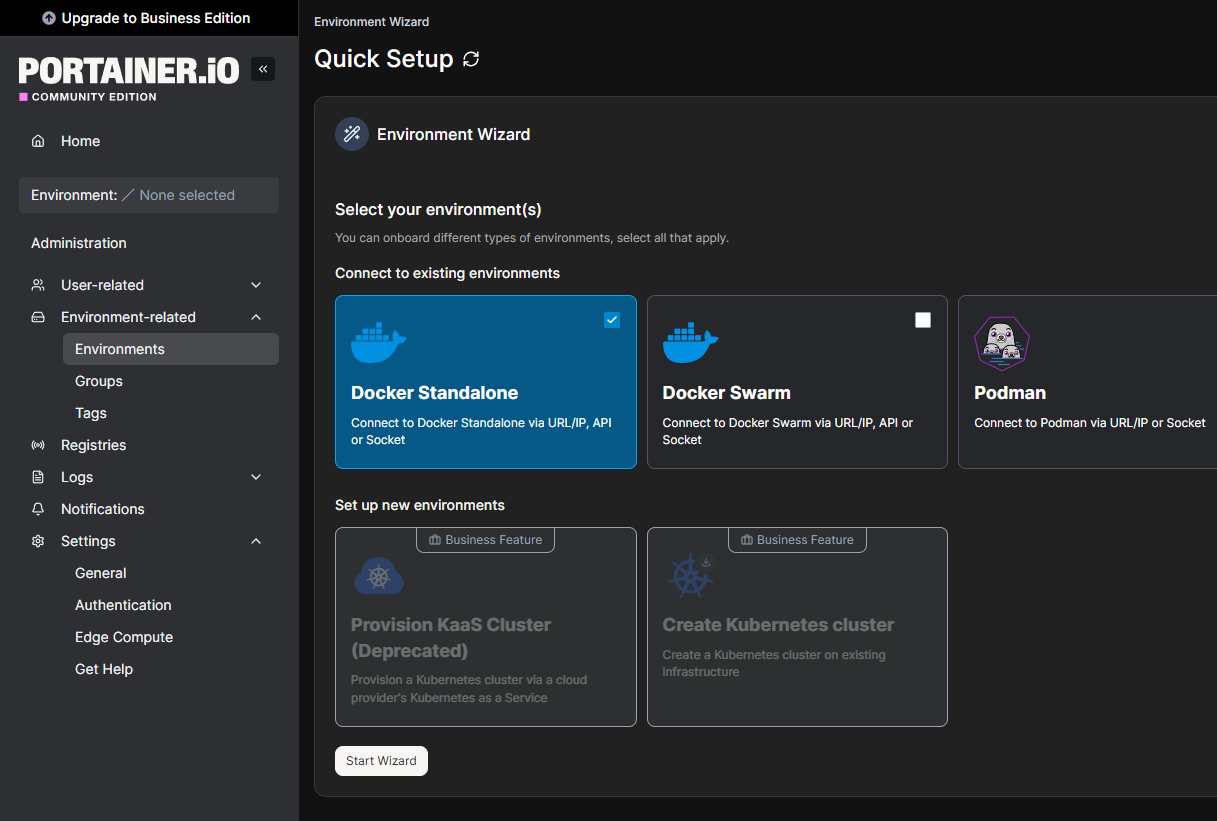
Enter a name for the host and the agent URL in the format {host IP or hostname}:9001. Click Connect and Portainer will connect to the agent and pull in that host’s containers and resources.
I set this up for each of my Docker hosts and it’s made managing everything a lot cleaner. Switching between hosts is just a click in the environment selector at the top of the dashboard — no separate logins, no SSH sessions just to check on a container.
Updating Portainer
Since the container is running with --restart=always and pulls from the latest tag, updates aren’t automatic — you need to pull the new image and recreate the container manually. Your data is safe because it lives in the portainer_data volume, not inside the container itself.
Stop and remove the running container:
docker stop portainer && docker rm portainer
Remove the old image so Docker pulls a fresh copy:
docker rmi portainer/portainer-ce:latest
Then re-run the original deployment command:
docker run -d \
  -p 8000:8000 \
  -p 8001:9443 \
  --name portainer \
  --restart=always \
  -v /var/run/docker.sock:/var/run/docker.sock \
  -v portainer_data:/data \
  portainer/portainer-ce:latest
Docker will pull the latest image and start the container. Your settings, users, and environments will all be intact since they’re stored in the volume.
Wrapping Up
That’s all there is to getting Portainer CE up and running. It’s one of the first things I deploy on any new Docker host because it just makes everything easier to manage. The multi-host agent setup is worth the few extra minutes it takes — once you have more than one or two servers, the single dashboard view is a huge quality of life improvement.