Back in 2022 I posted a guide on installing Docker, Docker Compose, and Portainer on Ubuntu Server. That article used Docker Compose V1 — the standalone binary you’d install separately and call with docker-compose. Docker officially deprecated V1 in July 2023, so I wanted to put out an updated guide that covers the current installation method. If you’re still running the old binary, now is a good time to move over.
This guide covers Docker Engine and Docker Compose V2 only. Compose V2 is a plugin that ships alongside Docker itself rather than a separate download, and the command changed from docker-compose to docker compose (no hyphen). The core behavior is the same — your existing YAML files will work without changes.
These steps work on any Debian-based Linux distribution, including Ubuntu Server, Debian, and Linux Mint. With Ubuntu 26.04 LTS dropping next month, now is actually a great time to get familiar with this process — whether you’re doing a fresh install on the new LTS or migrating an existing server over, you’ll be running through these exact steps anyway.
Already Running Docker? Check What Version You Have First
If you’ve had Docker installed for a while and have been keeping it updated through normal system updates, you may already be on Compose V2 without realizing it. Run these two commands to find out:
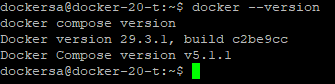
docker --version
docker compose version
If docker --version reports 20.10 or later and docker compose version returns a version string, you’re already running a current Docker Engine with Compose V2 as a plugin and you don’t need to follow this guide. Your setup is current. Docker Engine 20.10 (released December 2020) is when the plugin architecture was introduced, so anything older than that is worth upgrading regardless.
If instead you get a “command not found” error and have to use docker-compose (hyphenated) to get a version, you’re still on the old standalone binary and this guide will walk you through switching over.
Prerequisites
Before starting, make sure your server is up to date:
sudo apt-get update && sudo apt-get upgrade -y
If you have any older Docker packages installed from a previous setup, remove them first to avoid conflicts. Before you do, stop any running containers — when Docker is removed from the system, anything still running will be killed abruptly rather than shut down cleanly:
docker stop $(docker ps -q)
Then remove the old packages:
for pkg in docker.io docker-doc docker-compose docker-compose-v2 podman-docker containerd runc; do
  sudo apt-get remove $pkg
done
The good news is that apt-get remove only uninstalls the packages — it does not touch your data. Your images, volumes, and container configurations stored in /var/lib/docker will still be there after the reinstall. Once Docker CE is back up and running, your existing setup should pick right back up where it left off. If you want a completely clean slate instead, you can delete that directory manually, but only do that if you’re intentionally wiping everything.
Adding the Docker Repository
Docker isn’t in the default apt repositories, so we need to add their official repo. Start by installing the packages needed to use an HTTPS repository:
sudo apt-get install ca-certificates curl
Next, create the directory for the GPG keyring and download Docker’s signing key:
sudo install -m 0755 -d /etc/apt/keyrings
sudo curl -fsSL https://download.docker.com/linux/ubuntu/gpg -o /etc/apt/keyrings/docker.asc
sudo chmod a+r /etc/apt/keyrings/docker.asc
The GPG key is what lets apt verify that the packages you’re downloading actually came from Docker and haven’t been tampered with.
Now add the Docker repository to your sources list:
echo \
  "deb [arch=$(dpkg --print-architecture) signed-by=/etc/apt/keyrings/docker.asc] https://download.docker.com/linux/ubuntu \
  $(. /etc/os-release && echo "$VERSION_CODENAME") stable" | \
  sudo tee /etc/apt/sources.list.d/docker.list > /dev/null
This adds the stable channel, which is what I always use. If you want to live dangerously you can swap stable for nightly or test, but I’d stick with stable for anything running in production.
Installing Docker
Update the package index to pull in the new repository, then install Docker and the Compose plugin together:
sudo apt-get update
sudo apt-get install docker-ce docker-ce-cli containerd.io docker-buildx-plugin docker-compose-plugin
Notice docker-compose-plugin in that list — that’s Compose V2, installed right alongside Docker. No separate download step needed like the old days.
Once that finishes, give your user account permission to run Docker commands without sudo:
sudo usermod -aG docker $USER
Do a full reboot to make sure the group change takes effect cleanly:
sudo reboot now
Verifying the Installation
After the server comes back up, run the hello-world container to confirm Docker is working:
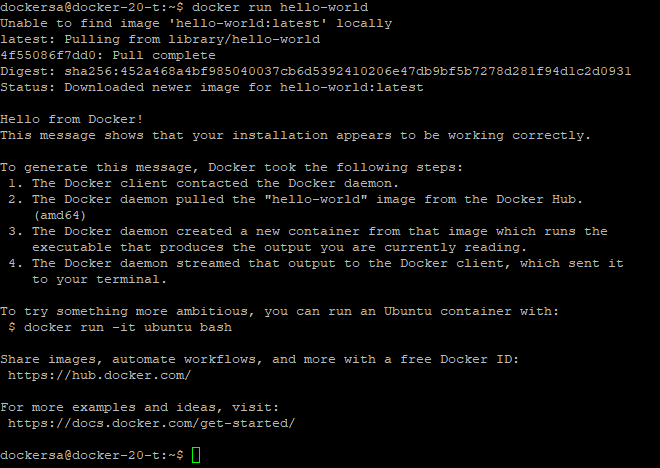
docker run hello-world
You should see Docker pull the image and print a success message. If you see that, Docker is running correctly.
Then verify Compose V2 is available:
docker compose version
You should get back a version string starting with Docker Compose version v followed by the current version number — the exact number will vary depending on when you’re reading this. Note the command is docker compose, not docker-compose — if you have scripts or aliases using the old syntax, this is the time to update them.

A Note on Docker Compose V1 vs V2
The main thing to know is that the command changed. In V1 it was docker-compose (hyphenated, separate binary). In V2 it’s docker compose (a subcommand of docker itself). Your docker-compose.yml files are fully compatible — you don’t need to rename or rewrite anything.
Docker dropped official support for Compose V1 in July 2023. If you’re still running it, it won’t receive security updates. The switch to V2 is straightforward and worth doing sooner rather than later.
That’s all there is to it. The new installation process is honestly cleaner than the old way since everything comes from one source and one install command. If you have any questions or run into something that doesn’t work on your setup, feel free to reach out.