For a few years now, I have been running my home lab on some decommissioned Dell R630 servers from my work. They have been great learning platforms with basically unlimited resources. They did come at a price…they are massive and draw a Lot of power. Because of this and the fact that I was moving in with my fiancé so I needed to downsize a little so I couldn’t use a full 4 post rack, I decided to start looking at mini PC’s.
About a year ago, Minisforum released the MS-01. A mini PC with a Intel 14th Gen Desktop CPU but one critical factor that stood out…two 10GB SFP+ ports! This was critical to my home lab for fast access to storage on my iSCSI network. I kept my eye on them and other online creates had nothing bad to say about them. I was almost ready to pull the trigger when I heard the announcement of the spiritual successor to the MS-01 and the MS-A1 in the MS-A2. An AMD powered 16 core/ 32 thread with 10GB SFP+ ports. I decided it was finally time and see if I could get my hands on one or a few of them when they released.
I knew they would go fast since the MS-01 was such a big hit so when I saw they posted on their social media accounts that they would release them on a live stream at midnight, I stayed up and pulled the trigger. I ended up grabbing three of them to totally replace my home infrastructure. Was even happier when I woke up the next day and saw that they had completely sold out.
My deployment of these new servers will be spread out over a few articles. Starting with this one, I’m going to cover my experience with shipping and unboxing the units. Then I’ll also cover the hardware and what I ordered to go inside for resources. Following in the next few days, I’ll be release an article on my Proxmox installation and all the settings I needed to get it running. They will then allow me to do more content that I haven’t been able to cover in the past with High Availability (HA) and Ceph storage systems. Keep coming back for that content soon.
Shipping & Unboxing
One issue I had with the process of ordering the units was the overall shipping time. It might have been because I ordered the first batch on the first hour of them being available but it felt like it took forever to receive the shipment. I ordered on April 27th, I then didn’t get an email saying my shipment was ready until May 18th. After they finally shipped a few days later, they didn’t delivered until June 2nd. With everything going on with shipping and tariffs, I understand some delay but it definitely added to the uneasiness of the process as I haven’t ordered anything from Minisforum before.
As for the packaging, they shipped in a very discreet brown box. Since I ordered three units, they packaged them all together in a single box. It does look like their shipping boxes are made to fit four so they filled in with a little bit of bubble wrapping. That combined with the box being heavier then it appears might have been why two of the product boxes had damaged corners. (you can see one in the bottom left corner of this picture)
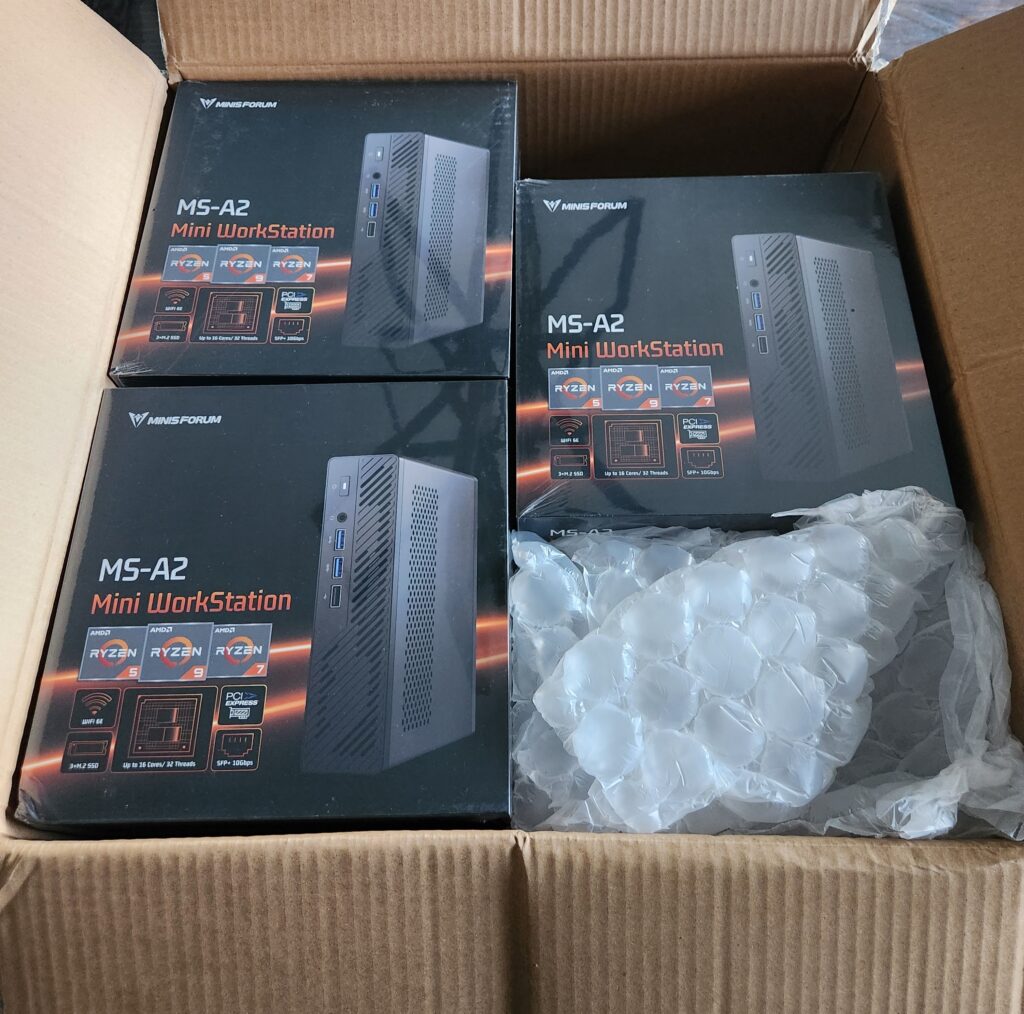
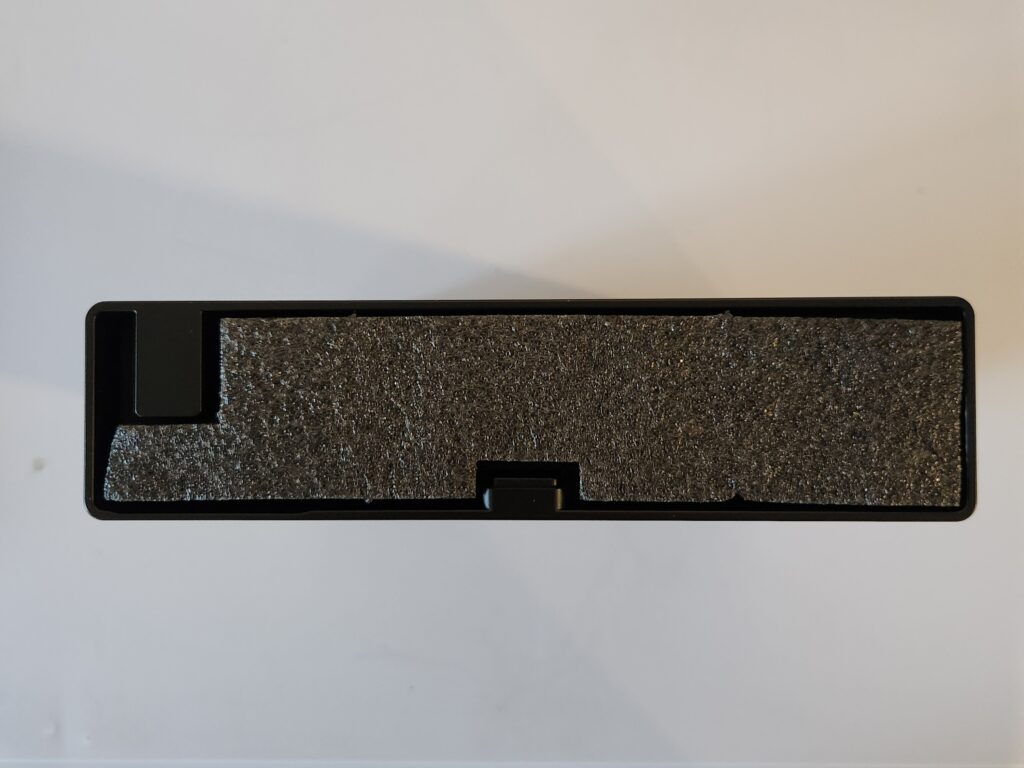
The packaging for the actual units was very good quality. Even though two of the corners had damage, the units themselves weren’t at all. The attention to detail of the foam padding was impressive. They even put a piece of foam to protect the I/O on the back of the device.
Overall, I am satisfied with the shipping and packaging. If they would have shipped maybe two weeks sooner, I’d give the experience a 10 out of 10 but because of that I can only give it a 7.
Hardware Review
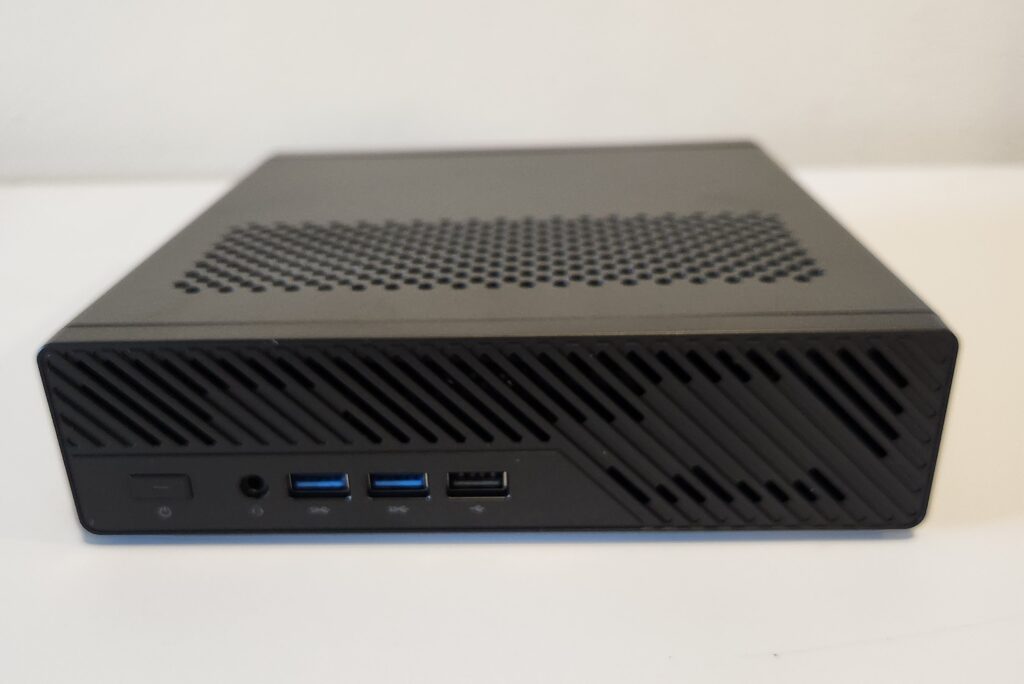
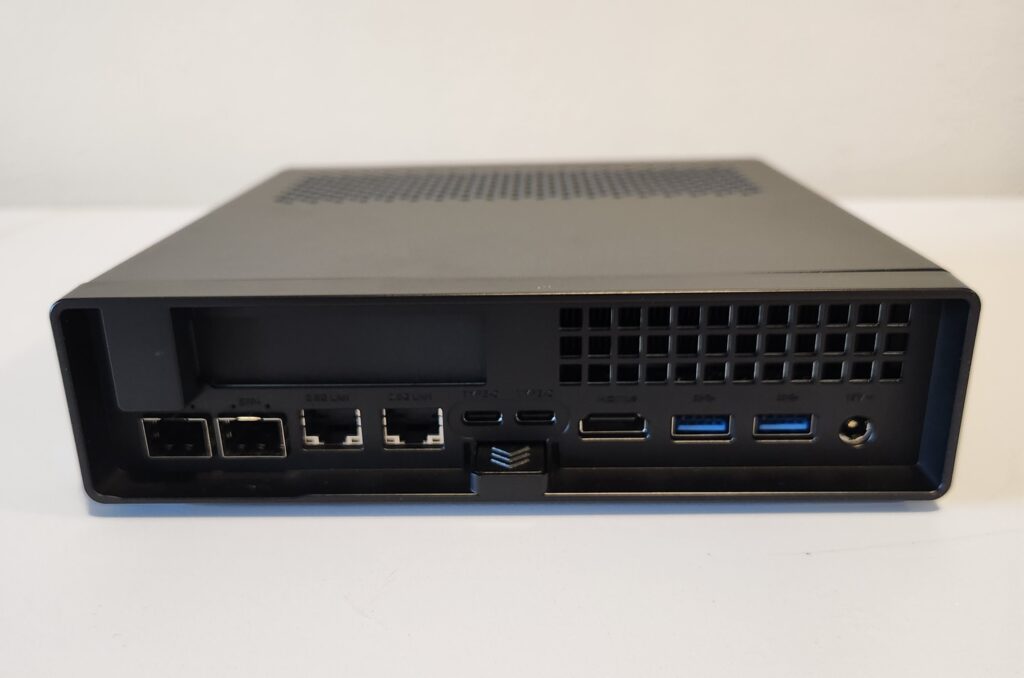
First impressions of these mini PC’s…they are exactly what I wanted! Taking them out of the box they feel solid and have weight to them. No cheap plastics here. I’m not going to go over all the I/O, you can read the product page on the Minisforum site for that but I will call out some of the reasons I ordered these units:
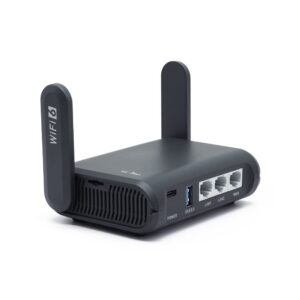
- 2x 10GB SFP+ Ports – I will be using these to connect to my networks and storage network. Amazing they were able to fit one SFP port in these little units let alone two.
- 2x 2.5GB RJ45 Ports – I’ll use these for secondary connections to the network or possibly to run a software firewall.
- 2x USB-C 3.2 Ports – I might look at using these in the future for external high speed storage or possibly an external GPU enclosure for video transcoding.
To be honest, other than the SFP+ ports, I didn’t purchase these because of the awesome I/O capabilities. I’m planning on using these as headless servers so the connectivity doesn’t really matter but if you are looking to use these as a workstation, they would be great at that as well.
One issue I have with how they built these devices is where they put the exhaust venting. They are located on the top and bottom of the case. I’m sure they did this for better thermal dynamics but if you want to stack them, they will just be pushing hot air into each other. I’m planning on trying some different layouts and orientations to see what the best layout on a shelf will be so stay tuned for that.
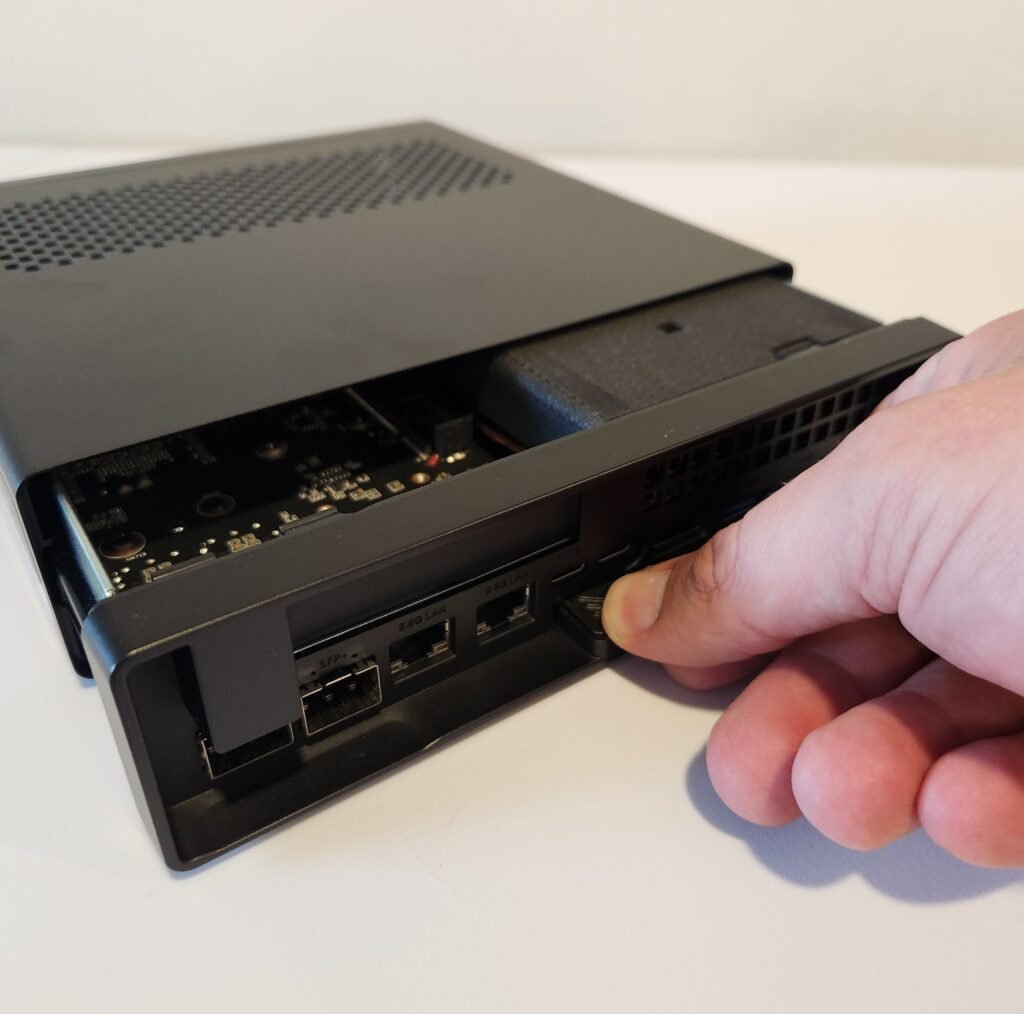
Going inside the device, I love how they made the case toolless. With a simple click of the button the back of the unit, the whole board tray slides out the back. I think this was a great design choice and really well executed. Closing the case, you get a satisfying click when it closes.
On the top of the board, you will find two main features…
The PCIe x16 Expansion slot – this is a PCIe4.0 x8 slot with Splitting Support. This is really nice because you could throw a NVMe expansion card into it and add a lot more storage for a NAS setup. You could also throw a networking card into it and get even higher speeds. I’m probably going to use these slots to add dedicated GPU’s to the units for video transcoding or AI processing. This is a half width slot however so you won’t be able to put a full size GPU with active cooling in it.
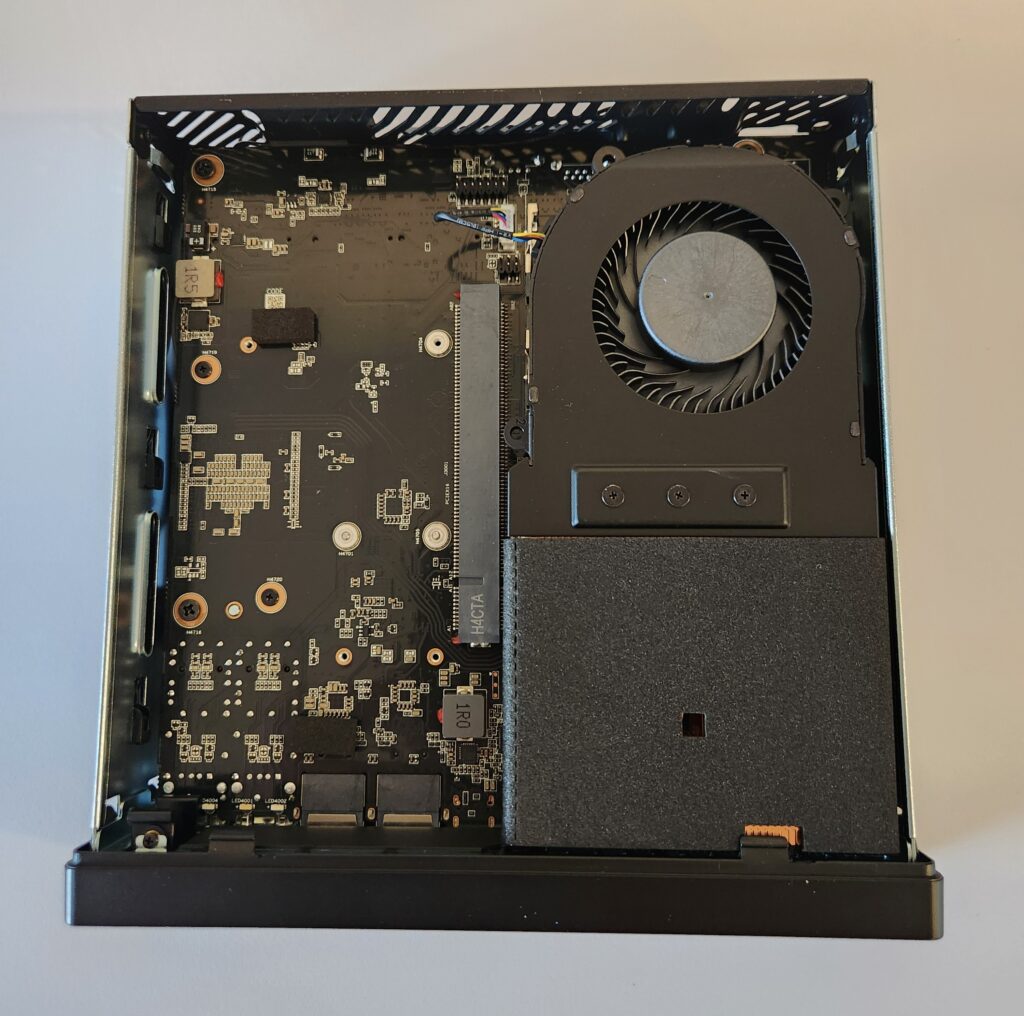
DDR5 So-DIMM Memory Slots – Under the fan on the right, you will find the memory slots. This is another minor issue I have with the unit. It’s toolless to get into the case however to do anything inside you will need a #00 Philips screwdriver. Once I remove the three screws, pulling up on the fan, I don’t know if solder from the CPU cooler wasn’t set yet but mine stuck and I had to pull them off the cooler. This was the case in all three of my units but doesn’t seem to have damaged anything.

Once you remove the fan, you will find the 2x DDR5-5600 (Ryzen 9000 Series that I ordered) memory slots supporting up to 96GB of SO-DIMM RAM. I haven’t done it myself but I have heard these units support the 128GB RAM kits that are now coming out.
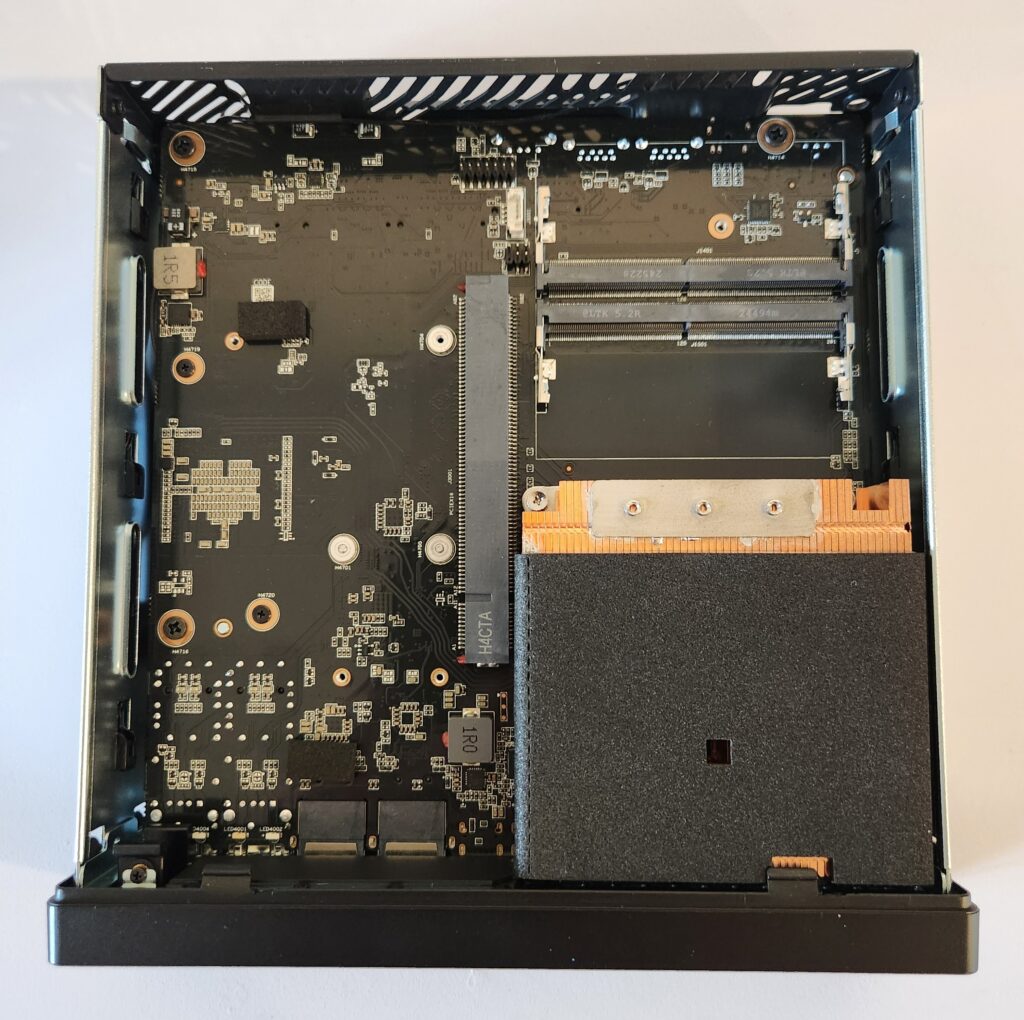
Flipping the board over, we get to the Storage side of the unit. Again, you will need to remove three screws to disconnect the cooling fan. The storage on these devices is really interesting. There are 3x M.2 2280 NVME drive slots. All three support PCIe 4.0 speeds. The reason these are interesting is slot one also supports U.2 drives for higher capacity. They even send you the daughter board to mount and connect the U.2 drives to this M.2 slot. Very nice touch for the different storage options and something I’m planning on taking advantage of.

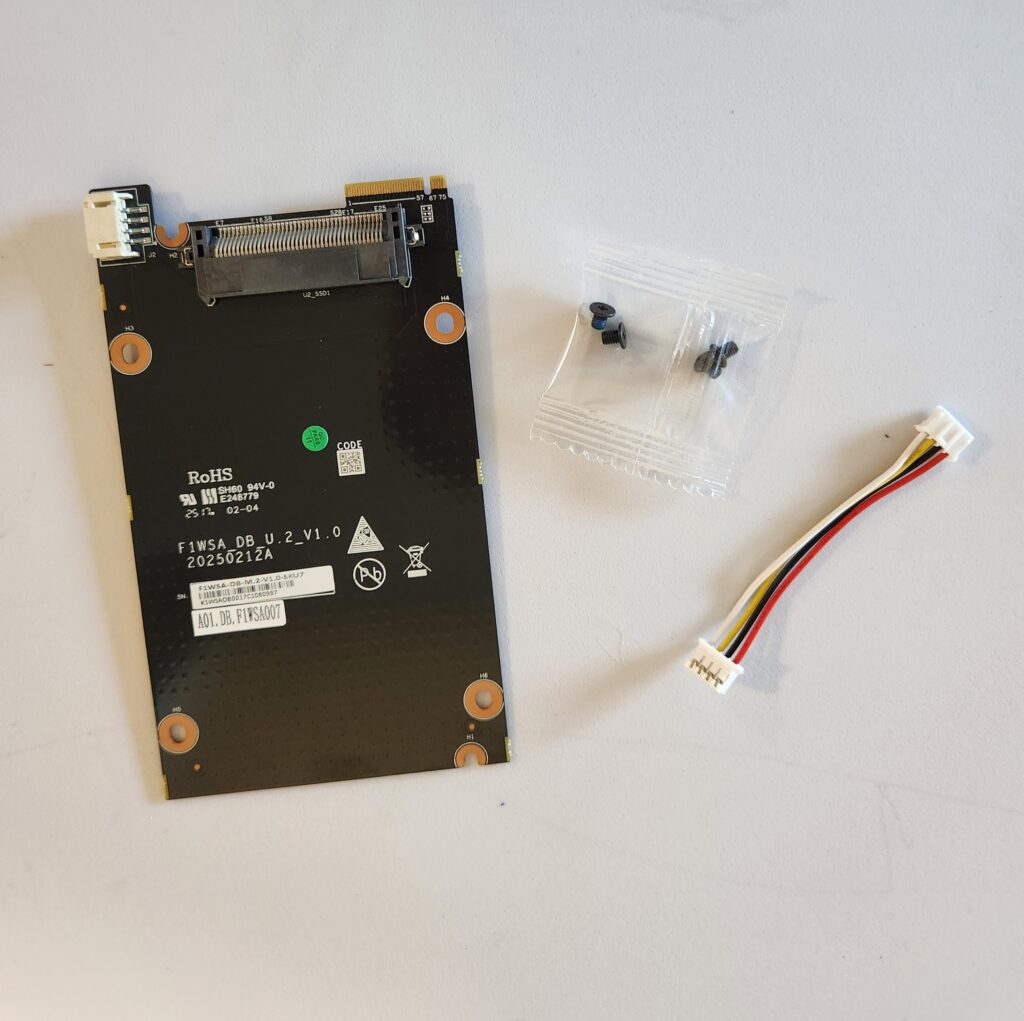
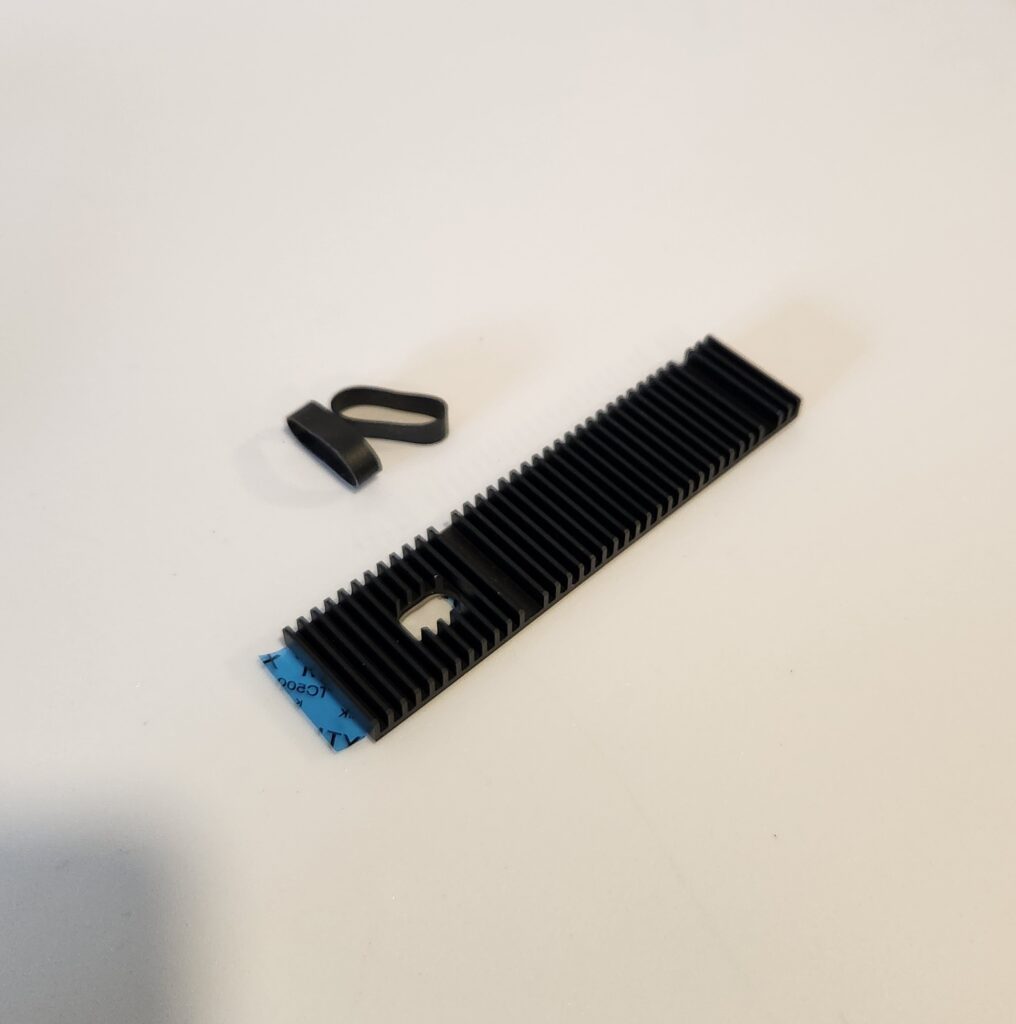
One other note on storage. They also send in the box an NVME size heat sink and two bands to attach it to your drive. I figured out, this is meant for an M.2 drive in slot #1, it doesn’t fit under the cooling fan. Since the #1 slot is outside the fan to accommodate the U.2 drives, this makes sense to keep your drive cool if you chose to use an M.2 instead.
That’s pretty much it for the inside of the device and what I’m going to use these for in my home lab.
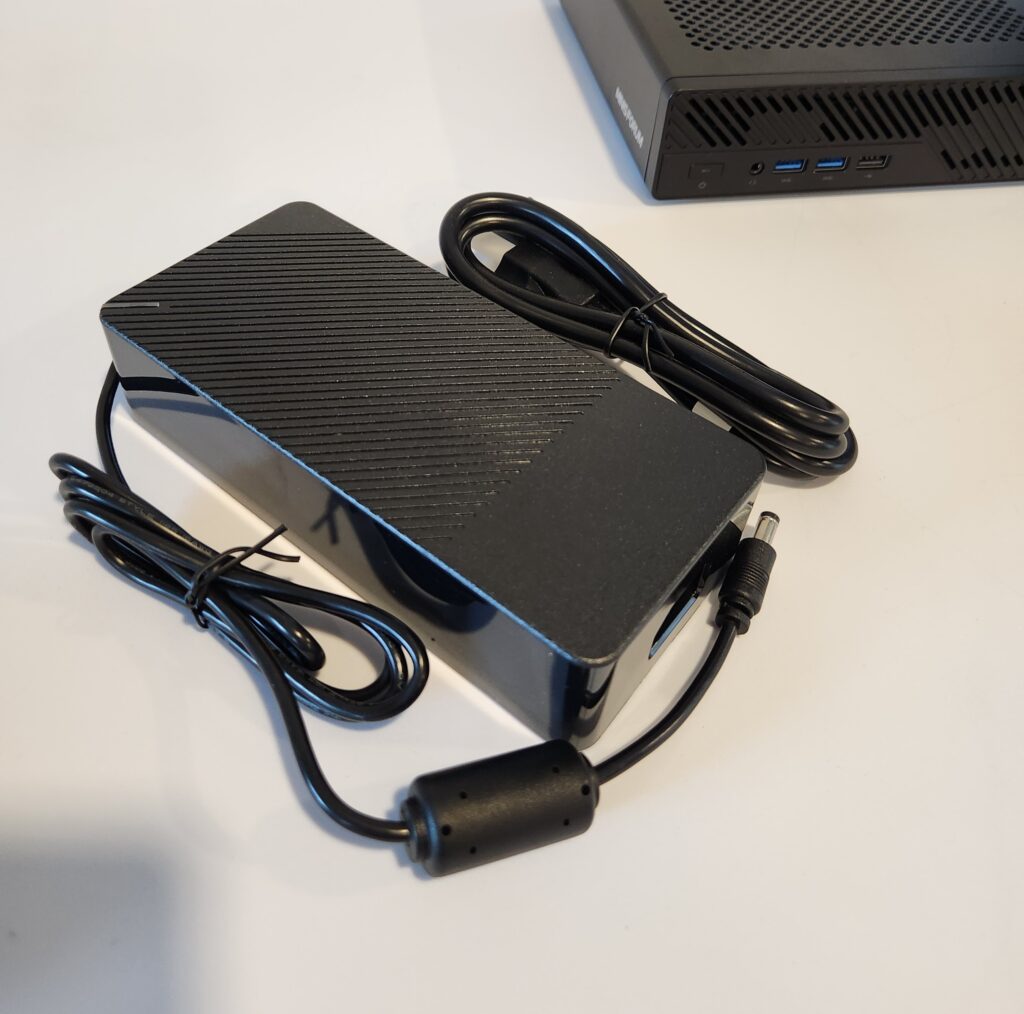
To go over the Power Supply, its an external rather large unit. Which it really needs to support the 19V/12.63A possible draw. It’s rated at 240W for peek however I know these units don’t draw that much even under load. I’m planning on doing a power draw comparison to my R630s soon as well.
Overall, I’d rate these devices a solid 9 out of 10. Darn near perfect for a home lab. Only issues I have are the screws to access the critical components, the venting hole locations and the large external power supply.
My Setup
As soon as I saw these on sale, I ordered to go with them a 96GB DDR5 5600MHz RAM Kit from Crucial and a Samsung 990 PRO SSD 4TB PCIe 4.0 M.2 drive for each of them. This setup will give me all the memory and storage I will need to migrate all my VM’s from my current setup running on R630’s.
Installation was quick and easy. I was able to unbox and setup all three units in a single evening. Didn’t run into any issues with taking them apart or putting them back together. If you are looking for a “First Server” I definitely recommend these just based on the ease of access to the hardware alone.
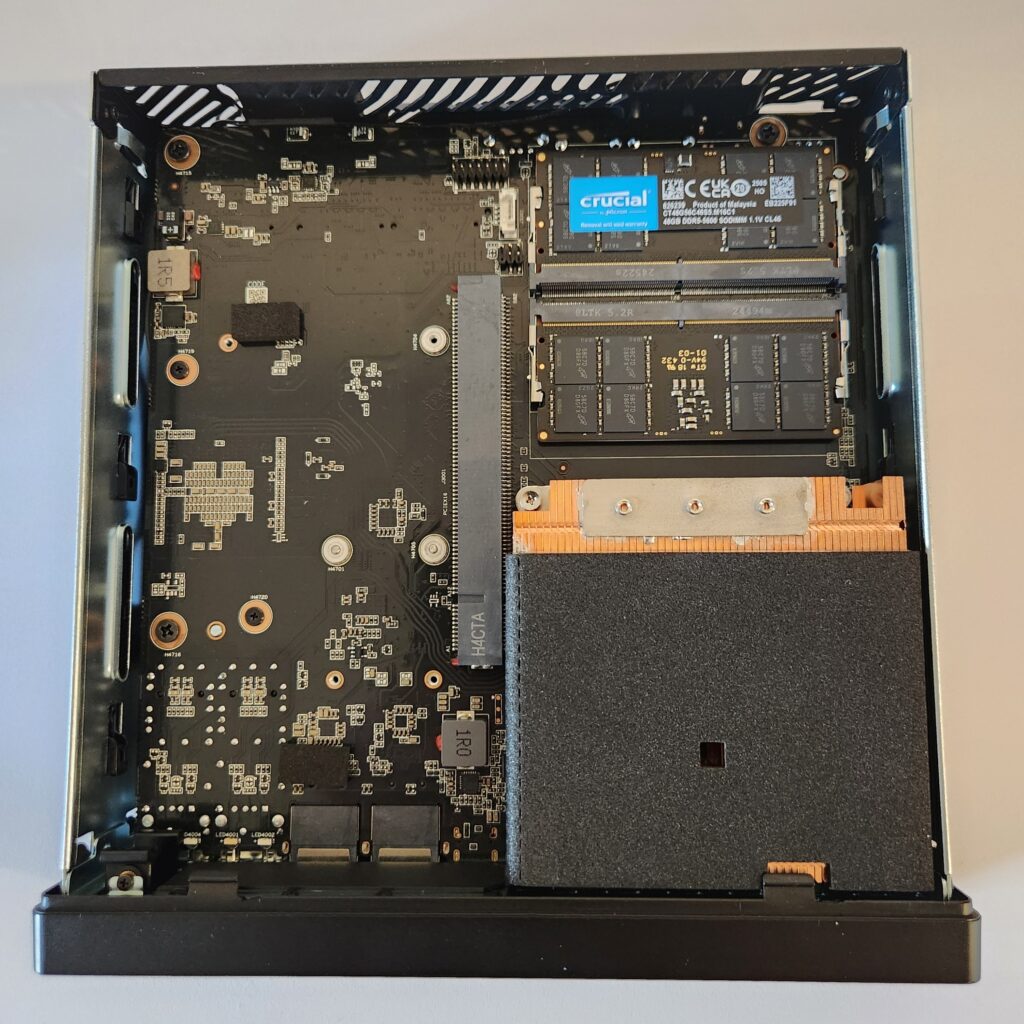
As you will see in the picture above, I chose to install the SSD into the 3rd drive slot so it’s as far under the cooling fan as possible. I also intend to take advantage of the U.2 functionality for mass storage in the future so I didn’t want to use slot 1.
Summary
Based solely on the hardware, these are a solid recommend from me. It really is hard to beat the form factor of these little units for a home lab while also giving you connectivity of a full enterprise level server. I really wish something like this was around when I was in college learning how to do server management.
If I had any recommendations for say a MS-A3, it would be to add some sort of network management to one of the interfaces like IPMI. That would really make these a server powerhouse.
I definitely look forward to using these systems and getting Proxmox setup on them. Come back soon for my continued articles on the Software side of the mini PC’s.