I have been using Nginx Proxy Manager for a few years now. Not sure why it took me this long to write an article about it but better late then never. This application solves a Lot of issues faced by home lab users that only have a single external IP address. Otherwise known as a Reverse Proxy, it takes request from a single external address and based on the URL used for the requests, directs them to the proper internal services. This allows you to host as many websites from your internal lab and make them all assessable from outside your network. It also uses Let’s Encrypt for certificates so your information is secure and valid.
For my setup, I go with an external MariaDB database. Usually running an external database container will be able to handle more load and things will work more consistent. This does add a little more management to the system along with resource consumption. If you would like to use the built-in database deployment, HERE is a link to the official documentation with an example.
For this walk through, I will go over the Docker Compose file I am using to deploy on my system. Then I will go over connecting to the admin web interface and setting up a website for proxy. Then I’ll finish by setting up an Access List inside the system to limit access to that website to just internal users.
Prerequisites
I will be setting this up on Portainer utilizing Docker Containers running on Ubuntu 24.04. Here are my setup guides for all of those pieces of software:
- Install Ubuntu Server 24.04 LTS
- Things to do after installing Ubuntu Server
- Install and Configure Docker, Docker Compose, and Portainer on Ubuntu Server
You will need to configure Port Forwarding on your router. This is outside the scope of this article because there is a lot of variables based on your personal router. You should be able to just google the make/model of your router and “port forwarding” to find walk throughs on how to set it up. You will need to forward Port 80 and Port 443 to the IP address of the server you will be running this container on.
You will also need to know how to manage your external DNS entries for your domain. I utilize Cloudflare for my external DNS Nameservers and will be showing examples on setting up DNS entries for my system.
Deployment
services:
  app:
    container_name: nginx-proxy-manager
    image: jc21/nginx-proxy-manager:2.11.3
    volumes:
      - nginx-proxy-manager:/data
      - nginx-proxy-manager-letsencrypt:/etc/letsencrypt
    ports:
      - 80:80 # Public HTTP Port
      - 443:443 # Public HTTPS Port
      - {port number}:81 # Admin Web Port
    environment:
      DB_MYSQL_HOST: "db"
      DB_MYSQL_PORT: 3306
      DB_MYSQL_USER: "{database username}"
      DB_MYSQL_PASSWORD: "{database password}"
      DB_MYSQL_NAME: "npm"
      DISABLE_IPV6: 'true'
    restart: always
    depends_on:
      - db

  db:
    container_name: nginx-proxy-manager-db
    image: jc21/mariadb-aria:10.11.5
    volumes:
      - nginx-proxy-manager-db:/var/lib/mysql
    environment:
      MYSQL_ROOT_PASSWORD: '{root database password}'
      MYSQL_USER: '{database username}'
      MYSQL_PASSWORD: '{database password}'
      MYSQL_DATABASE: 'npm'
    restart: always

volumes:
  nginx-proxy-manager:
  nginx-proxy-manager-letsencrypt:
  nginx-proxy-manager-db:
Stuff to change for your deployment:
- Image – At the time of writing this article, 2.11.3 is the current version of Nginx Proxy Manager and the best MariaDB version to accompany it is 10.11.5 from jc21. I don’t recommend setting this system to “latest” as there is a database tied to it and sometimes allowing it to automatically update could break your system. Nginx Docker Tag page has the current version of container if you want to update.
- Volumes – I setup different volumes within Portainer however you could just as easy use blind mounts to the folder structure of your server. I can also confirm this container works great with NFS Volumes (which I detailed the setup in recent articles so check those out).
- Port Numbers – You will want to leave “80” and “443” alone so the application can send/receive traffic correctly. The port associated with “81” is the admin interface. Set this port number to something that is available in your lab.
- Database Username and Password – This is the login information the main container uses to communicate with its database. You will want to set these to something specific to your environment and keep them secure. Make sure you update it to the same username and password in both container configurations.
- Root Database Password – Set this to something very secure. You won’t need to use this anywhere but the system will need an entry. Make it something long and complex.
- Restart – You will want to set this to the way you want docker to handle the restarting of the container. Here is a link to the Restart Policies to choose from. I prefer “always” so if it crashes or the server restarts, it will automatically restart the container.
Configure Admin Interface
Now that your container is deployed, lets connect to the web interface and start using it.
Open your web browser and navigate to “http://{server name or IP}:{port you configured in the stack}”.
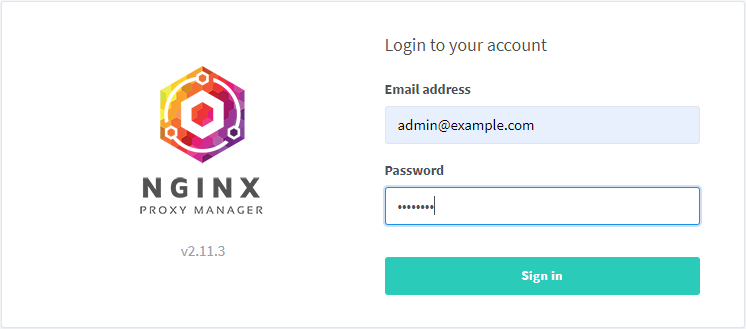
You should see a login page prompting you to enter “Email address” and “Password”. The default email address is “[email protected]” and password is “changeme”. Enter that into the fields and click on “Sign in”.
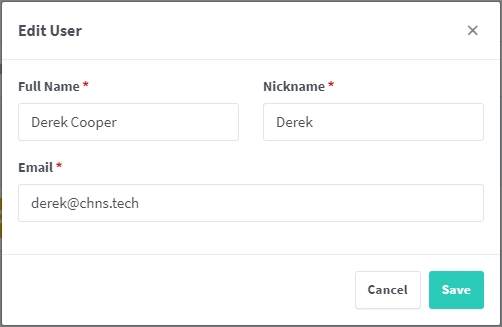
You will then be asked to create a new user. This will be the main administrator user for the system. Enter your information, using a valid email address for cert registration, and click “Save”.
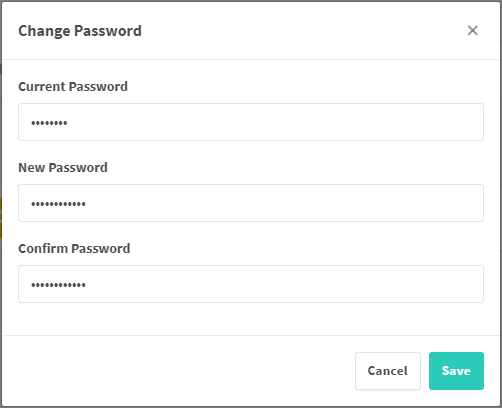
You will then be prompted to Change Password. Enter “changeme” for the current password and then enter a new complex password for your user account and confirm it. Click “Save” when you are all done.
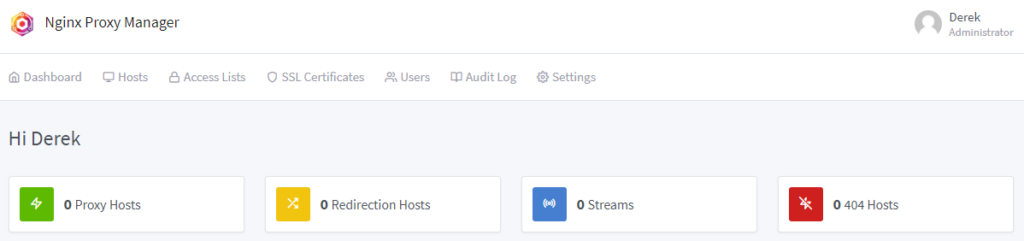
The first page you will see is the “Users” page. This is where you can come back and update your password or change your email address. You can also add more users if others will also be managing the system.
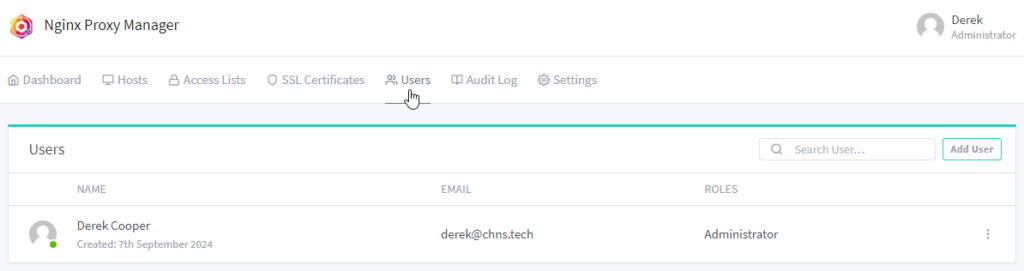
If you click on the “Dashboard” button in the top left menu, this will take you to the main interface for the system and where we jump from to do some more configuration.
Setup a Proxy Host
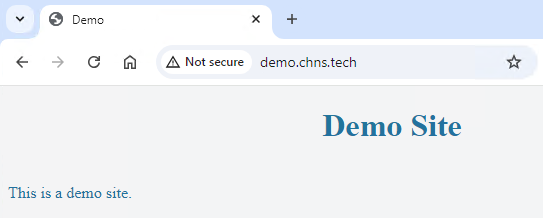
For the sake of this article, I setup a “Demo Site” on one of my local web servers. I also set it up to have internal DNS pointing directly at this server. Notice no certificate on this website and I’m just using basic HTTP (Port 80) to display the page.
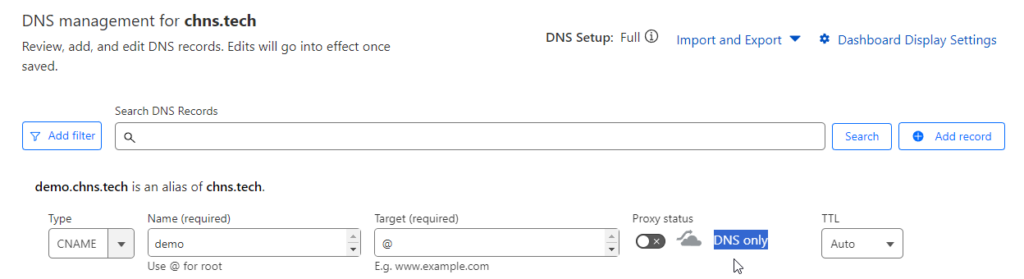
First thing we need to do is setup an external DNS entry for our site on whatever DNS Nameserver provider your using for your domain. This is needed so Let’s Encrypt can test to verify the server is online before issuing a certificate. I use Cloudflare for all my external DNS so here is a basic example. For my setup, I use a Host (A) record that points “chns.tech” at my external IP address. Then when I create websites like the demo site, I use a CNAME record to point the new URL to the same A record using the “@” for Target. This gives me flexibility if my external IP address ever changes, I only have to update the one A record for the root site and all other URL’s will be updated.
Also notice, at first I create the record with “DNS only” and don’t Proxy it through Cloudflare. There is an issue where if you have the proxy enabled while requesting a certificate form Let’s Encrypt, it fails. We will come back in here and enable the proxy once the certificate is created.
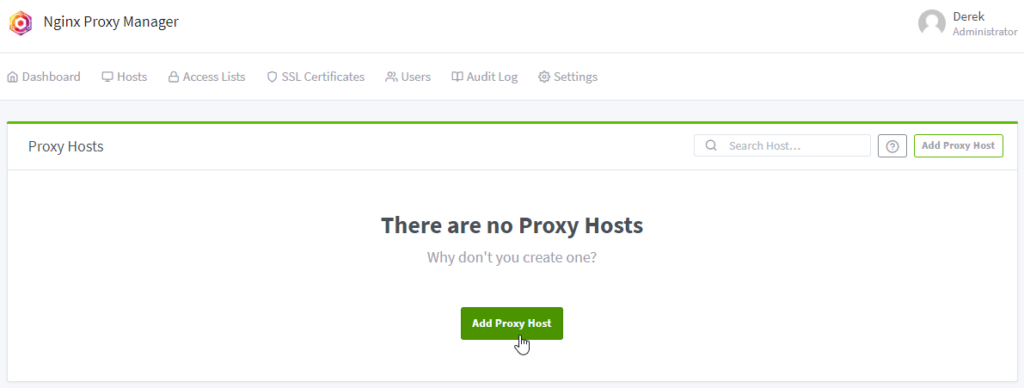
Once your record is created, switch back over to your Nginx Proxy Manager interface. On the top menu, click on “Hosts” and then select “Proxy Hosts”. Click the “Add Proxy Host” button in the middle of the page to get started.
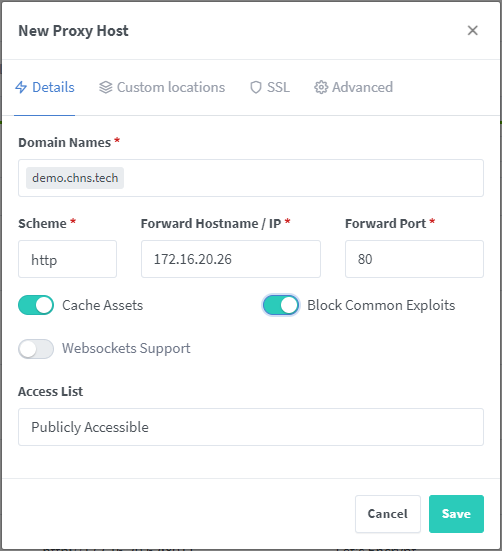
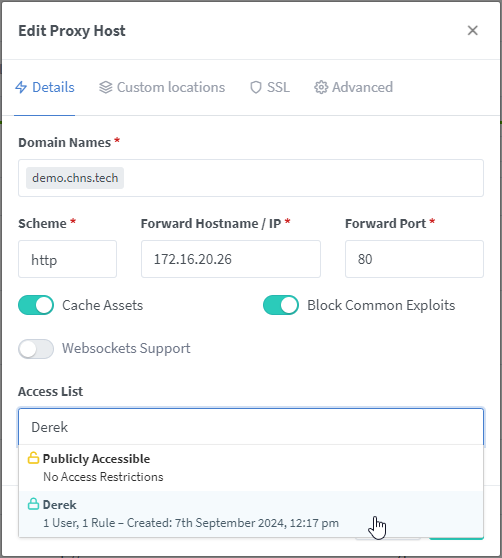
On the Details page, enter the domain name you wish to use for the site. This should be the same as what you entered into your external DNS provider. Press “Enter” after typing it to add it to the list. Enter the “Forward Hostname / IP”, this will be the IP address of the server hosting the website. Enter the “Forward Port”, this is the port that your website is accessible on. If you are just using basic HTTP, this is port 80. If you are pointing it at a Docker container, it will be whatever you set in the configuration of the Container. I enable the sliders for “Cache Assets” and “Block Common Exploits”, both things that are good to do and I haven’t had issues with enabling on my systems. I will cover “Access List” later in the article, for now just leave it on “Publicly Accessible”.
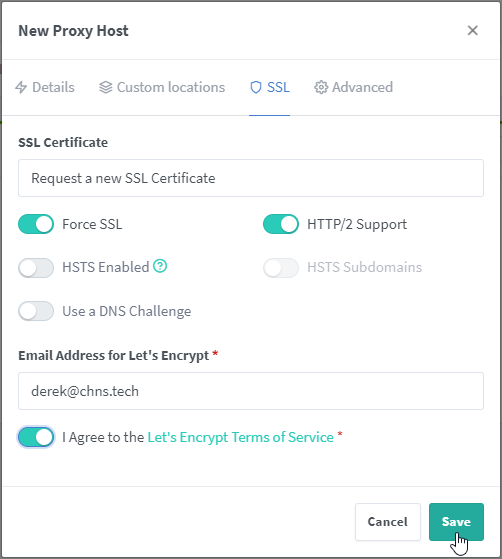
Switch tabs over to “SSL”. This is where we will manage the certificate for the website. Click the dropdown under “SSL Certificate” and select “Request a new SSL Certificate”. I enable the sliders for “Force SSL” and “HTTP/2 Support”. You can enable HSTS if you need it, read the help icon for more information (I usually leave it disabled). Validate that your email is correct so Let’s Encrypt can email you information about your certificates. Agree to the Let’s Encrypt Terms of Service and click “Save” at the bottom.
Assuming everything is in place and working, you shouldn’t get any error messages and be taken back to the Proxy Hosts page where you should see your new website entry.

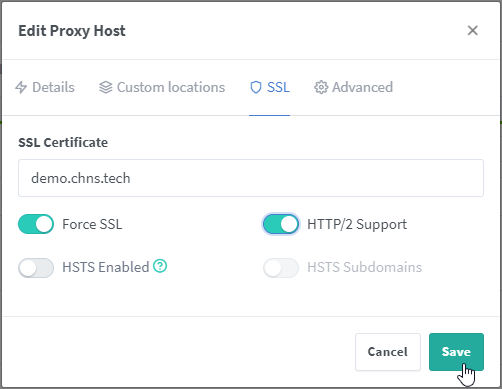
One thing you have to do with new entries, I don’t know if this is a bug or intended, is go back and edit your entry, switch back to the “SSL” tab and re-enable the “Force SSL” and “HTTP/2 Support” and “Save” again.
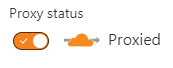
Now that you have your certificate for your website, go back into Cloudflare if you are using them for your DNS Nameserver and Enable the “Proxy” setting. This doesn’t cause any issues which certificate renewal, only at creation so you shouldn’t have any issues in the future.
Last step to using the website is to update your internal DNS to now point at your Nginx Proxy Manager server instead of directly at the webserver. You will also need to flush your DNS on your computer if you already visited the site directly (This can be done by launching a command line interface and using the “ipconfig /flushdns” command).
Once you do that, you should be good to open a new browser window and go the https://{website URL}.

If you inspect the certificate on the site, you should now see the Organization is “Let’s Encrypt” and the “Issued On” and “Expires On” dates.

That’s it for setting up your websites. Duplicate these steps for every web service you want to make publicly accessible.
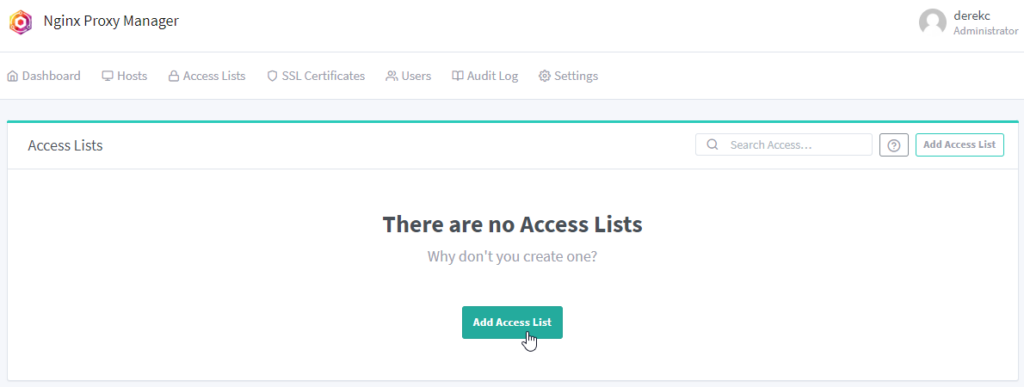
Access Lists
The last thing I want to touch on is Access Lists. I never found a good explanation for these or how to set them up so I thought I would include it in this walk through since I know a little bit about them now.
Access Lists allow you to have more control over who has access to your systems. This doesn’t, in my opinion, eliminate the need for full blown authentication methods or applications like Authentik but for simple sites you just don’t want the world to have full access like a documentation site, it works great.
On the top menu, click on “Access Lists”. Click the “Add Access List” button in the middle of the page to get started.
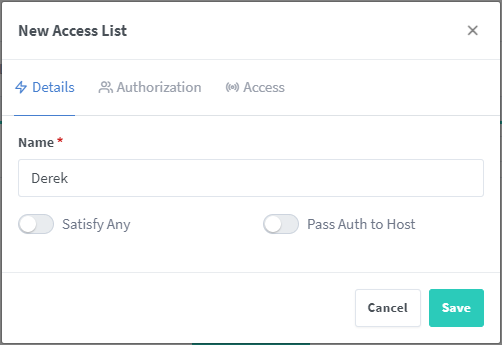
On the “Details” tab, enter a descriptive name for this list. For this example, I’m going to setup a user account for myself so credentials are needed to access the website. I’ll just enter my name so I know it’s my user information.
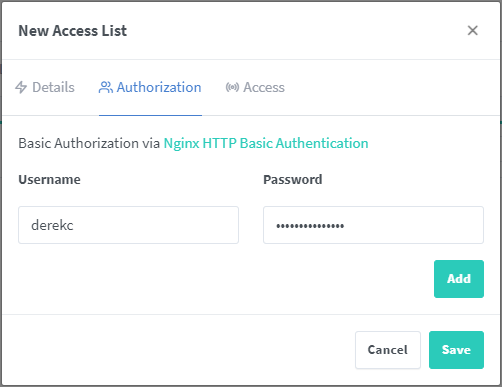
On the “Authorization” tab, since I want it to prompt for Username and Password, I’ll enter that information here. To my knowledge, there isn’t a way to tie this into any other user authentication method, just whatever you enter here.
Alternatively, if you want to lock down access to say just internal networks or a specific machine on your network and not prompt for username and password, you can leave this blank and only add entries on the “Access” tab.
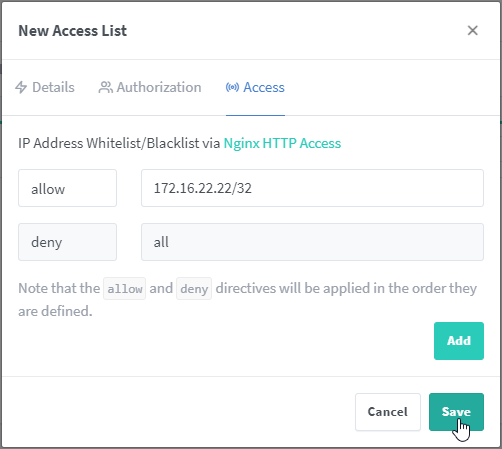
On the “Access” tab, we need to set what networks or devices have access to the website. For my example, I’m going to lock it down to a single IP address through which my desktop is accessing. I can enter the IP and then do a “/32” to specify that is the only IP address that has access. If I wanted to say do my whole internal network, I could enter “172.16.0.0/16” and any system on my internal network would have access and everyone external would get the Forbidden Page. Make adjustments to this based on your network IP address scheme. When you are done, click “Save”.
Now to make the list apply, you need to switch back over to the “Proxy Hosts” page, find the entry we want to apply it to and edit it. On the “Details” tab, click the dropdown under “Access List” and select your new Access List. Then click “Save” to enable the list on that host site.
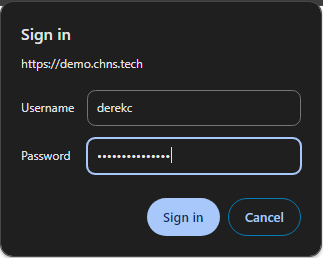
Navigating to that demo website in my browser now I’m prompted to enter a Username and Password before allowed access to the website. Enter the information and click “Sign in” to continue. If I try to access the website from anything other then the desktop on that IP address, I get a Forbidden Page.
If you just did the network access idea, you should be allowed to go to the website however if you try from outside the IP addresses you granted access, you should get the Forbidden Page.
I really like what this application offers. My home lab knowledge and experience grew exponentially when I set this system up in my lab.
Every project has it’s downside though so be aware of those also. The group behind this container doesn’t release full version updates very often so development and bug fixes are slower. I also know a lot of people are switching to Cloudflare tunnels because of the ease of use. I’m not a big fan of that idea since it puts more reliability on Cloudflare for my system to work instead of a self hosted solution but I’m also already using them for DNS so it wouldn’t be that much more to depend on the tunnel service. Be aware that since you don’t have the tunnel setup to an external provider, you are allowing external users to have access inside your network. I mitigate this by running this container on its own server in its own isolated DMZ network.
Hopefully this walk through helps you in your Home Lab journey. Drop a comment below if it did or if you would change any of this information.