Trivy, by Aqua Security, is a scanner application to find any vulnerabilities to better harden your network before you deploy applications.
You can install it directly on your servers to do scans of applications or systems however I use it primary to scan new Docker Images before deployment of new containers. With a single command on any Linux Server running Docker, the system will download the new image, scan it for known vulnerabilities and return all the CVE numbers and the status of the issue to you through the console interface. From there, you can determine if the image is worth downloading and deploying based on your risk tolerance.
My usual process for scanning is if the image and/or creator is new to me, I will scan before I deploy the container. Once I do this a few times with a couple version upgrades and feel comfortable that they aren’t going to introduce issues into my system, I then start deploying and upgrading automatically with Watchtower and only scan occasionally or if there is a vulnerability announced.
In this walk through I’ll cover running the Trivy Docker container to scan another image. Then go over some of the logs and how to understand the information it returns. Out of scope for this article, I won’t cover installing it on a server and running it from the native server. For what I use it for, this doesn’t make sense and just ends up being more to manage on my servers that I like to keep clean as possible.
Deployment
The really cool thing about this container is you can download the latest version, execute the scan and then it closes the container all with a single command. Here is the line that I use for my deployments:
docker run --rm -v /home/{username}/trivy_cache:/root/.cache/ aquasec/trivy image {image name:image tag}
Here is what each piece of the command does and why I use it in this way:
- –rm – This removes the container after it executes the scan. Saves you from having to do clean up after the fact.
- -v /home/{username}/trivy_cache:/root/.cache/ – as part of the run, Trivy needs to download a vulnerability database so it knows what to scan against. By mounting a cache folder, it only needs to download/update the database once and then will use that for each container it scans. If you leave this off the command, it will need to redownload the database every time you run a scan. This save a lot of time with the more images you scan.
- aquasec/trivy – This is the Trivy image to run with this command. I don’t include a version tag so it just uses the latest version available.
- image {image name:image tag} – This references the name and the tag of the image that you wish to scan (ex. trivy:latest).
One thing I choose to leave off that they encourage to include is mounting the docker.sock. This allows it to control other containers and really isn’t needed for my application.
Execution of Scan
Once you have your command all configured with the information for your system, execute the command inside the console of your Linux Docker Server.
First thing you will see is the traditional Docker returns letting you know it couldn’t find the Trivy image and then start downloading. It will then also download all the supporting database and Java files you need for it to run to the cache folder you configured.
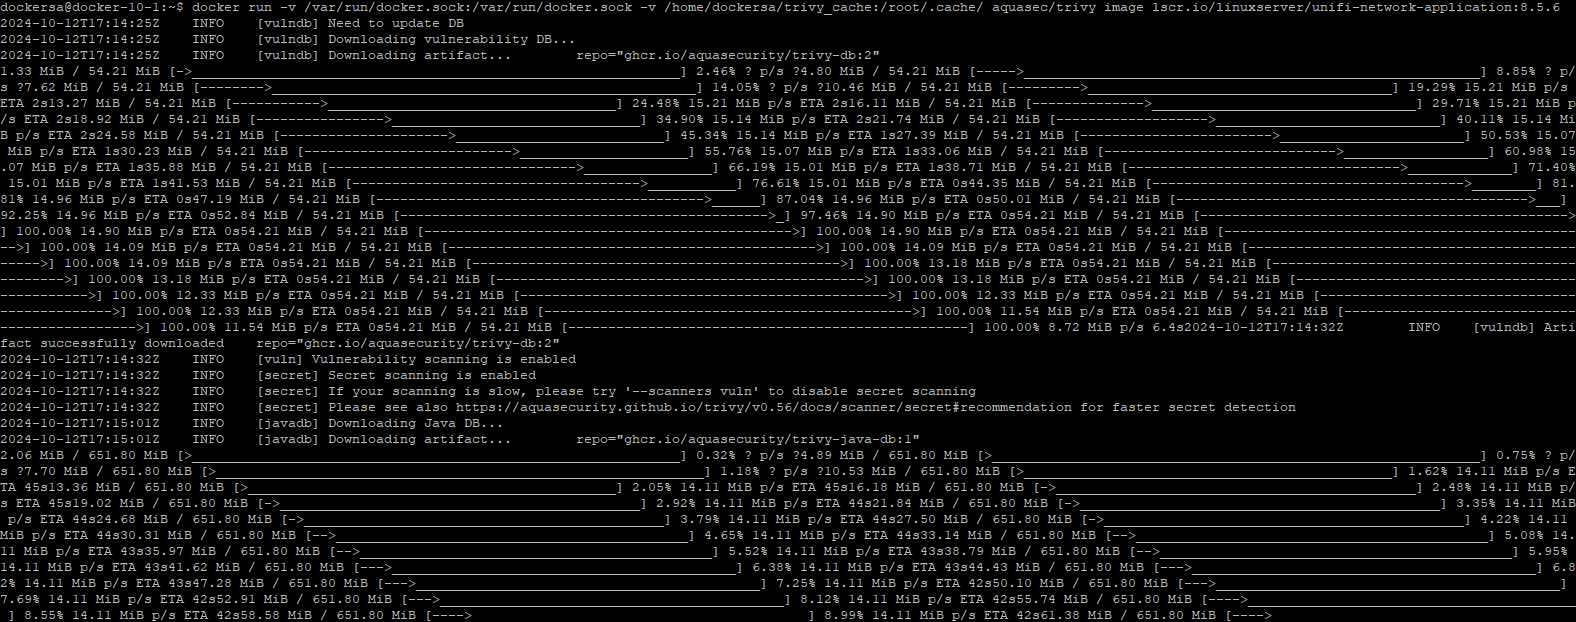
Once it is finished downloading, it should give you some information about the cache and then execute the scan of your image.

Once it is finished, it will display a table with all the vulnerabilities it is able to find:
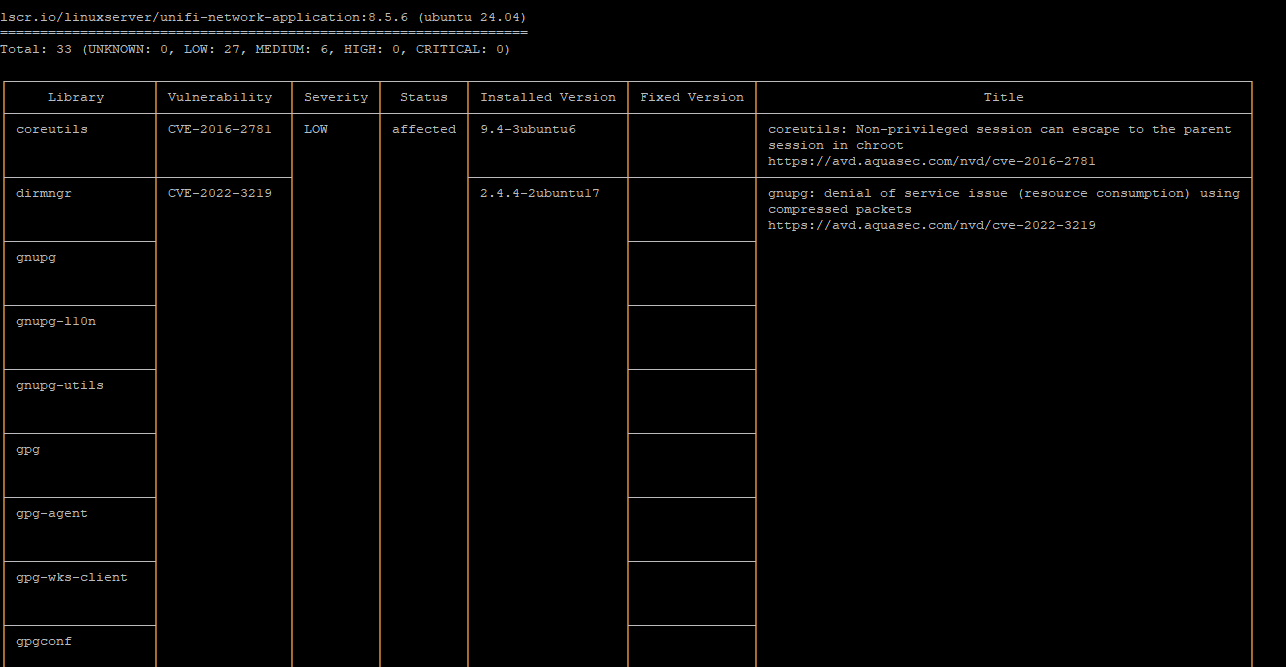
Lets take a look and break down what we are seeing. For this example, I had it do a scan of LinuxServer’s Unifi Network Application image version 8.5.6. LinuxServer does a really good job of maintaining their images and making sure they are as patched as possible. For this image, it doesn’t look like there are any Critical or High vulnerabilities, which is great! I will still use it as my example and show you what I do to look into the errors it does have.
You can see in the first column it lists the Linux Library that is affected and the specific CVE number for the issue. CVE information is great because you can just grab that number and do a Google search and find all the information about the issue. It also returns, based on the CVE, the Severity and the Status of the issue. All the vulnerabilities are listed as Medium or Low, which is good but the Status is still in a “affected” state which isn’t good. One thing to pay attention to is the “Fixed” status. Just because it returns as fixed, that doesn’t mean the vulnerability is fixed in this container, in fact it means there is a fixed version out there and the container needs to be updated.
Lets now dig into what I do to see if the risk is worth it compared to what I would gain running the container. I grab the CVE and Google it to be taken to the NIST (National Vulnerability Database) website.
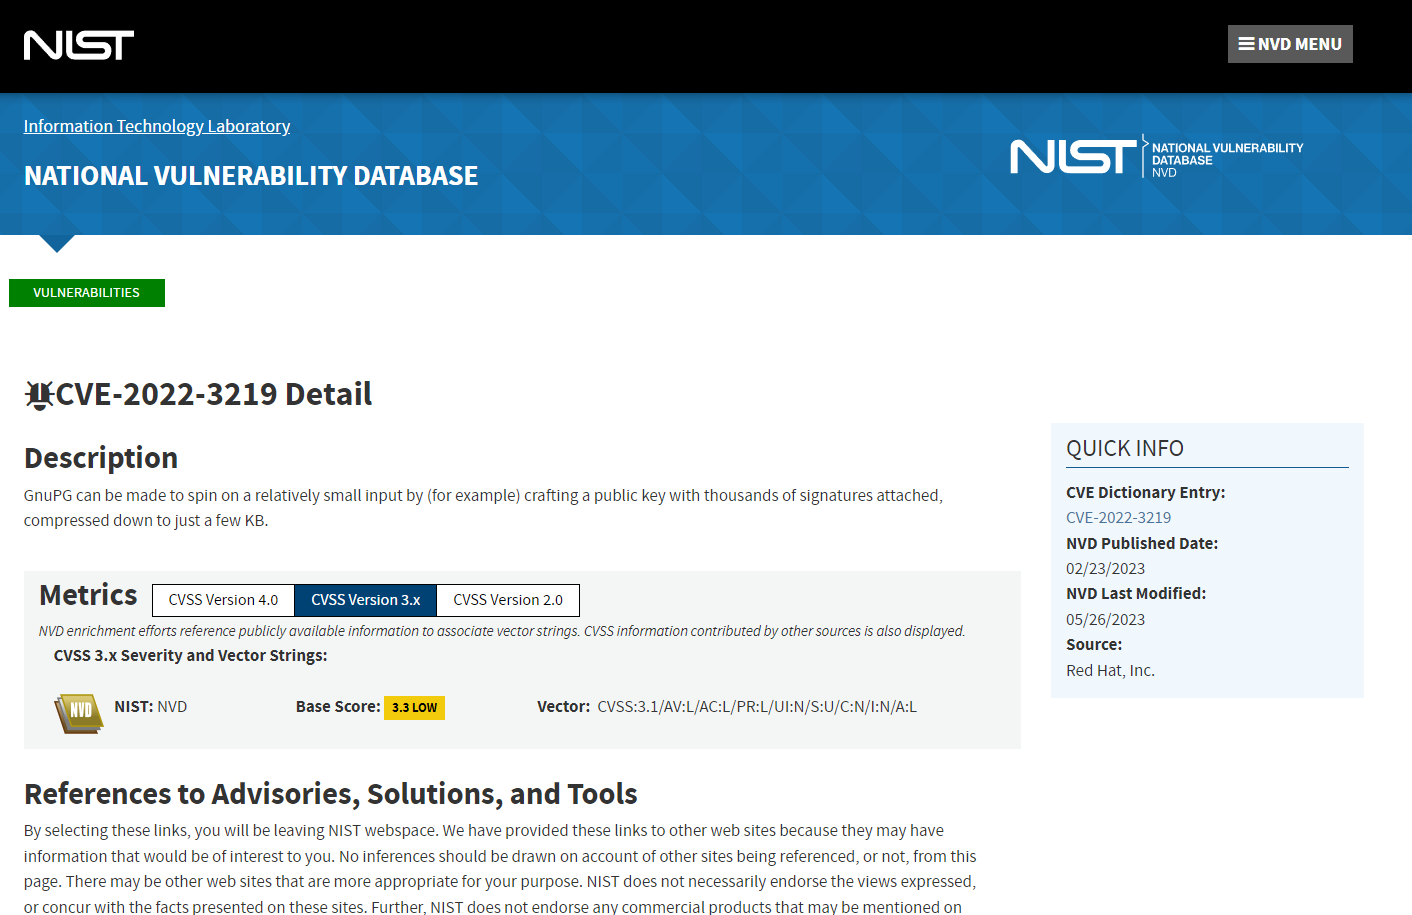
On this page, I can see all the information about the vulnerability including when it was Published as an issue and description of what the vulnerability really is along with Advisory, Solutions and Tools to help correct the issue.
Based on this information, I can make the determination if I want to possibly introduce this into my environment.
Since these all came back as Low or Medium and the container I’m deploying is the management of all my network devices for Unifi, that is a risk I’m willing to accept and deploy. If it was a situation where an image came back with some High or Critical and the image was something that I don’t really need to run or something that I’m only going to use once in a while, that might not be worth taking the risk. Really the determination on what you deploy is up to you and your risk tolerance.
I didn’t find this container on my own, I came across it thanks to DB Tech’s video Docker Container Security: Scanning for Vulnerabilities with Trivy which covers the applications and how he was deploying it. Check out his video if you want to see more/different information or need more help deploying.
Hopefully this helps you stay more secure and know what exactly is running on your home network. If it did or you have anything you would change, drop a comment below.