I’m a little late to the game on this one but since I’m covering everything I’m doing with my migration from VMware to Proxmox, I had to write an article on the Proxmox virtual machine Import function.
With the buy out of VMware by Broadcom and the subsequential removal of the free version of the ESX hypervisor it was clear a Lot of people would be migrating over to open source hypervisors. Proxmox saw this move coming and got to work on a migration method to move your ESX virtual machines over to Proxmox as easy as possible.
I took the opportunity of migrating to a new system as a way to life cycle some of my older VM’s and migrate the data to newly built servers on Proxmox. However, there were some newer servers I built that I decided to use this import tool to migrate since it would be a waste of time to rebuild a server that I just built a few months ago.
In this walk through, I’ll go over connecting your existing ESXi host and then go over the import process and setting changes needed to migrate your virtual machines.
Mount ESXi Host
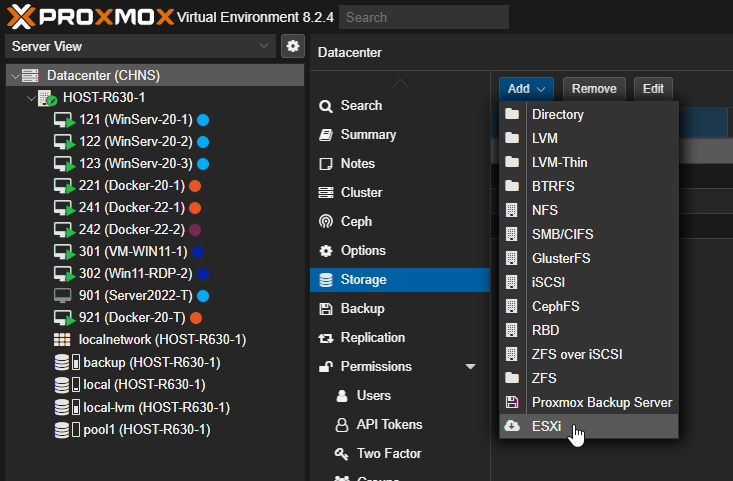
From your Proxmox management interface, click on your “Datacenter”. Then in the main panel, click on the “Storage” page. Then click the “Add” dropdown and click on “ESXi”.
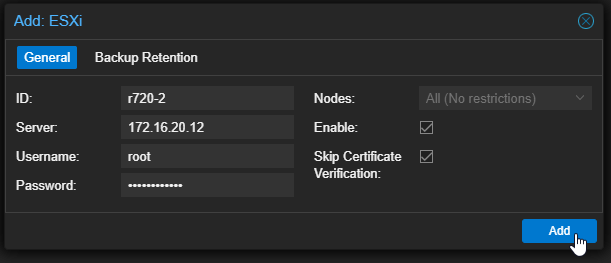
In the “Add: ESXi” popup menu, enter the information for the ESX server you want to migrate virtual machines from. These are the same settings you would use to login and mange your ESX host. For my instance, I entered the Management IP address for the “Server”, entered the “root” username and password to authenticate, checked the box to “Skip Certificate Verification” since I don’t use a SSL cert for internal management. When you are done, click the “Add” button at the bottom.
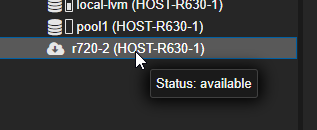
After a few seconds, you should see your host show up as “available” under your storage devices.
Import Virtual Machine
Now that your two hosts are talking to each other, lets import a virtual machine. One important note, you will want to shutdown the virtual machine on the ESX host before performing an import.
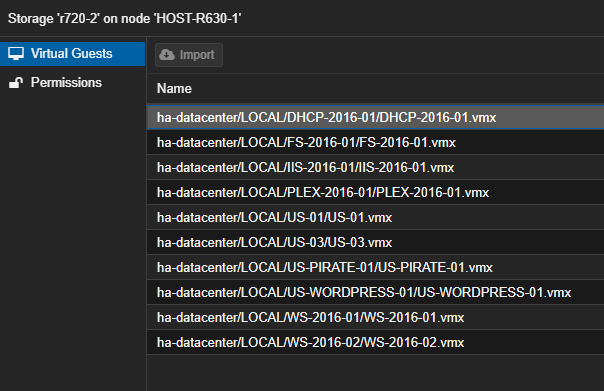
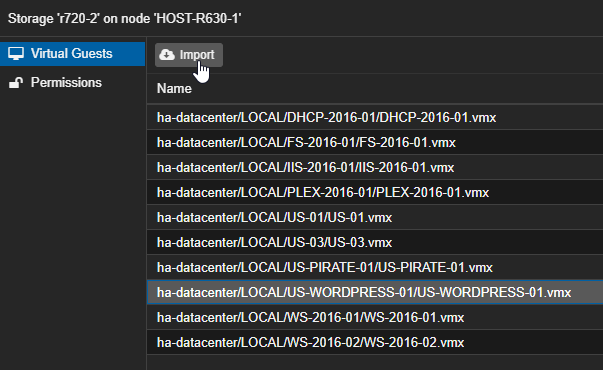
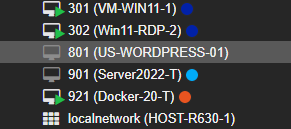
Clicking on the host storage listed under the host you want to migrate to in the left panel, you should see a page on the main panel to view “Virtual Guests”, these are the virtual machines running on your ESX host. Click on the virtual machine .vmx file you want to migrate over.
Once you select a virtual machine, the “Import” button will enable at the top. Click it to start the process.
Next the “Import Guest” menu will appear and prompt you for the settings you want to use for the new machine. For the import process, I recommend you leave these settings the same as what they are on the existing virtual machine to eliminate any chance of failure due to incompatibility. After you import and verify that everything is working, you can then change the system resources to whatever you want.
You will need to identify a “VM ID” for Proxmox. Also set the “Storage” and “Bridge” (Network Interface) you want this machine to use since Proxmox won’t know what to use by default.

Note: If your network interface is VLAN aware and you need to specify a VLAN for it to access out to the network, you can set this on the “Advanced” tab at the bottom of the page under “Network Interfaces”.
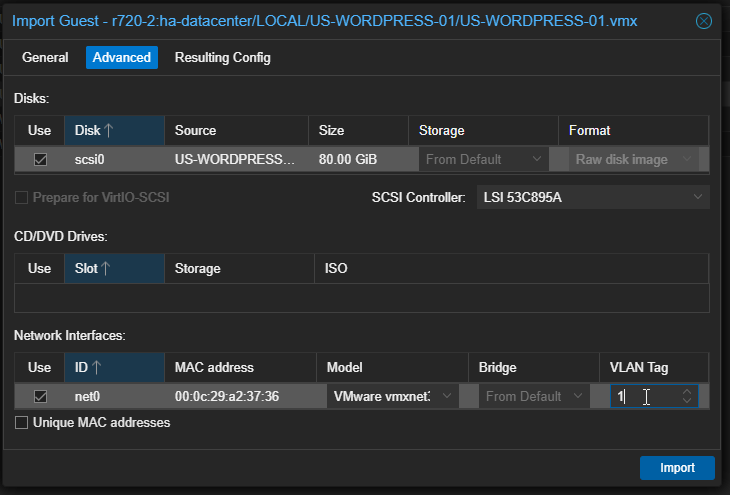
When you have all your setting ready, click the “Import” button at the bottom of the page.
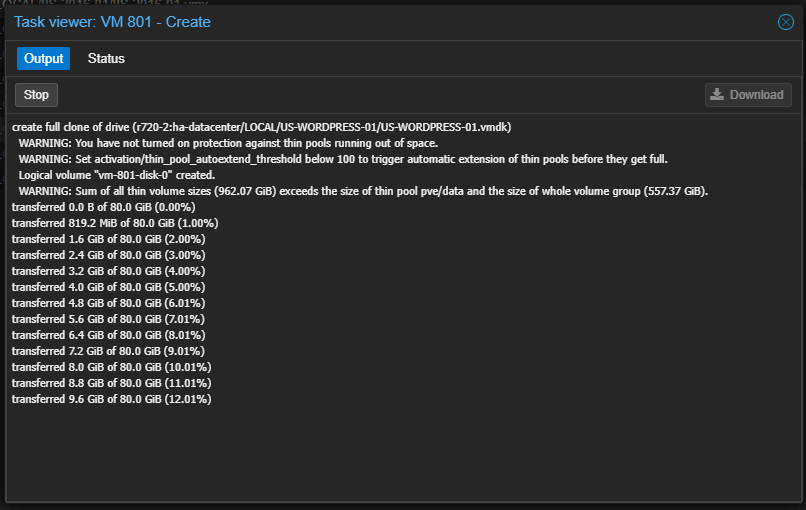
Assuming you have everything configured correctly and don’t get any errors, the VM Create process should start and start transferring data. Wait for this to finish.
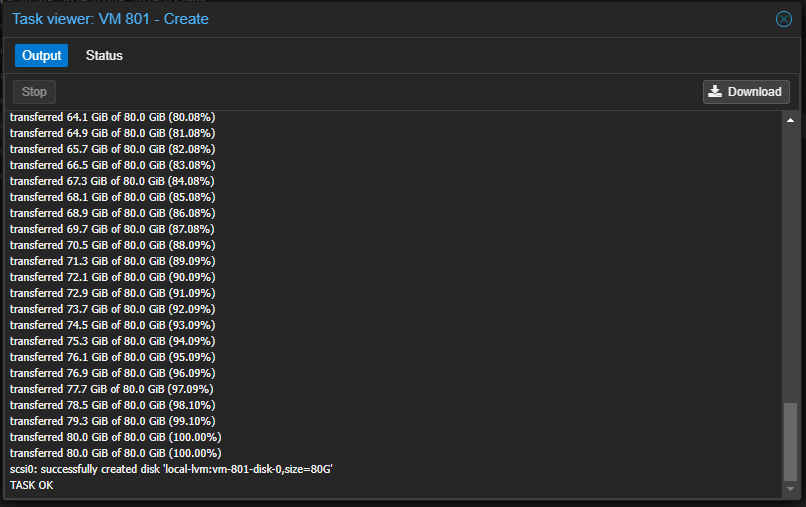
Once it finishes the transfer and creation of the new virtual machine, you should get the “TASK OK” prompt and it’s ok to close the task viewer.
Now you should see your newly migrated virtual machine in your list of machines based on the VM ID you set in a powered off state. Simply power it on and confirm that everything worked as expected. I recommend keeping your old VM on your old ESX host in a powered off state for a little while just to make sure everything is working properly.
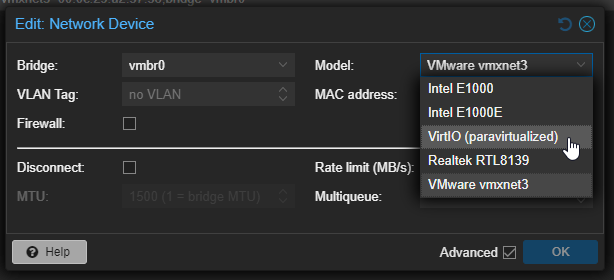
One thing I ran into was importing with the “vmxnet3” network model for interface. I had issues getting this working after import. To correct this, I installed the QEMU Guest Agent (which you should do on all your virtual machines anyways) and changed the interface to “VirtIO (paravirtualized)”. Instructions for installing this agent can be found in my article on Creating a Virtual Machine in Proxmox at the bottom of the page.
Hopefully this helps you on your home lab journey. If it did or you have anything you would change about my process, drop a comment below.
Additionally, drop a comment if you are like me migrating to Proxmox from ESX. I’m curious how many people that read my articles are making the switch.