For this week’s article, I wanted to do TrueNAS Configurations and cover a few topics that need to be covered for my TrueNAS functionality but aren’t really big enough topics to warrant their own article. I will be covering a wide variety of topics including adding a secondary network device to your TrueNAS server, configuring datasets, enabling and configuring NFS service, and setting up NFS shares.
If you are following along with my August theme of migrating Docker persistent volumes from local storage to NFS shares, most of these things are prerequisites to the final article that I will be publishing next week. If you don’t know what I’m talking about, check out the referenced article and see if it’s something you can setup and use.
If you are just finding this because you need help with something specific that I’m covering, thanks for stopping by and hope this helps.
Prerequisites
The first thing you will need in order to configure this is obviously a TrueNAS installation. If you don’t have a server already built, you can follow the walk through on installing TrueNAS Scale 24.04.2 virtually on Proxmox. If you choose to do this on physical hardware or on a different hypervisor, these instructions will follow the same concepts to setting it up but you will need to make adjustments to your situation.
The next thing is optional but it’s how I’m setting up my system. I configured a secondary Linux Bridge on a separate physical interface so it can have access to my storage network. There is a full walk through available on how to add the secondary Linux Bridge to your Proxmox host.
Adding a Secondary Network Device to your TrueNAS Server
In Proxmox, select your TrueNAS server and then on the main panel, select “Hardware”. Then click “Add” at the top and select “Network Device”.
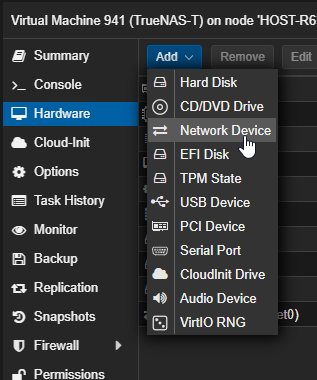
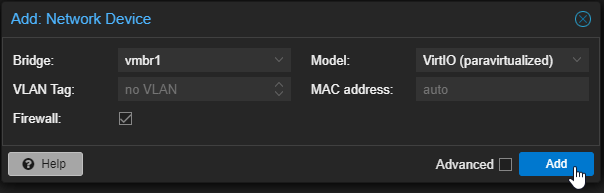
In the “Bridge” dropdown, select the Linux Bridge you want to use. If you are following me, this will be the one we just created called “vmbr1”. If you need to specify a VLAN for this network, you can do that under the “VLAN Tag”. Once you are good with your settings, click the “Add” button.
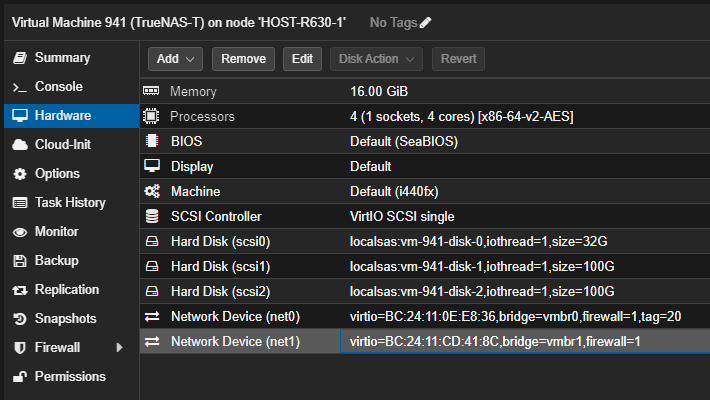
As long as you have the QEMU Guest Agent installed and enabled, it should add the network device right away and you don’t have to restart the server, it will just be activated and you will see it in the list of Hardware for the server.
That’s it for the Proxmox configuration. Next we will login to our TrueNAS web interface and configure it to use the new network device.
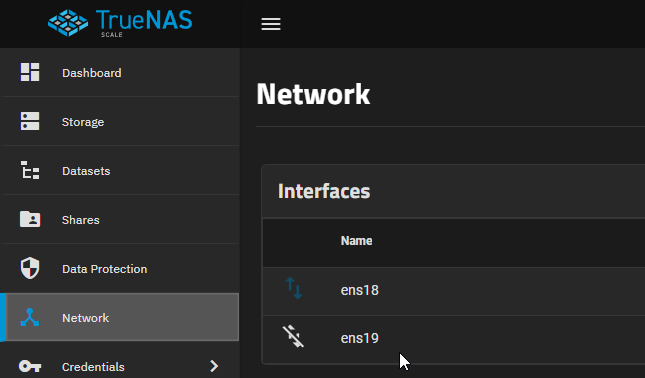
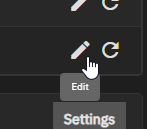
Once you login, on the left panel, click on “Network”. You should now see your new secondary interface show up with no configuration.
Click the pencil icon to the right to edit the configuration.
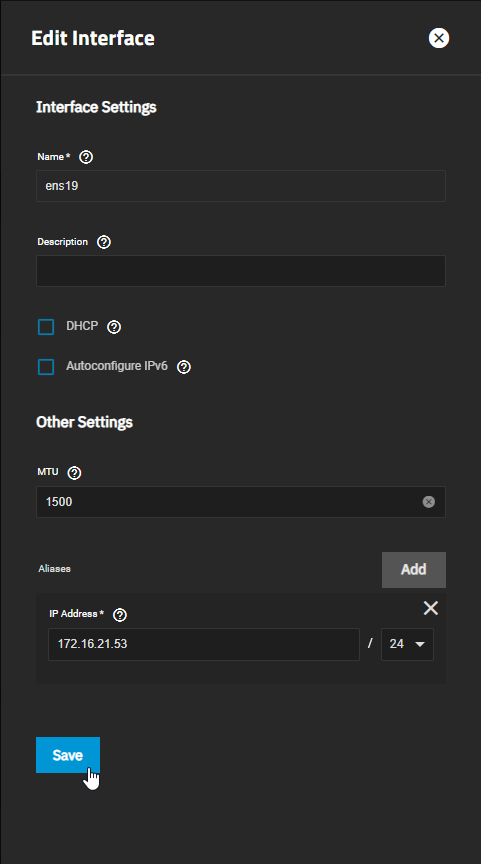
Change the settings that you want. I recommend adding an “Aliases” with a static IP address and subnet for your server since we don’t want this to change with DHCP. Once you’re happy with your configuration, click “Save” at the bottom.
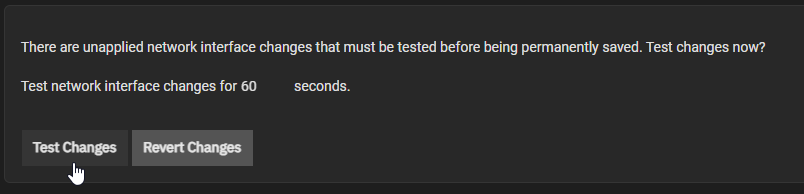
When you save it, it doesn’t apply the setting right away. They added a test function to protect users to not lock themselves out of the admin interface. At the top of the page, you should see a “Test Changes” and a “Revert Changes” button. Click the “Test Changes” when you are ready to apply the settings. If this screws up anything with access to the server, after 60 seconds, it will revert the setting so you can get back in.
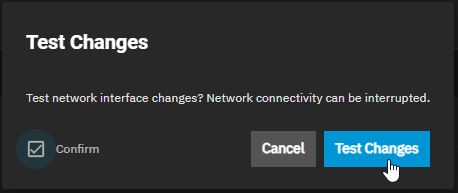
You will then be prompted to confirm you want to set these changes. Check the box next to “Confirm” and click “Test Changes”.
The screen should then refresh and take you back to the main network configuration screen where you should see the countdown started to revert the settings and a “Save Changes” button. If you misconfigured something, you maybe locked out at this point so just wait the 60 seconds for it to revert. If you did it properly, you should be good to just click the “Save Changes” button.

It will then prompt you to make sure you want to Save Changes. Click the “Save” button to finish.

Now back on the main Network screen, you should see both interfaces with configured IP address and Blue up and down arrows next to the interface names.

That’s it for the configuration of a secondary interface. You should now be able to ping and connect to this IP address from any other server on that network.
Configuring Datasets
Next thing I wanted to cover as part of my TrueNAS setup is Datasets. Datasets are the file system built on top of your storage pools. We can build these Datasets so that specific Services or Shares on the server only have access to what they need. It also allows you to do different shares or services on the same storage pool instead of having to setup multiple pools.
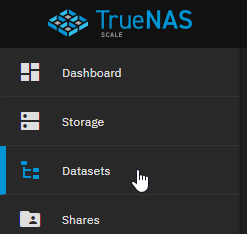
In the TrueNAS web interface, click the “Datasets” on the left menu.
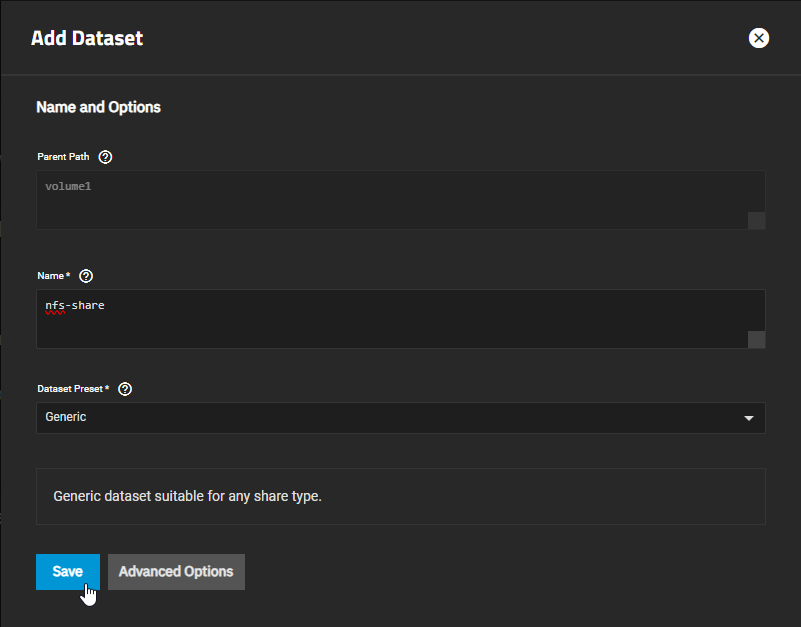
If you followed my walk through on installing TrueNAS Scale 24.04.2 virtually on Proxmox, we already setup a storage pool called “volume1”. Make sure it’s selected and then click “Add Dataset” in the top right corner.

Enter a “Name” for your first Dataset. For this example, I’m going to create one called “nfs-share” so I can use it later in the article when we talk about NFS. Leave the reset of the settings alone and they will be inherited from the settings on “volume1”. Unless you know what you are doing and have specific reason to edit these settings, I recommend you use the defaults. When you are done, click the “Save” button at the bottom.
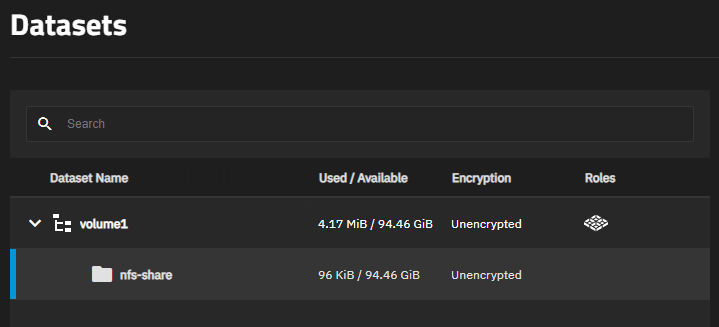
You should now see your new Dataset listed under the main storage pool.
That’s all there is to creating a folder on the File System. You can now use that folder for shares or organizing services.
Enable and Configure NFS Service
By default, all of the services that come installed on TrueNAS are disabled. This is good for security since we don’t want services open if we aren’t using them. This does mean in order to use one of the services, we have to manually enable it and configure it to work.
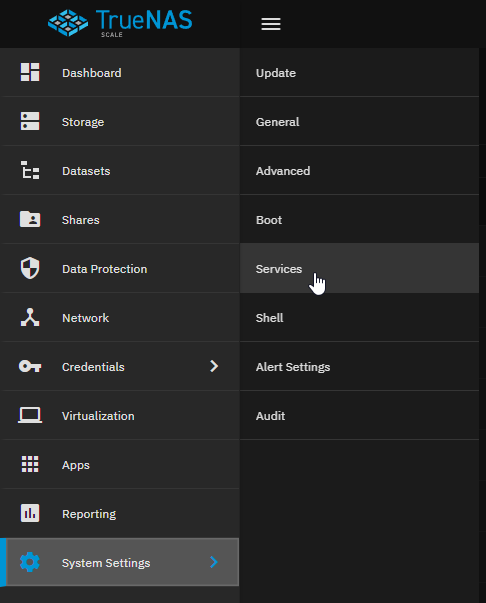
In the TrueNAS web interface, click the “System Settings” on the left menu and then click “Services”.
Find the “NFS” service in the list and click on the slider to start the service.
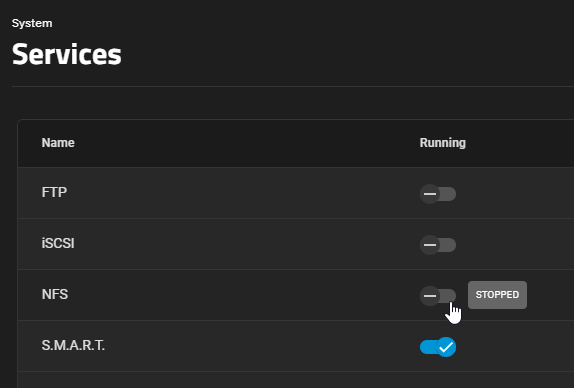
Then you need to check the box under “Start Automatically”. This will make sure the service restarts when the server restarts.

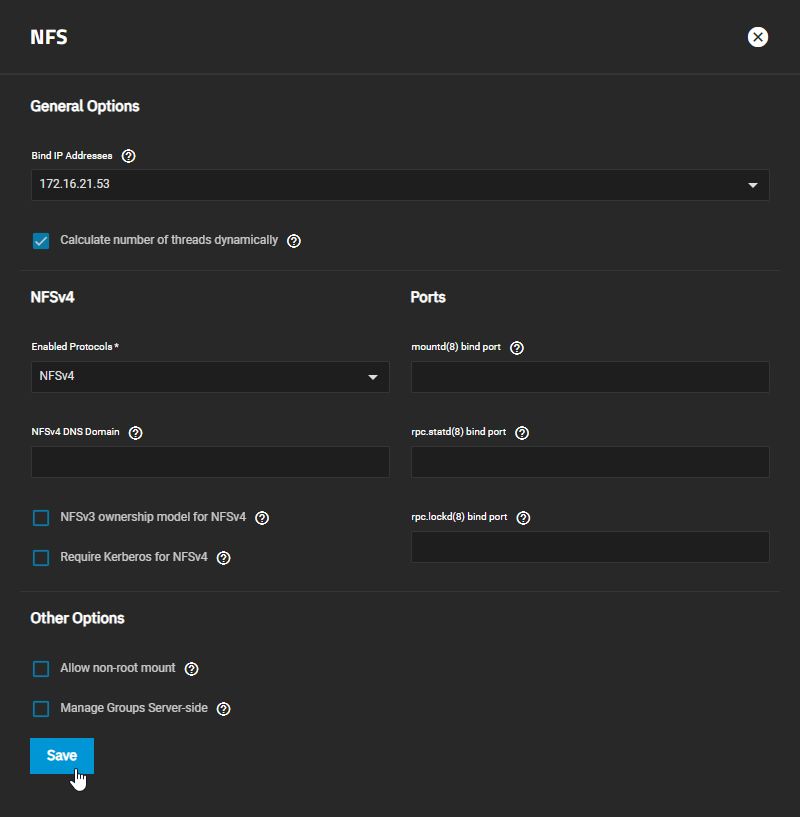
On the right side of the screen, click the pencil icon to edit the settings for the service.
Depending on what you are using this server for, I recommend a few configurations. One is setting the “Bind IP Address” to the interface you want this service accessible on. If you only have a single interface, this isn’t necessary but if you want it only accessible on a secondary interface to make make sure it’s operating at the best speed like me, I hard set this to the secondary IP address.
The other thing I set is the “Enabled Protocols”. I set this to only allow NFSv4. All of the systems I use, have the ability to use v4 so I hard set it so it doesn’t even try to use v3. When you are ready, click the “Save” button at the bottom of the page.
That’s all we have to do to configure TrueNAS to use the NFS service. Next we need to setup NFS shares so other systems can access the service.
Setup NFS Share
Finally, let’s configure a NFS Share so other systems can access it and use it for storage.
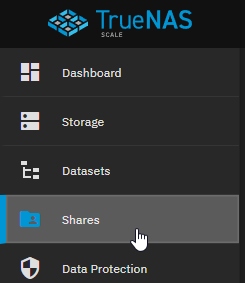
In the TrueNAS web interface, click the “Shares” on the left menu.
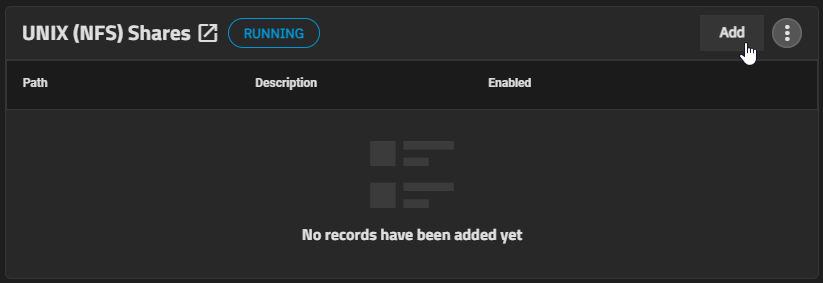
On the right side of the screen, you should see the UNIX (NFS) Service in a “Running” state. Click the “Add” button.
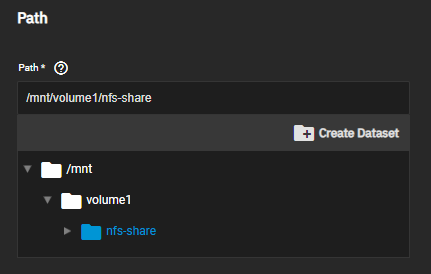
First thing we need to set is the Dataset we want to use. For this example, I’m going to use the “nfs-share” dataset that I created earlier.
Enter a “Description” if you would like.
Next, we need to specify which systems can access this share. NFS doesn’t really have great permissions built in but we can lock it down to specific IP address of other systems or you can enter a whole Network if you want everything on that network to have access. I’m just going to add my test Docker server’s storage network IP address.

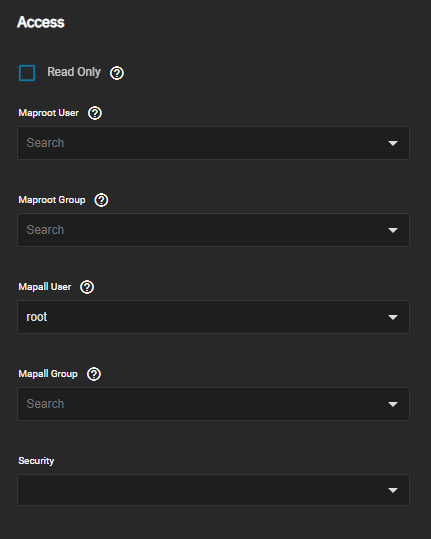
Note: Depending on what you are using the share for, you may need to change some of the settings under “Advanced Options”. Specifically, the “Mapall User” setting. You may need to change it to “root” for it to work and the other system to have access.
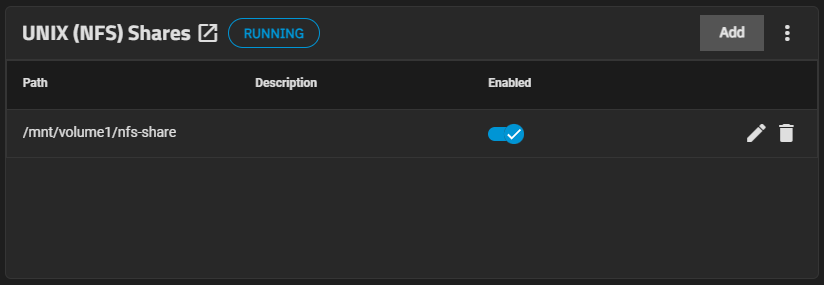
Once you have everything as you want it, click the “Save” button at the bottom. You should now see the share show up and enabled.
You should now be able to access your share on that other system and start saving files.
Hope this helps everyone out there with their TrueNAS deployments. If there is anything you think I should add or change, drop a comment below and I’ll check it out.
Those of you following my August Theme for Docker NFS Volumes, come back next week for the final article in the series where I take all this information and put it to use in a really cool and flexible storage solution for Docker containers.