Continuing with my Proxmox deployment and migration from ESX, this week I wanted to start moving towards a fully High Availability (HA) setup with shared storage. The first step to get there is by setting up a Cluster with all of your Proxmox Hosts.
A cluster is a group of servers (2+ hosts) that can all communicate with each other and transfer virtual machines between them to better use resources. To be clear, you don’t need shared storage between the hosts for a cluster for this to work. Proxmox will automatically, on migration of a VM, move the virtual disks to the other host and then resume the VM after the transfer. This is really cool for home labs and people that don’t have a budget to run a fully network storage setup.
Another thing to note, some people think you need 3 servers to cluster to have establish something called quorum. That is true for High Availability however its not needed for simple clustering. I will discuse quorum and getting high availability working in a future article.
In this article, I’ll go over the setup of the cluster and then show migrating a virtual machine to a second host.
Prerequisites
You will need 2x Server Hosts with Proxmox installed and able to communicate on the same network. This is usually done by having the “vmbr0” Linux Bridge on the same network with an assigned IP address.
If you need a walk through on setting up and installing Proxmox, I wrote a Guide a few weeks ago.
Another thing you will need for this to matter is a running virtual machine that we can migrate. If you need a guide on creating a VM, here is a Guide.
Configuration
Start by logging into both of your Proxmox hosts through the web management interface on different tabs in your web browser.
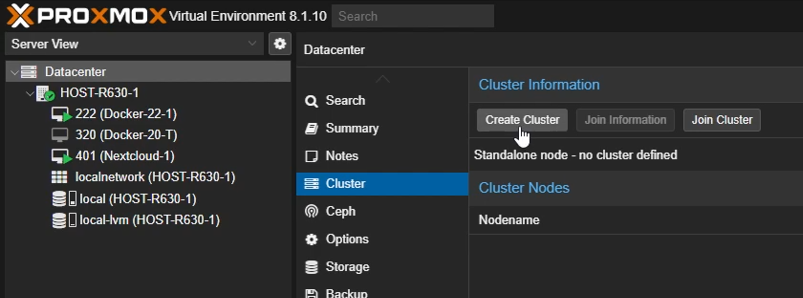
On the first server, click on “Datacenter” on the left panel. Then on the right panel, click on the “Cluster” menu. You will need to “Create Cluster” since this is the first node.
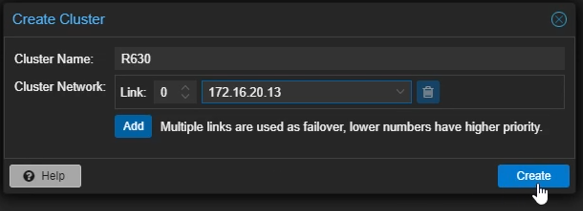
Name the cluster something descriptive. I am going to create a cluster for just my two new R630 servers so that is what I’m going to name it. For the first host in the cluster, leave the Link as “0”. Change the IP address to the address of the management interface that your hosts can communicate on. Then just click “Create”.
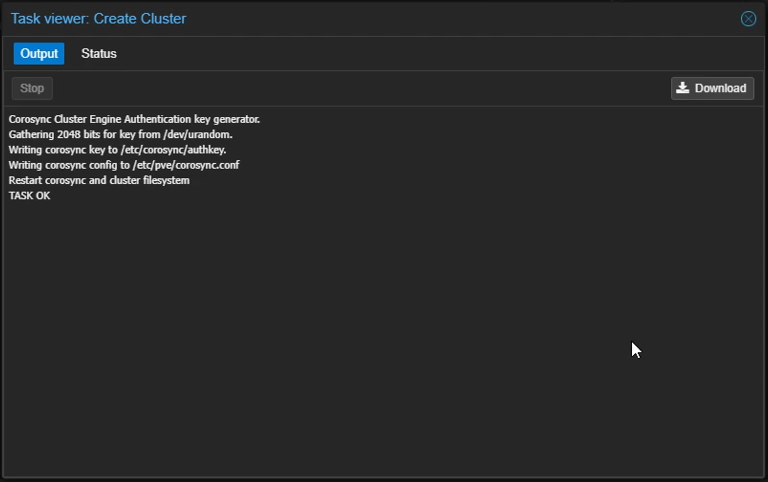
It took my servers a little while (about 45 seconds) to create the cluster. When it’s finished you should see the “TASK OK” message. You can now close the Task Viewer pop-up.
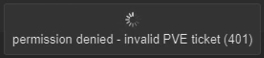
I did then get this error message however I just left it process a little while longer and it refreshed and everything was good.
Now that we have a cluster created, we need to grab the “Join Information” for the second host.
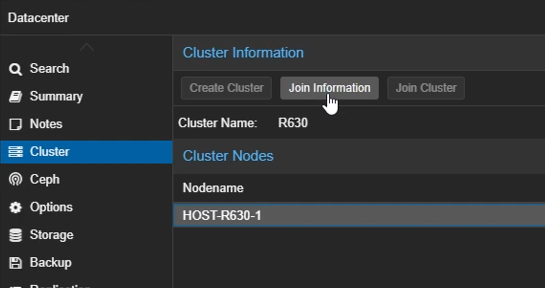
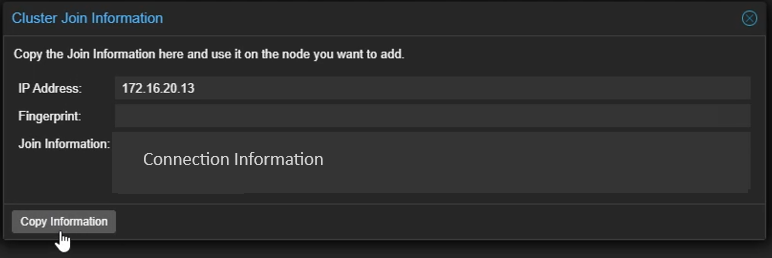
The pop-up will have all the information we will need to connect the second host to the cluster. Note – every host you connect will have its own Join Information so make sure after every connection you come back in here and re-copy the generated info. Simply click the “Copy Information” button at the bottom and it will put the correct info in your clipboard.
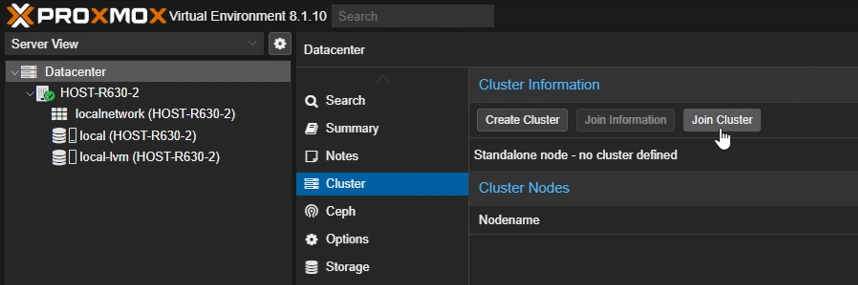
Switch over to the management interface on the second host and click the “Join Cluster” button.
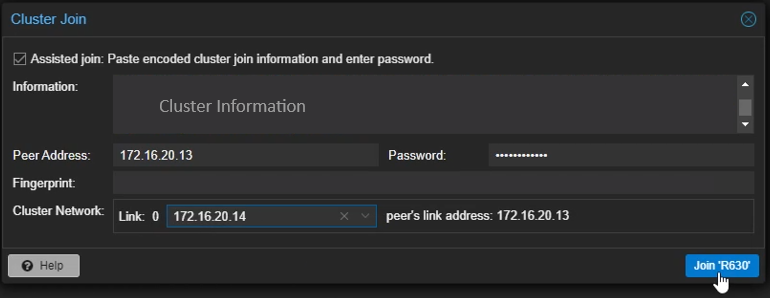
In the “Cluster Join” pop-up, paste the connection information. Once you do it should fill in some of the fields you need and ask you for some information to confirm and setup the connection.
- Peer Address – This should be the IP address of the first node in the cluster.
- Password – This will be the root password for the first node.
- Cluster Network – Click the drop down and select the IP address for the management interface of this second host.
Click “Join {cluster name you configured}” to start the join process.
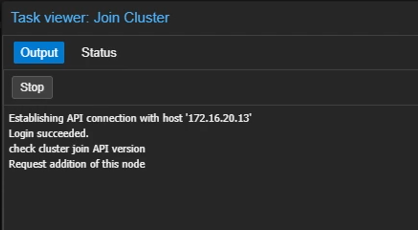
I got this message after connecting and it didn’t ever finish. I ended up giving it a little time to process and then closed the Task Viewer window. After refreshing, everything seemed to connect just fine and it joined the cluster. If you had a similar or different experience, let me know in the comments below.
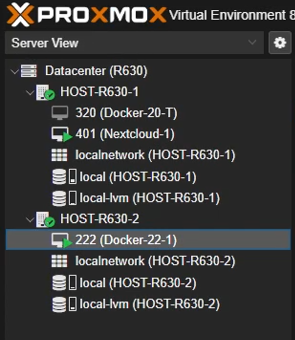
Now that it’s joined, you should be able to see and use both hosts through both management interfaces.

Migrate Virtual Machine to Second Host
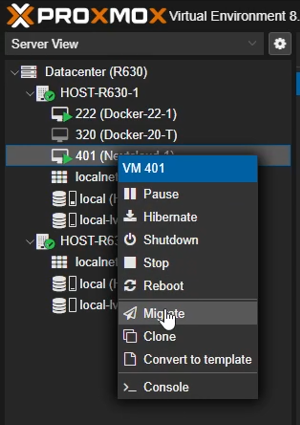
Next thing we will do is migrate a VM to the new host so we can start using it’s resources. Select the VM you wish to move, right click on it and click “Migrate”.
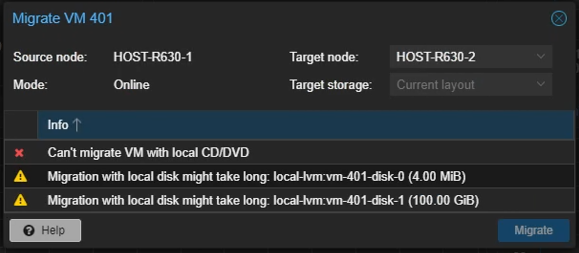
The first thing you will notice on most newly created VM’s is this error “Can’t migrate VM with local CD/DVD” error.
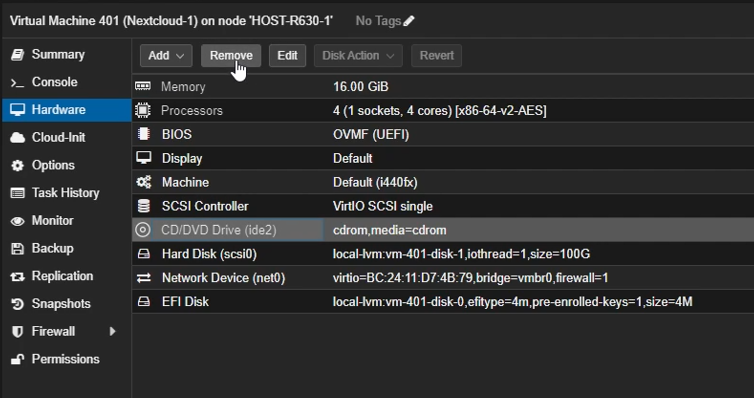
Switching over to the Hardware menu, you can just click the CD/DVD Drive and remove it. It’s best practice to not have stuff attached to the VM that isn’t needed and you can always add a CD drive later if you need to attach an ISO later. You will have to do a full shutdown process on the VM for it to completely remove the device.
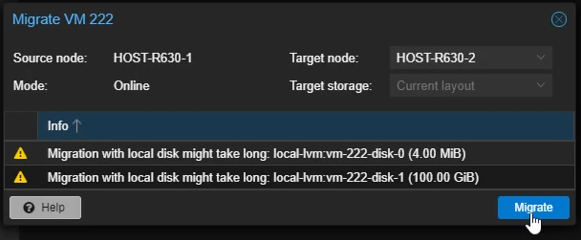
Once you have this cleaned up, the error will go away and allow you to Migrate. Set the “Target node” to the second host that you want to migrate it to. Since I’m not using shared storage, I get a warning that the migration will take longer. This is expected because it has to move the files before cutting it over. Click “Migrate” to start the process.
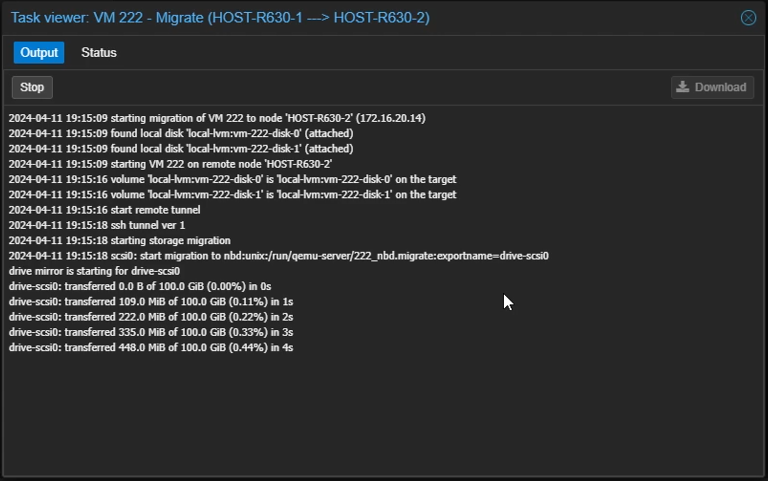
The Task Viewer window will open and it will start processing. You don’t need to keep this window open the whole time, you can close the Task Viewer window and it will process.
Once it finishes, it will do the cut over and the VM should resume on the second host and everything should be working fine.
The fact that this feature is built into Proxmox and included for no extra cost is a huge plus especially moving away from the VMware setup where you had to pay for a vCenter server to manage this feature. On top of that, being able to do it without shared storage is great for Home Labs.
I plan on pubishing articles on setting up High Availability on this cluster and shared storage using Ceph so stay tuned for that.
Let me know in a comment below if this helped or if you would do anything different.