About 6 months ago, Ubiquiti released UniFi Network Application 7.5.187 which has a bunch of WiFi improvements for the UniFi system. One thing that I knew I needed in my setup as soon as I saw it was the Private Pre-Shared Keys (PPSK) system.
What is PPSK? Instead of having different SSID’s for each network on your system for people to wirelessly connect, you have a single SSID and the password the device uses to connect determine which network it’s put on. It’s a small but powerful setting that I really like.
In my case, I have 4 SSID’s for the different networks I have devices connecting to (3 LAN networks and a guest network). In this walk through, I’ll be consolidating that down to only two (CHNS and Guest network). There is some limitations with this technology which is why I’m not including my Guest SSID with the rest of the networks which I will go over when I get to that part of the configuration.
Prerequisites
At the time of writing this, the current version of the UniFi Network Application is 8.1.113 which I am running in a Docker container on one of my Portainer servers. HERE is a walk through on how I deployed that container. You don’t need to have it deployed in a container or on this version, as long as you are on a version newer then 7.5.187.
I already use the UniFi Wireless Access Points and configuration so I will be migrating all of my devices from existing SSID’s to the single new SSID. I recommend if you already have a wireless setup, you do a migration and leave your existing SSID’s in place just in case you need to connect to some IOT devices that don’t have an interface.
Configuration
Start by logging into your Network Application and going to the “Settings” icon at the bottom of the left menu bar (looks like a gear).
The first page you will see is the “WiFi” configuration page:
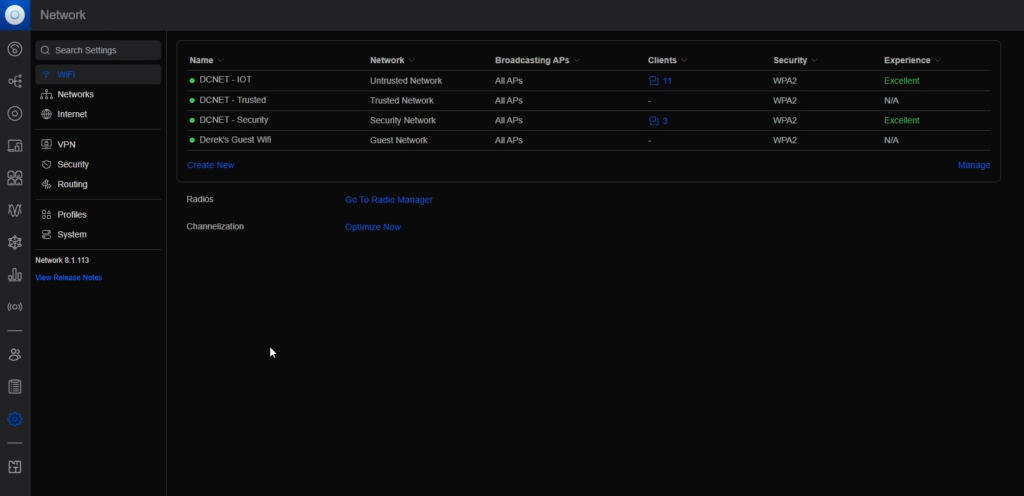
You should see all your SSID’s listed. I have been needing to clean this up for a while, since I went by DCNET, so this was good motivation.
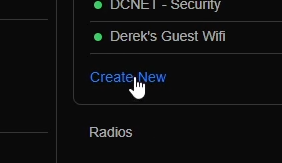
Click the “Create New” button in the main panel:
Enter a “Name” for your new SSID. This will be the name that shows up on all devices. Then check the box next to “Private Pre-Shared Keys”:
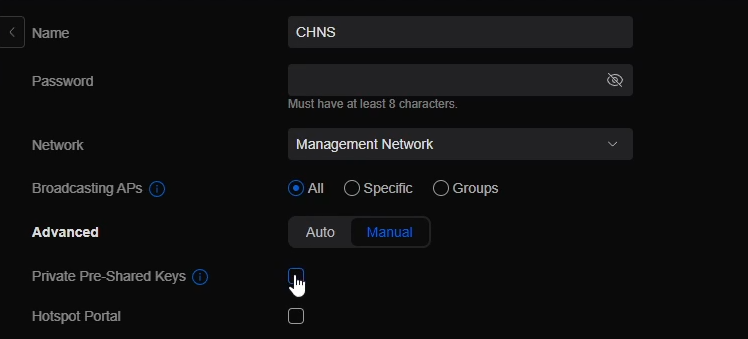
This will pop up a configuration box:
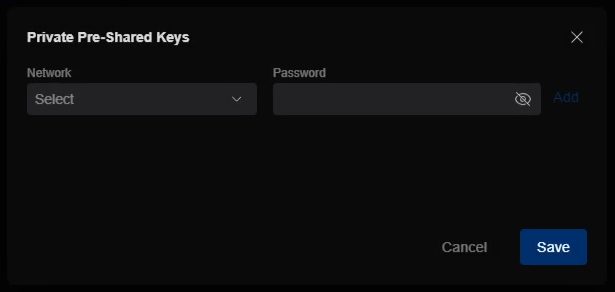
You can now select the “Network” you wish to configure. These are the different networks you should already have configured on your UniFi setup. Find and select the network you wish to configure:
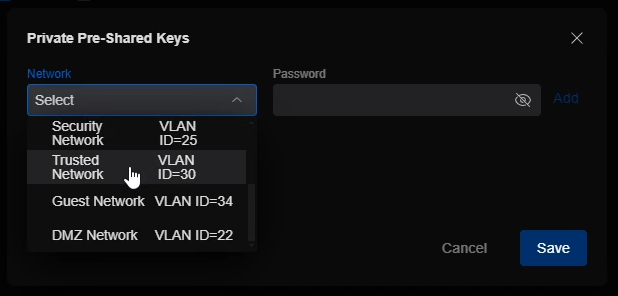
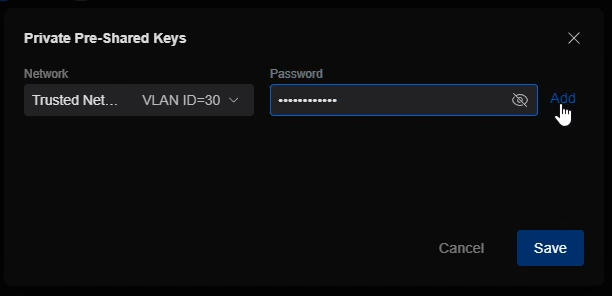
Enter in a password for this network. This will be the password used when connecting a device to the SSID. I like to use a password generator, like LastPass, to generate a random password that is easy to visually understand and type into my devices while also being long enough that it’s not easy to decipher. Click the “Add” button to add it to the list.
Repeat this step for each of the networks you wish to add to this SSID. You should end up with something like this:
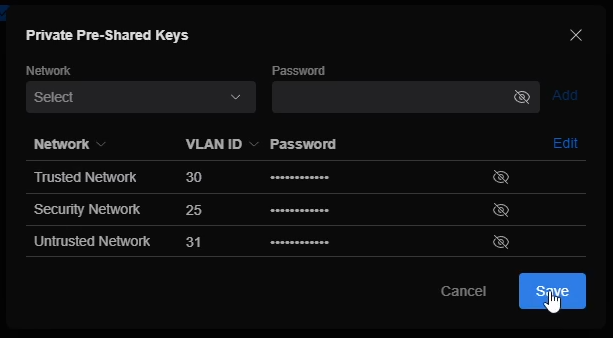
Click “Save” to add the networks to the SSID.
Back on the main configuration page, some of the options at the top are now gone. The settings that were removed would have conflicts with running multiple networks so they just removed them all together.
Under the “Advanced” section, you will see the rest of the configurations for the SSID. A few to call out that I set:
- Hotspot Portal – Once you enable PPSK, the ability to do a Portal for a guest wireless network goes away. This is a setting I use for my Guest SSID so that is why I don’t add my Guest network to this main SSID.
- WiFi Band – I leave both 2.4 GHz and 5 GHz checked. I don’t have a 6 GHz access point yet so that is greyed out.
- Band Steering – I actually have this selected so my devices capable of 5 GHz connect using it to get full bandwidth. There is some debate that new devices are good at selecting the correct option however I haven’t seen any issues on my network so I just enable it to make sure the devices work at their best speed.
- Hide WiFi Name – I actually don’t check this for my main SSID just to make it easier to add to devices and hiding it doesn’t help that much with security.
- BSS Transition – I have this checked however I don’t see much difference with only my 2 access points.
- Multicast Enhancement – I have all physically wired access points so I have it checked. If you are running a Mesh network, you may want to leave this unchecked.
- Group Rekey Interval – I have this checked and set to 3600 which increases the security of the network a little bit.
Once you set the settings you would like, click “Add WiFi Network” at the bottom of the page.

Now that we have the SSID broadcasting and ready to accept client connections, lets connect some devices to it and migrate them over.
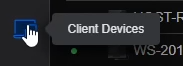
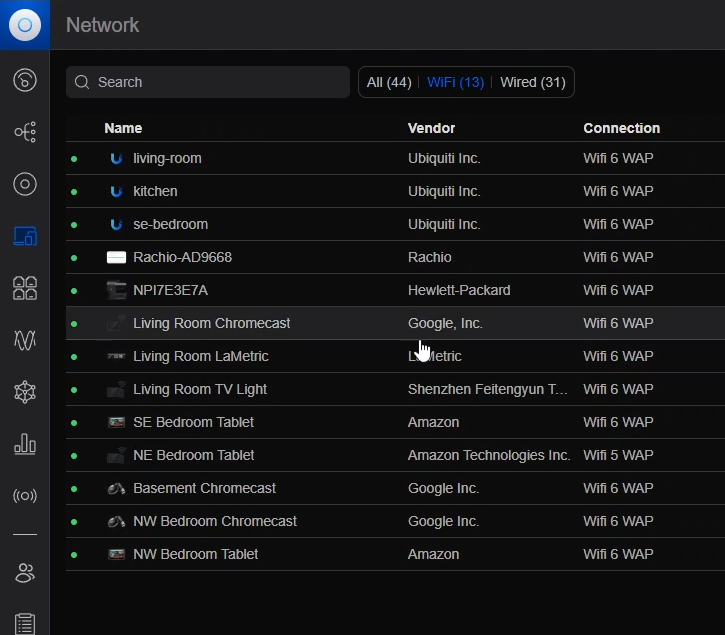
Click on the “Client Devices” menu on the left menu bar. This will give you a list of all client devices passing data on your network and able to be seen by the network application.
Click the “WiFi” button at the top, this will narrow the list to just connected to your access points.
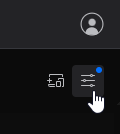
On the right hand side of the screen, click the “Display Options” icon.
Click on the “Columns” tab and then check the box next to “WiFi”.
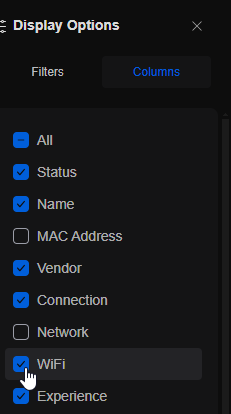
This will show which SSID the client is currently connected to. Go through your list of clients and start moving them over to the new SSID, one by one. Make sure you use the correct password you set for the network you want the device to connect to. You can make sure the device is connecting to the correct network by checking which IP address it gets after you connect on the same Client Devices page or go back into your “Columns” and check the box next to “Network”.
Once you are done, you should have a screen like mine, all cients are connected to the same WiFi SSID however the different clients have different IP addresses on different networks.

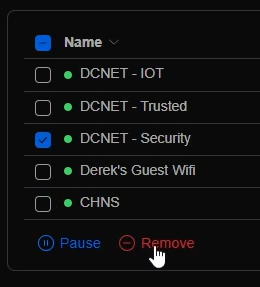
Now that you are done and all client devices are disconnected from the old SSID, make sure you go back to your WiFi settings and “Remove” the old SSID. You can do this by clicking “Manage” in the bottom right corner of the SSID list.
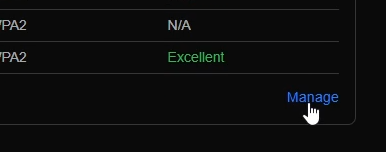
Check the box next to the SSID you wish to delete and then click “Remove” at the bottom.
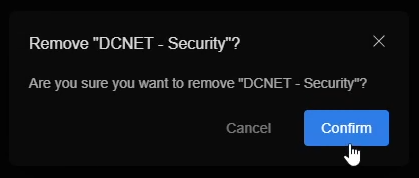
It will pop up a confirmation to make sure you wish to delete it, just click “Confirm”.
So far, I haven’t had any issues with this setup and I really like having the single SSID for all devices. Only downside I see with it is devices that swap between SSID’s as needed will be difficult since it will save only the one password. However, I don’t have many devices that do that.
Overall, i’m very happy Ubiquiti added this feature and hope they continue down this path of adding more great tools.