If you haven’t read through my first article on Proxmox last week and why I’m switching to it for my home lab hypervisor, be sure to check it out and build out your own server. This article will be a direct continuation of that article and focus on the whole reason to run a hypervisor, to actually build servers and run workloads.
I’ll be covering how to Create the vitual machines and the settings I found work best for my deployment. Frist I’ll go over the process of getting your installation media onto the hypervisor. Then, I’ll cover the deployment for both Linux and Windows Server. I’ll finish the article going over the QEMU agent installation for both Linux and Windows.
This will be a “simple” deployment, no fancy VLAN’s, GPU passthough or resource pools. That stuff comes later, just an easy first server deployment.
Prerequisites
Like I said above, you will need to follow my first guide from last week on Installing & Updating Proxmox 8.1. You will need a running hypervisor to make any of this work.
Next, you will need to make sure you have your installation ISO ready for whatever operating system you chose to deploy. This is for sure the case for Windows Server. If you are installing only Linux servers, I’ll show you a way in the next section how to have your server directly download the ISO from the website.
Get Installation Media on Server
If you already have the ISO for the Operating System (OS) you want to install, great, we can just do a quick upload to the server. If you don’t have it already, skip ahead to the end of this section, Proxmox has a really nice feature I’ll cover where the server downloads the ISO for you so you don’t have to then upload it from your computer.
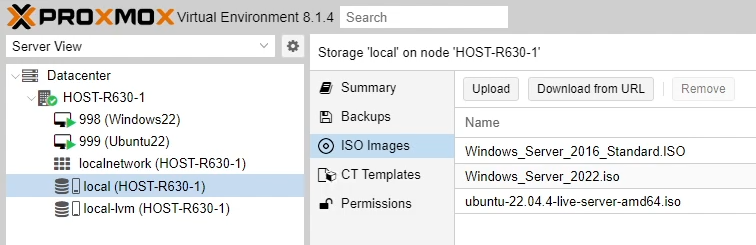
First thing to do is login to your Proxmox management web interface and under your server, select “local ({server name})”. This will be the storage for your hypervisor. Then click on “ISO Images” and then click on “Upload”.

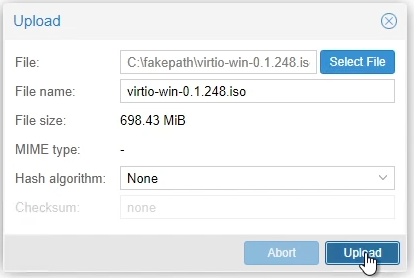
When the “Upload” box appears, click on “Select File”.
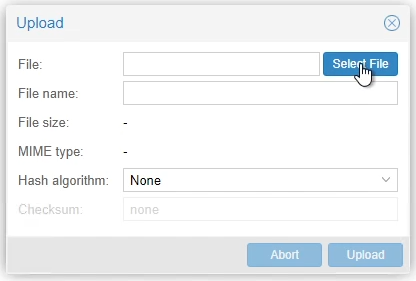
Navigate to where you have your downloaded ISO file on your computer, select it and click “Open”.
It should then populate the File Name and the File Size in the Upload window. Simple click “Upload” to kick off the process.
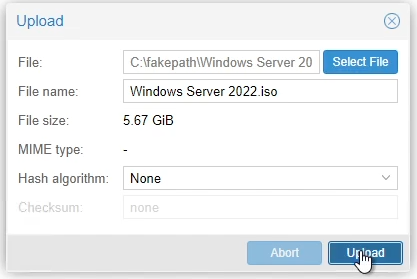
Wait for the file to be uploaded to the on server storage.
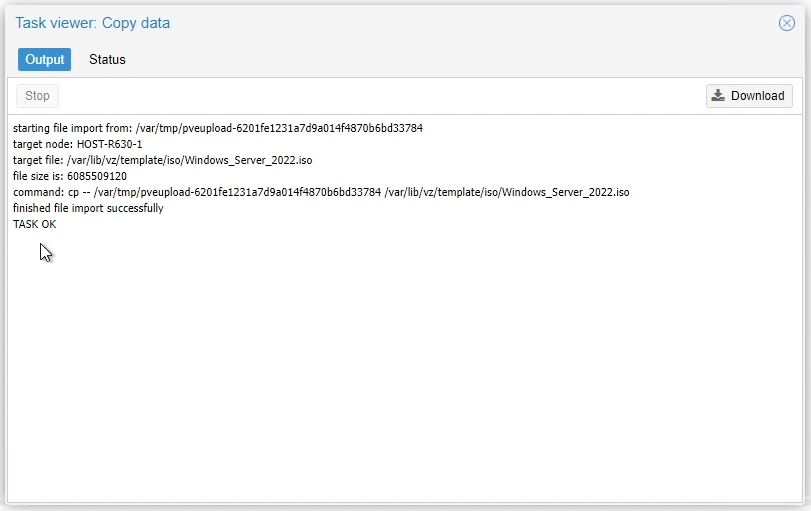
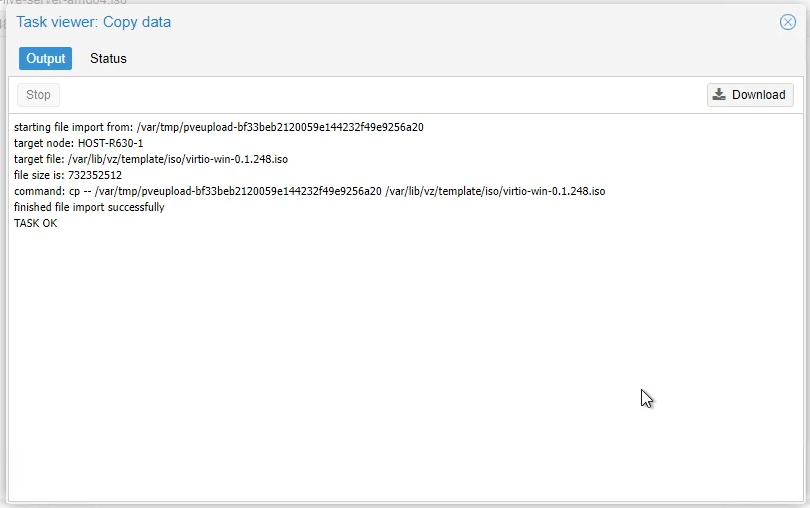
Once it has finished the upload, a different “Copy data” windows will pop up. Once it say “TASK OK” it’s safe to close out with the blue X in the top right corner.
Now you should see your installation media listed on your server ready to be install.
For those of you that skipped down here because you haven’t downloaded your ISO yet and want to do a direct server download, here are the steps.
First we need to get the link to the ISO file. You will need to do some digging if you are using something other then Ubuntu because that is what I will be using.
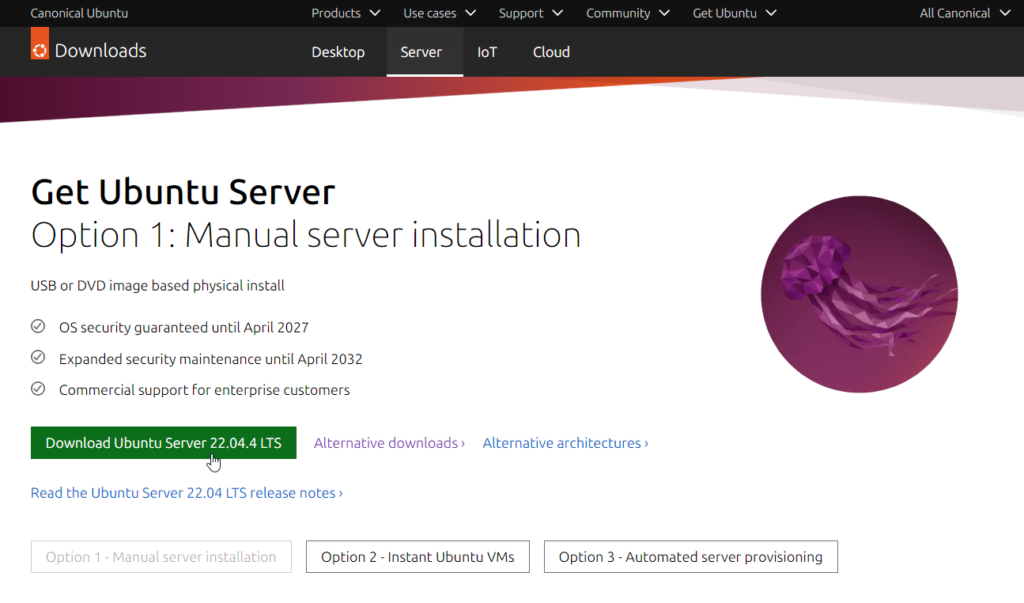
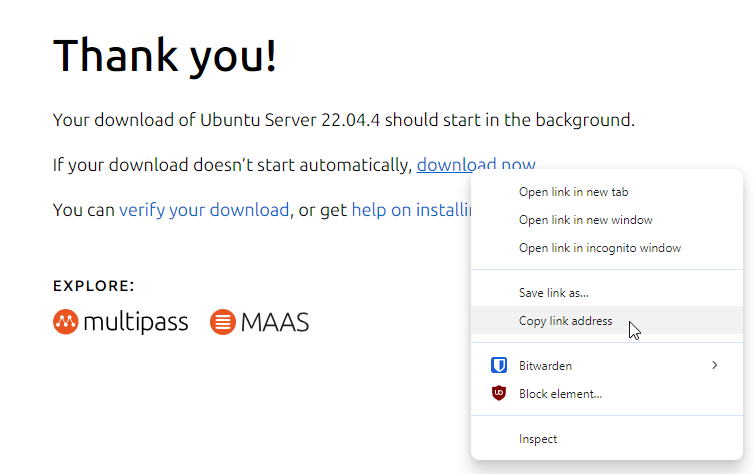
Navigate to the Ubuntu Server Download page. You will want to click this link to “Download Ubuntu Server {version number}”.
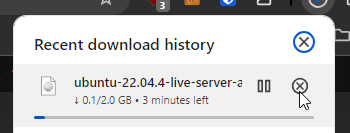
This will automatically kick off the download to your local machine. We don’t want that so you can just cancel it in your browser.
Next you will want to right click on the “download now” link and select “Copy link address”.
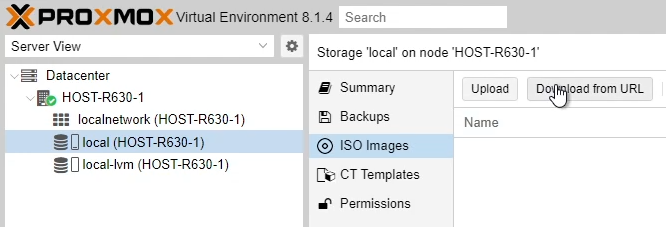
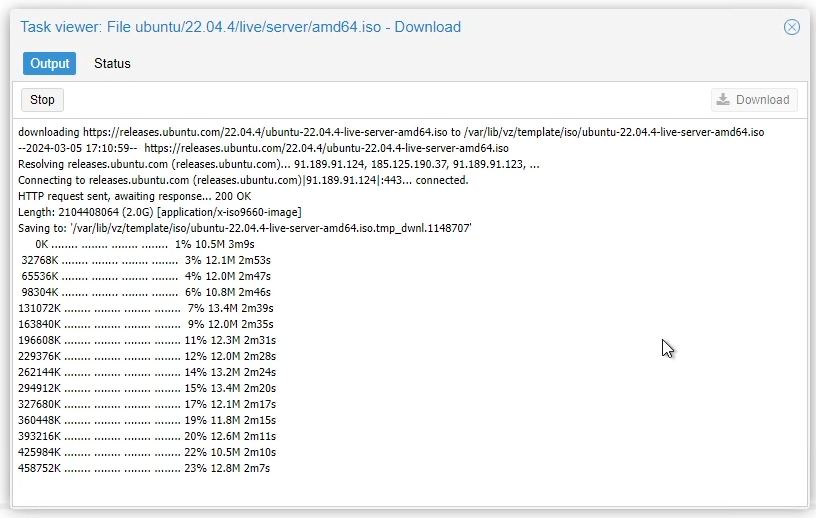
Now login to your Proxmox management web interface, click on “local ({server name})” and then on “ISO Images” again. This time, instead of click on “Upload”, we want to click on “Download from URL”.
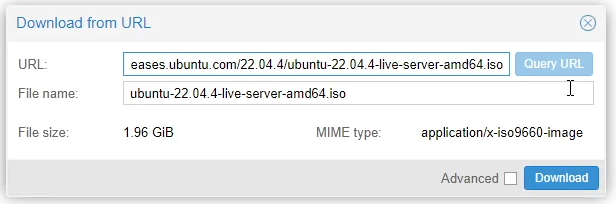
This will pop up a “Download from URL” box. Paste the URL you copied from the Ubuntu website in the “URL” field and click “Query URL”. The server will then go out to that URL and pull the specifications for the ISO you want to download. Feel free to change the “File name” to something you understand. Click “Download” to start the process.
Wait for it to finish downloading to the server. You should see % updates as it pulls the Image.
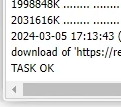
Once the download finishes, you should see the “TASK OK” prompt at the bottom of the screen. Click the blue X in the top right corner to close the box.
That should be it for getting the install media onto your hypervisor. Upload all the different OS’s you want before moving onto the next steps of actually creating and installing the VM’s.
Creating a Linux Virtual Machine
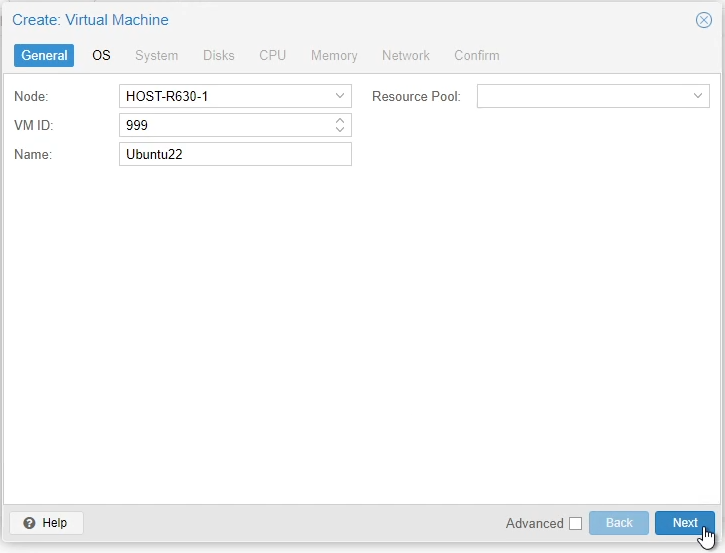
In the top right corner, click on “Create VM”.

This will pop up a “Create: Virtual Machine” wizard box. Fill in the information needed for your virtual machine:
- Node – This is the hypervisor server you want to create the VM on.
- VM ID – This is a unique 3 digit number specific for this VM. Make sure you pick wisely as you can’t have 2 VM’s with the same number. Most people also come up with a numbering scheme for these numbers also. For example, Production VM’s are 100-199, Test VM’s are 200-299.
- Name – This will be the name for the VM.
- Resource Pool – If you have pools already configured, feel free to select the one you want to use. I will be coving resource pools in a later article so I’ll just leave it blank.
Click “Next” once you have entered all of your information and are ready to continue.
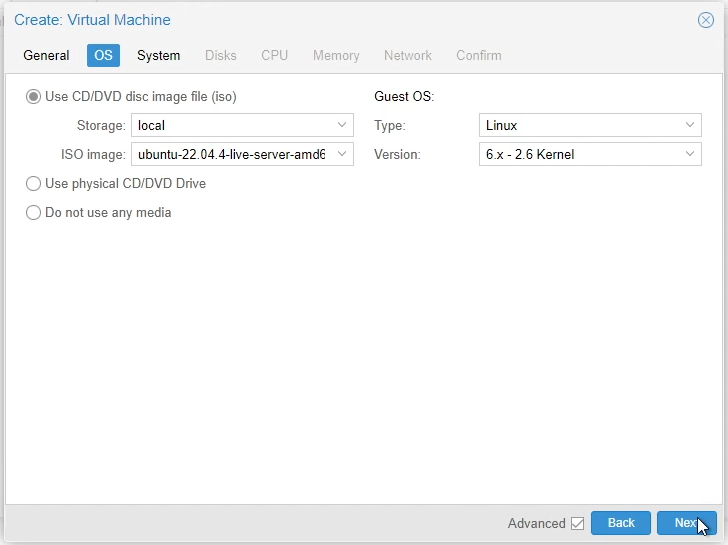
The next screen will have your “OS” settings. Fill in the information needed for your virtual machine:
- Since we uploaded the ISO images prior to starting, we will leave it on “Use CD/DVD disc image file (iso)”.
- Storage – This is the volume you want to look at to find the ISO you already uploaded to the server. We uploaded it to “local”.
- ISO image – Select one of the ISO files we already uploaded to the server.
- Type – We will leave this on the default “Linux” as we are deploying a Linux Server.
- Version – This will be the Kernal version you want to use for your Linux install. Currently, Proxmox uses v6.x so unless you have a reason to change it, leave it on the defualt.
Click “Next” once you have entered all of your information and are ready to continue.
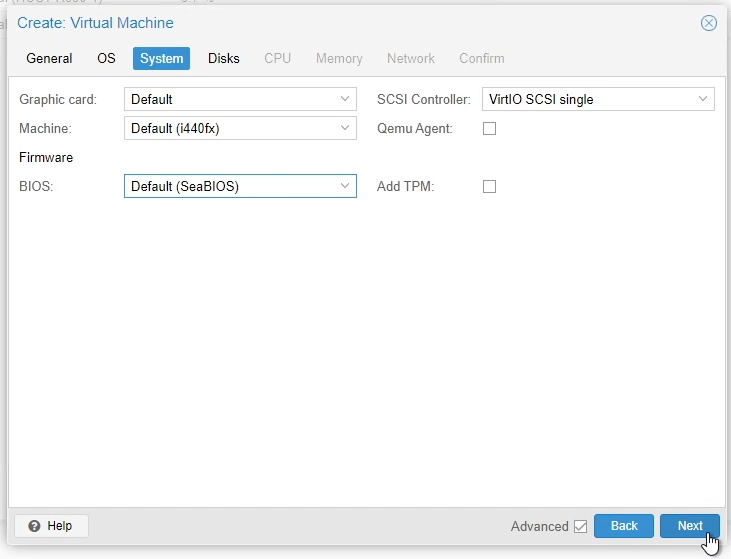
The next screen will have your “System” settings. For most people, the default settings will work, that is what I am using. You may need to change to the “OVMF (UEFI)” BIOS if you are using newer hardware. Leave “Qemu Agent” unchecked for now, we will enable this setting later after installing the agent on the VM. Click “Next” to continue.
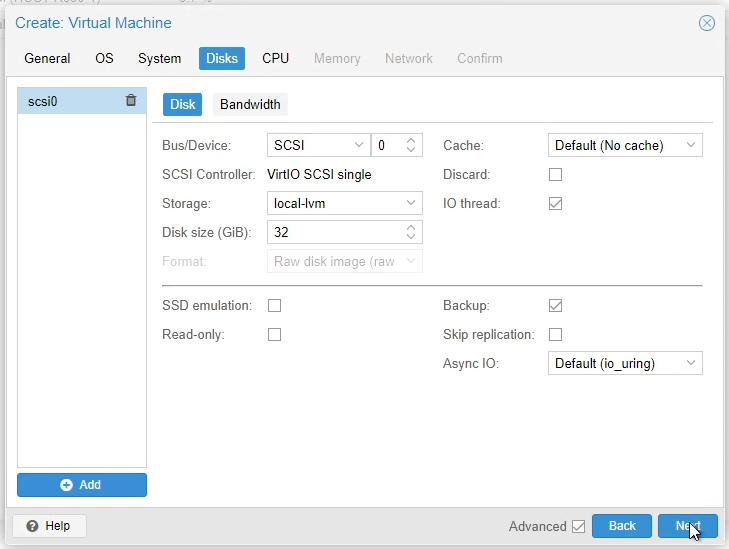
The next screen will have your “Disks” settings. Fill in the information needed for your virtual machine:
- Bus/Device – Unless you have a reason to change it, the defaults should work fine. If you are adding more than one drive to the server, you will need to assign that second drive a different SCSI device number.
- Storage – This will be where it actually stores the virtual volume files for the VM. I am just going to store them locally on this server for this walkthrough. In a later article, I’ll cover running VM’s off remote storage.
- Disk size (GiB) – This is the size of the volume in Gibibyte’s. This is just another way to calculate Gigabyte’s, the numbers are basically the same.
- If you are using cache, select it.
- If you are using SSD’s or any sort of Flash memory, you will want to check the box to “Discard”. This will maintain the drive for you.
Click “Next” once you have entered all of your information and are ready to continue.
The next screen will have your “CPU” settings. Fill in the information needed for your virtual machine:
- Sockets – This only matters if you are trying to maximize your CPU to RAM performance and is outside the scope of this article. I will be and in most cases leaving this with “1”.
- Cores – This is how many CPU threads you want this VM to have access to. It isn’t a 1 to 1 on your physical CPU thread count so don’t worry to much about that, you just don’t want to overdue it. I will be using 4 for this demo.
- Type – This is where you select the architecture of your CPU. You could track down the matching architecture to your physical CPU or you can do what I’m going to do and leave it with the default “x86-64-v2-AES”.
Click “Next” once you have entered all of your information and are ready to continue.

The next screen will have your “Memory” settings. You will need to calculate how much RAM you want this VM to have allocated, I recommend going with a healthy amount so it runs better but at the same time I understand I have a very beefy server that has a lot of resources. The calculation is in Mebibytes, which again is another way to calculate Megabytes, basically the same. To calculate to get GB, simply multiply the amount of GB’s you want to allocate by 1024. Enter the value and click “Next” when you are ready to continue.

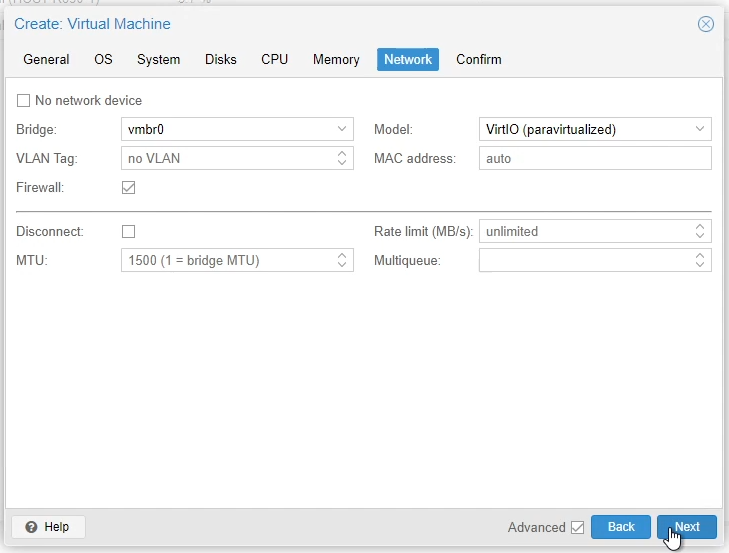
The next screen will have your “Network” settings. I am going to leave all defaults on this screen. I will be covering more advanced Network configurations in a future article. There is some that say you don’t want to share the same network bridge for VM’s as your main management bridge but for this simple walkthrough, it works.
The final screen is the “Confirm” screen. Look over your settings and hit “Finish” to create your VM.
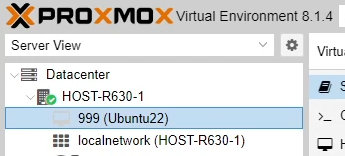
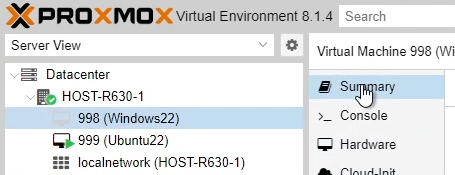
Once it finishes building, it should looks like this:
Select the newly created VM, then click on “Console”. This is the remote viewer for the VM. Click on “Start Now” to start the VM up for the first time!
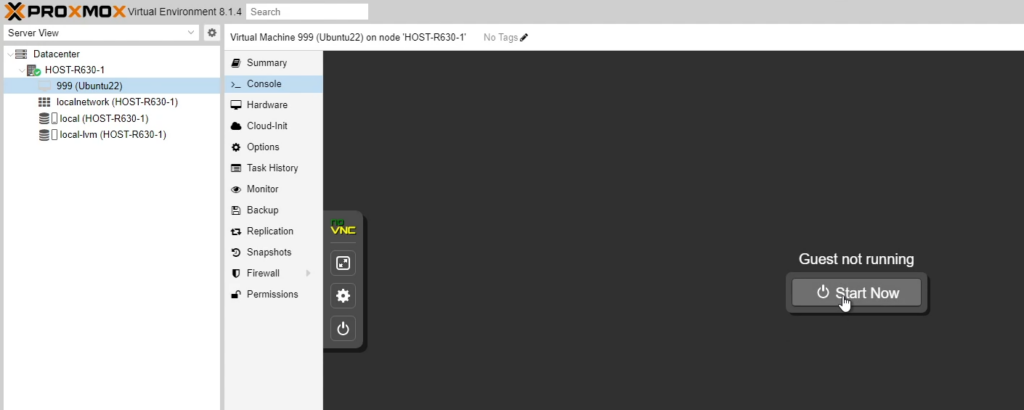
After a few seconds and screen flashes, you should see a POST screen and then it should boot off the Installation ISO you pointed it to at the beginning of the configuration.

Run through the installation process just like any other server install. If you need a guide on how setup Ubuntu Server, I recommend following my other walkthroughs on the topic Here.
Creating a Windows Virtual Machine
In the top right corner, click on “Create VM”.

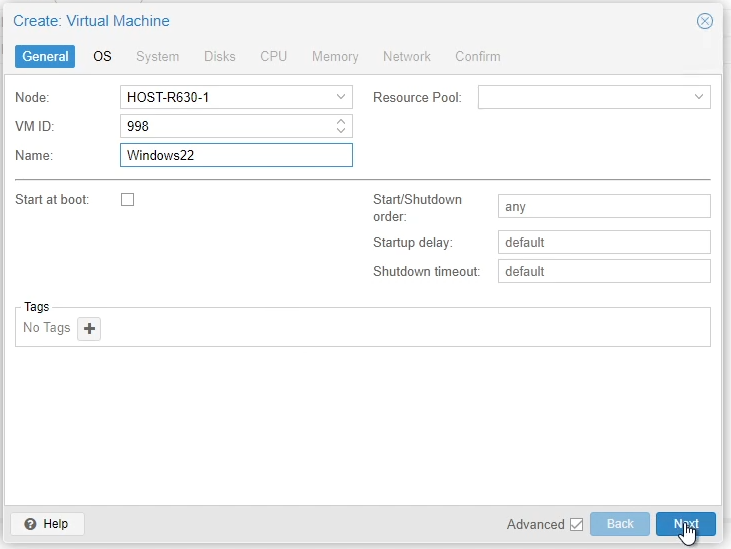
This will then pop up a “Create: Virtual Machine” wizard box. Fill in the information needed for your virtual machine:
- Node – This is the hypervisor server you want to create the VM.
- VM ID – This is a unique 3 digit number specific for this VM. Make sure you pick wisely as you can’t have 2 VM’s with the same number. Most people also come up with a numbering scheme for these numbers also. For example, Production VM’s are 100-199, Test VM’s are 200-299.
- Name – This will be the name for the VM.
- Resource Pool – If you have pools already configured, feel free to select the one you want to use. I will be coving resource pools in a later article so I’ll just leave it blank.
Click “Next” once you have entered all of your information and are ready to continue.
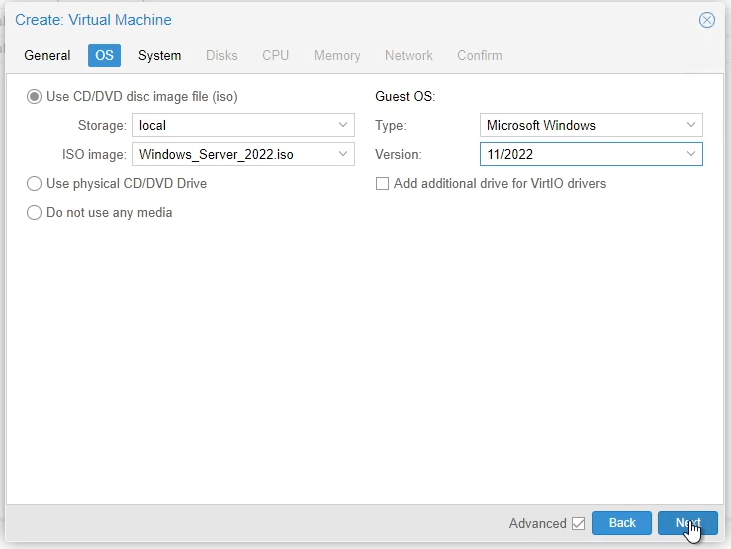
The next screen will have your “OS” settings. Fill in the information needed for your virtual machine:
- Since we uploaded the ISO images prior to starting, we will leave it on “Use CD/DVD disc image file (iso)”.
- Storage – This is the volume you want to look at to find the ISO you already uploaded to the server. We uploaded it to “local”.
- ISO image – Select one of the ISO files we already uploaded to the server.
- Type – You will want to change this to “Microsoft Windows”.
- Version – You will want to change this to the version of Windows you are installing. I’m installing Microsoft Server 2022 so I’ll select “11/2022”.
Click “Next” once you have entered all of your information and are ready to continue.
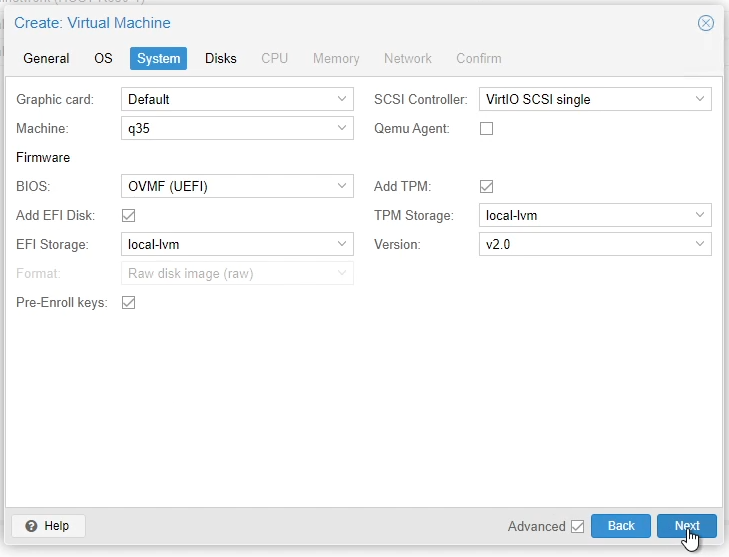
The next screen will have your “System” settings. Some of the setting requirements might change based on if you are installing a newer vs. older version of Windows. Fill in the information needed for your virtual machine:
- BIOS – I leave on the default “OVMF (UEFI)” for Windows.
- EFI Storage – This is a persistant volume that holds BIOS settings like Boot order. Set it to the storage volume you are going to store the VM on.
- TPM Storage – This is a persistant volume that stores secret data, such as encryption keys, securely and provides tamper-resistance functions for validating system boot. Set it to the storage volume you are going to store the VM on.
- Leave “Qemu Agent” unchecked for now, we will enable this setting later after installing the agent on the OS.
Click “Next” once you have entered all of your information and are ready to continue.
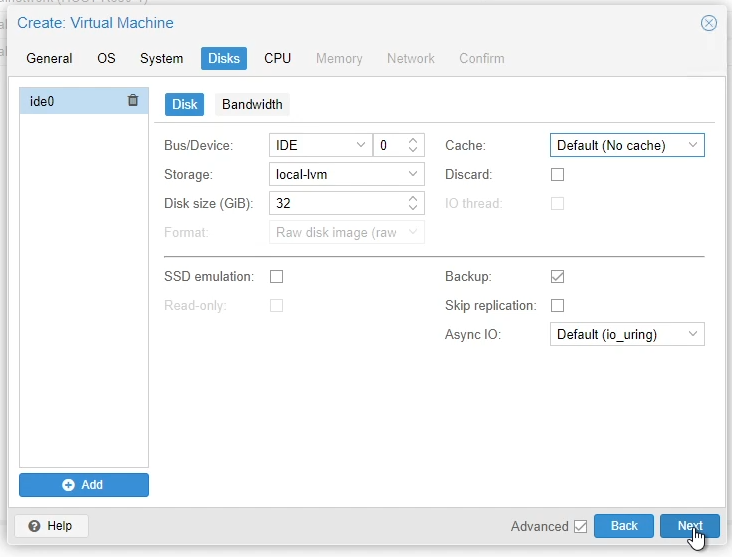
The next screen will have your “Disks” settings. Fill in the information needed for your virtual machine:
- Bus/Device – Unless you have a reason to change it, the defaults should work fine. If you are adding more than one drive to the server, you will need to assign that second drive a different IDE device number.
- Storage – This will be where it actually stores the virtual volume files for the VM. I am just going to store them locally on this server for this walkthrough. In a later article, I’ll cover running VM’s off remote storage.
- Disk size (GiB) – This is the size of the volume in Gibibyte’s. This is just another way to calculate Gigabyte’s, the numbers are basically the same.
- If you are using cache, select it.
- If you are using SSD’s or any sort of Flash memory, you will want to check the box to “Discard”. This will maintain the drive for you.
Click “Next” once you have entered all of your information and are ready to continue.
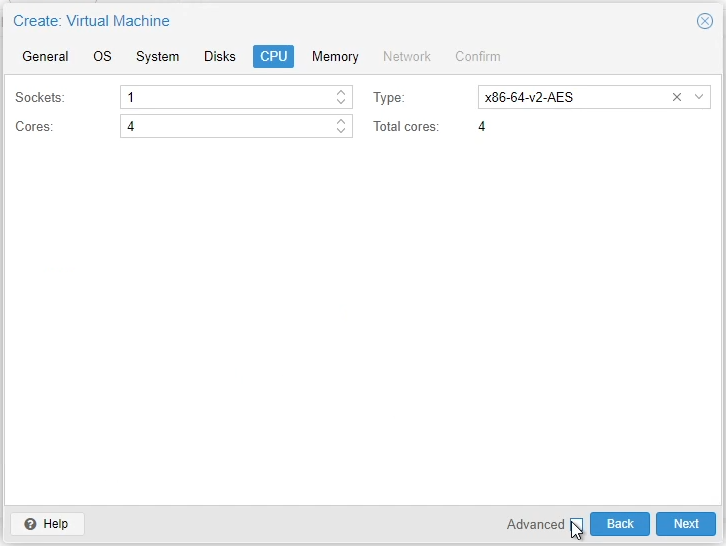
The next screen will have your “CPU” settings. Fill in the information needed for your virtual machine:
- Sockets – This only matters if you are trying to maximize your CPU to RAM performance and is outside the scope of this article. I will be and in most cases leaving this with “1”.
- Cores – This is how many CPU threads you want this VM to have access to. It isn’t a 1 to 1 on your physical CPU thread count so don’t worry to much about that, you just don’t want to overdue it. I will be using 4 for this demo.
- Type – This is where you select the architecture of your CPU. You could track down the matching architecture to your physical CPU or you can do what I’m going to do and leave it with the default “x86-64-v2-AES”.
Click “Next” once you have entered all of your information and are ready to continue.
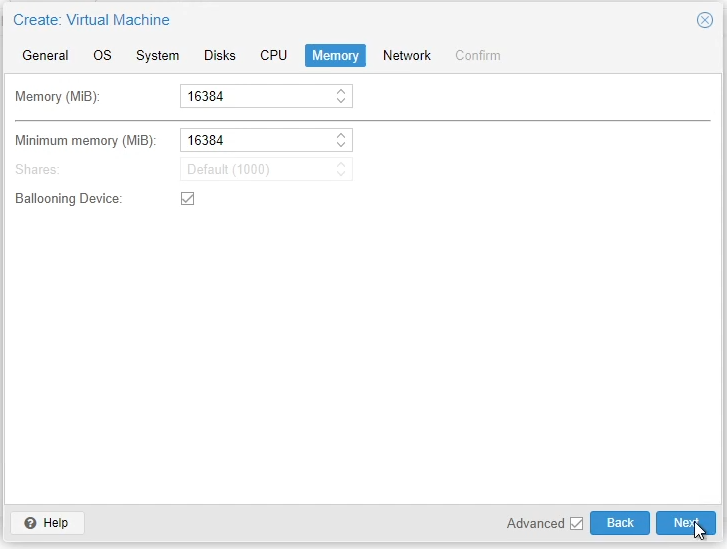
The next screen will have your “Memory” settings. You will need to calculate how much RAM you want this VM to have allocated, I recommend going with a healthy amount so it runs better but at the same time I understand I have a very beefy server that has a lot of resources. The calculation is in Mebibytes, which again is another way to calculate Megabytes, basically the same. To calculate to get GB, simply multiply the amount of GB’s you want to allocate by 1024. Enter the value and click “Next” when you are ready to continue.
The next screen will have your “Network” settings. I am going to leave all defaults on this screen. I will be covering more advanced Network configurations in a future article. There is some that say you don’t want to share the same network bridge for VM’s as your main management bridge but for this simple walkthrough, it works.

The final screen is the “Confirm” screen. Look over your settings and hit “Finish” to create your VM.
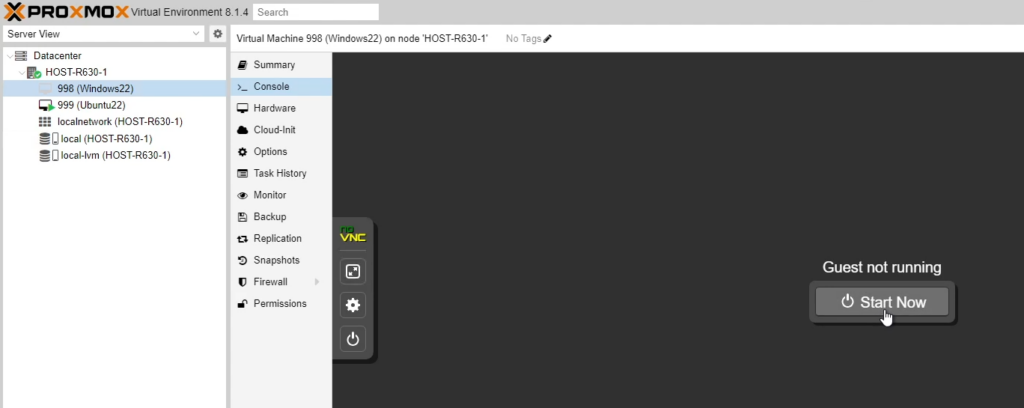
Once it finishes building, it should looks like this:
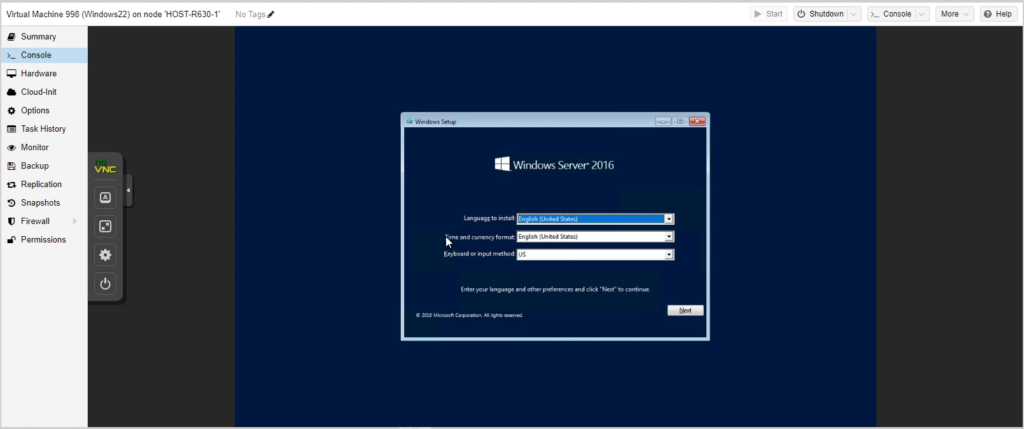
Select the newly created VM, then click on “Console”. This is the remote viewer for the VM. Click on “Start Now” to start the VM up for the first time!
After a few seconds and screen flashes, you should see a POST screen and then it should boot off the Installation ISO you pointed it to at the beginning of the configuration.
Run through the installation process just like any other server install.
Installing and Configuring QEMU Agent
The QEMU Guest Agent is a helper daemon, which is installed on the VM. It is used to exchange information between the host and VM, and to execute command in the VM. Things like properly shutting down the VM OS, freezing the VM file system to make a backup/snapshot or resuming after pause.
For Linux Servers:
For Linux Servers, its super easy to install:
- SSH or Console into the guest VM.
- Make sure your system is up to date.
- Execute the following command:
sudo apt install qemu-guest-agent -y
Once it has finished installing, do a full shutdown of the VM operating system.
sudo shutdown now
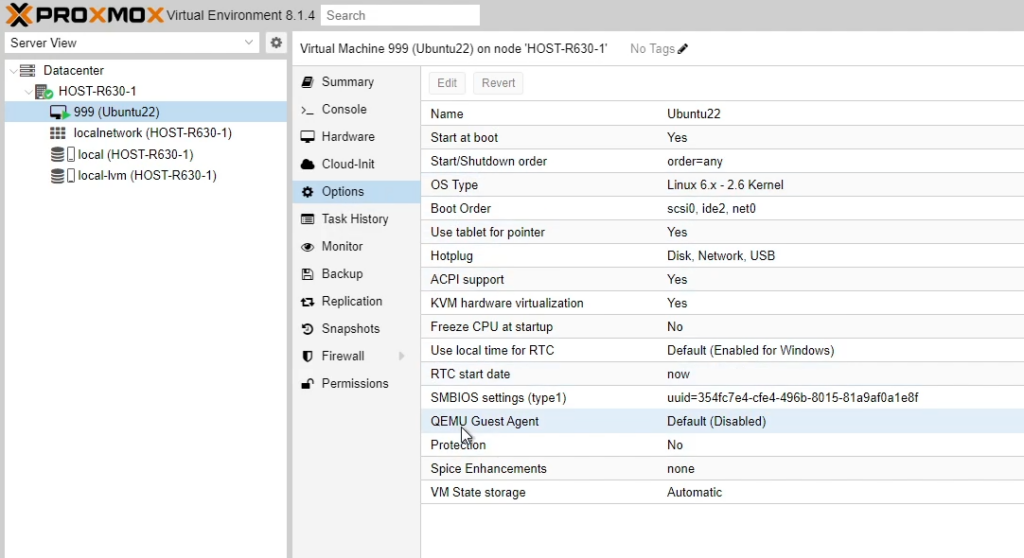
Once the system is shutdown, go to the “Options” screen for the VM. Select “QEMU Guest Agent” and then click on “Edit” at the top.
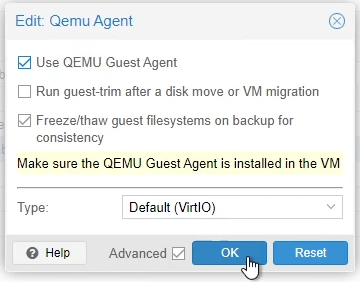
Check the box next to “Use QEMU Guest Agent” and then click “Ok” to apply.
The QEMU setting should now look like this:

Power On the VM by click “Start” in the top right corner.

Once the VM has fully powered back on, the QEMU setting should change to this:

You will then know its running on the guest VM by SSH’ing or Consoling back into the VM and run the following command:
systemctl status qemu-guest-agent.service
You should get a response like this:
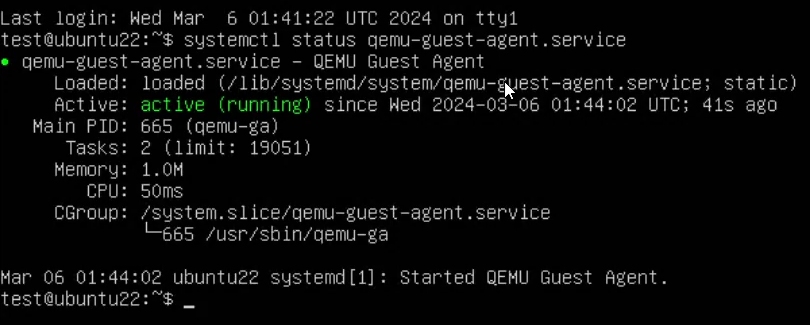
That’s it for installing the agent on a Linux Server! Proxmox should now have the ability to manipulate the server OS as needed.
For Windows Servers:
Now lets look at the install process for Windows. It is a little more difficult but these instructions should get you there.
First thing we need to do is go out and download the ISO file that has everything you need. Here is the link to the Proxmox Wiki where you can download it. Click the “download the latest stable” link to download the ISO.

Once it is finished download to your computer, switch back to your hypervisor management interface, go back to “local” storage and to “ISO Images” like we did earlier when uploading the install media.
Click “Upload” at the top, click on “Select File”, locate the ISO file you just downloaded and click “Upload” to start the process.
Once it has finished uploading, you will get the “TASK OK” prompt on the “Copy data” window.
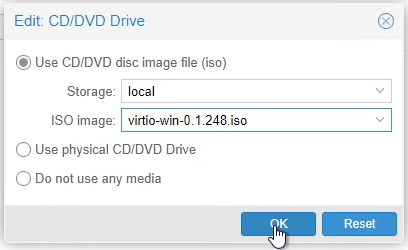
Now go back to your newly create VM, click on “Hardware” under Console, then select the “CD/DVD Drive” (probably still has your Windows Install disk mounted). Click on “Edit” at the top.
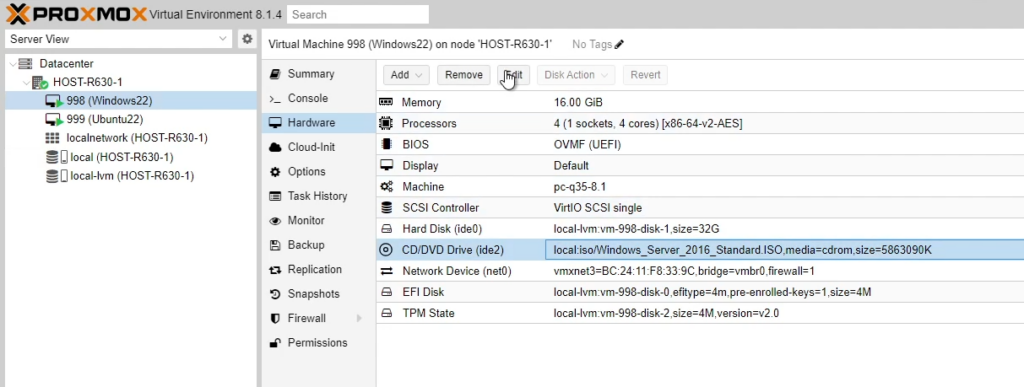
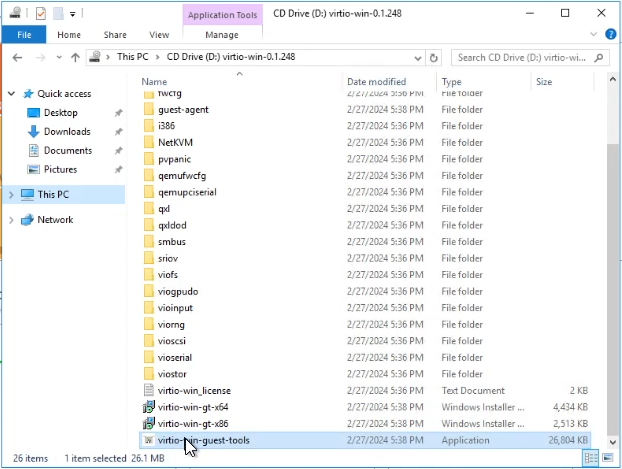
Change the “ISO image” to the virtio ISO file you just uploaded.
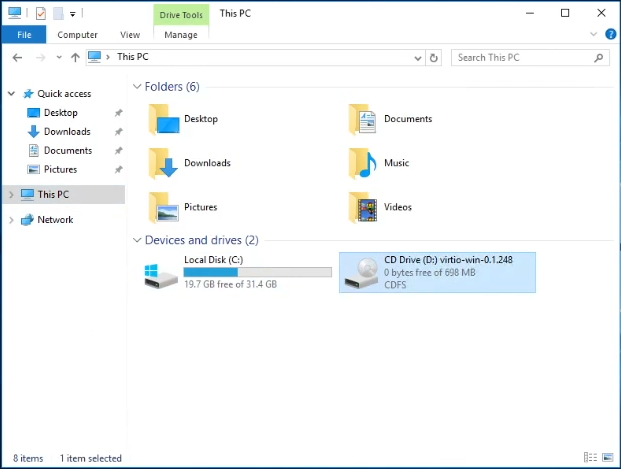
Switch back to the Console screen and login to your VM. You will find the CD drive mounted under “This PC” in the File Explorer.
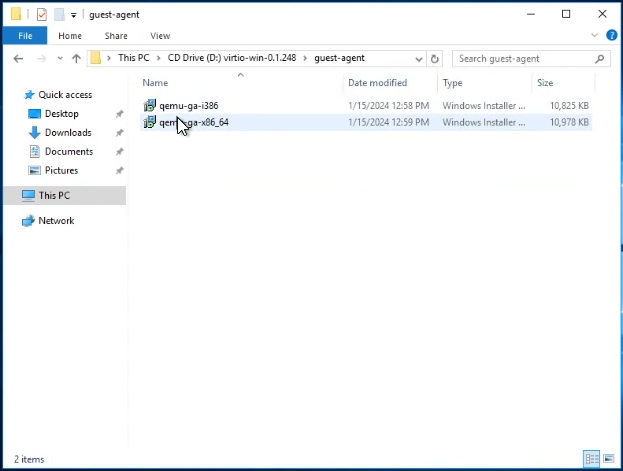
Open the CD Drive, then navigate to the “guest-agent” folder. You should see 2 installers, run the installer that fits your CPU type. Mine was x86-64.
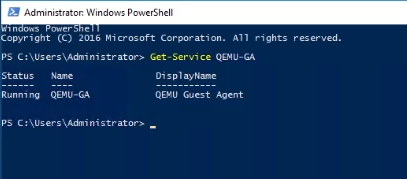
When you run the installer, it will pop up a box really quick and then go away, there won’t be a confirmation screen or anything to click. You will know it’s installed correctly by launching a PowerShell Prompt and typing this command:
Get-Service QEMU-GA
If the service is installed correctly, you will see it with a “Running” status.
Now that it’s running on the VM, we want to do a full system Shutdown.
Once the system is shutdown, go to the “Options” screen for the VM. Select “QEMU Guest Agent” and then click on “Edit” at the top.
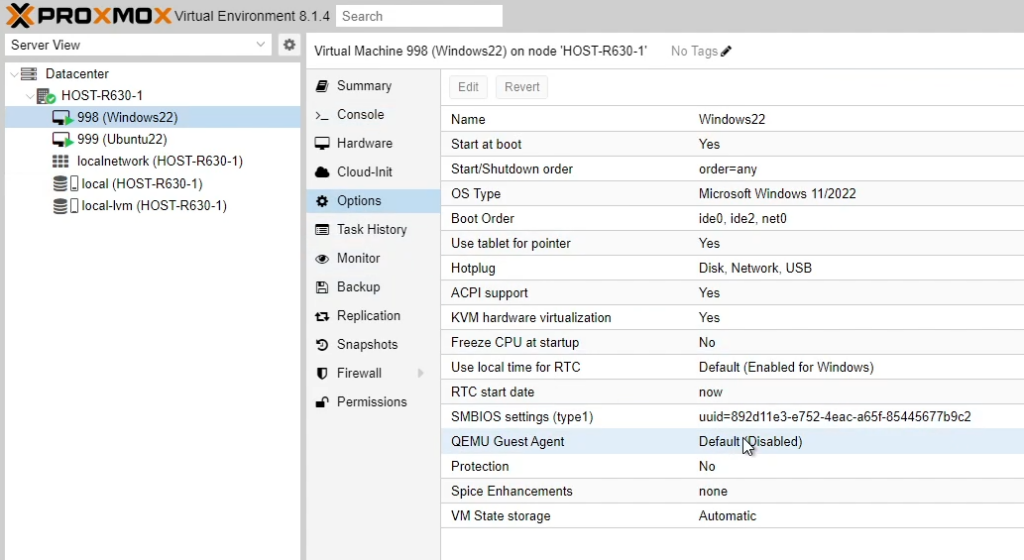
Check the box next to “Use QEMU Guest Agent” and then click “Ok” to apply.

The QEMU setting should now look like this:

Power On the VM by click “Start” in the top right corner.

Once the VM has fully powered back on, the QEMU setting should change to this:

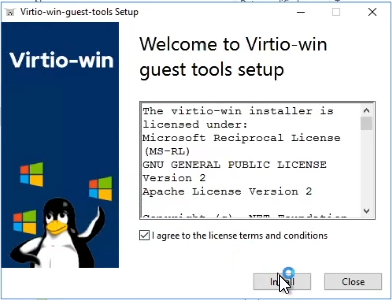
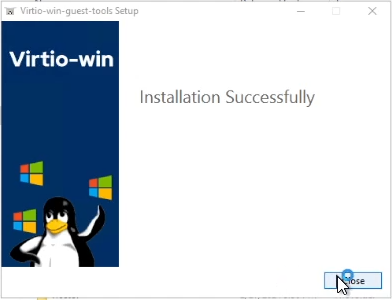
Optional, but highly recommended for best experiance, you can install the Virtio Windows Guest Tools. This can be found at the root level of the virtio ISO file down at the bottom.
Running this installer, you will get a Setup window where you need to agree to the terms and then click “Install”.
When it finishes installing, you will get a “Installation Successfully” screen. Now all the missing drivers should be installed and improved remote-viewer experience.
That’s it for installing the agent on a Windows Server! Proxmox should now have the ability to manipulate the server OS as needed.
I was definitly taken back when I saw all the customization of your VM’s when I first started. Hopefully this walk through helped you wrap your head around at least some of the settings.
In the future, I also plan on doing a walk through on how to setup a VM as a template which will save time from having to do all of these steps for every VM you deploy so keep an eye out for that article.
Let me know in the comments below if you would change, add or remove anything from your VM deployment.