This has been an interesting article for me to write. I have been a VMware user and advocate for many years now, going all the way back to my college years when I first started pursuing server environments and virtualization. My senior research project was on installing and configuring a vCenter cluster back before it was widely used in the industry. My current possition of employment is Virtual Desktop Engineer running a VMware Horizon environment and have been to the VMware Explorer conference twice. So I have a lot of real world experiance with VMware.
However, with the recent Broadcom acquisition of VMware and more specifically their decision to end the free version of ESXi, I don’t think I can continue to support the product like I have in the past, especially when it comes to home labs. One thing that really got me to where I am today was being able to build a home lab and experiment in a non production environment. The ability to break things and figure out how to fix them is what I believe got VMware to the top in the first place. Their community of forums and knowledge spread is so vast that users could really support themselve without actually having to call support every time there is an issue. Another reason for Broadcom to kill the project, get those support dollars back.
That being said, I don’t hate VMware or the business decisions that Broadcom is making to get their money back on the investment. They have to report to their investors and aquiring a great product/company like VMware was a no brainer. Just sucks that it’s at the expense of small companies/home labs to not be able to use the product anymore.
Ok, rant over. This leads me to the reason for this article. In search of a different hypervisor to replace ESXi in my home lab, I looked at a few but nothing stood out more than Proxmox. I really like that it’s built on the customization qualities of Linux. Not to mention, all features are available for free. They do have a support program which gets you access to their more stable update repository and support so if you would like to support the project in that way, its great that it is an option.
In this article, I’ll go over the hardware that I am installing on. Then give you a step by step guide on how to install Proxmox on your system. Then finish with some configuration of the update system and running the upgrade.
Prerequisites
For hardware, I was blessed with two Dell R630’s that my work life cycled at the end of last year to add to my home lab. I hadn’t installed ESX on them yet or deployed any workloads to them yet so they were the perfect platform to move my lab over.
You by no means need full on enterprise level hardware to do this install. Here is a link to the Proxmox System Requirements. Some things of note, if you are just starting on your virtualization/home lab journey:
- Make sure your CPU has Virtualization (Intel VT or AMD-V) support and enabled.
- You will want as much RAM as you can pack into your system. 2GB is the bare minimum but I wouldn’t go with anything less than 32GB. Slight brag but my new to me R630’s have 768GB of RAM each! Will definitly handle any workloads I can throw at it.
- I recommend for storage you go with a minimum of 2 SSD drives. Don’t have to be crazy big unless you want to store your Virtual Machines (VM’s) on them. The Proxmox installation has a software RAID built into it so don’t worry too much about the redundancy, I will cover that setup also.
One last thing, if you plan on truncating VLAN’s to your server (making the hypervisor VLAN aware and passing multiple networks to the interface ports so you can run different servers on different isolated networks), you will want to hold off on doing that at first. I will go over how to set this up in a future article but for now just pass whatever network you want to use as your Native VLAN for management as an access port.
Installation
First thing you need to do is head over to the Proxmox Downloads page and download the current ISO file. At the time of writing this article, version 8.1-2 is out. Use your favorite USB flashing tool to make the ISO bootable, Rufus works well for this. Insert the drive into your system and boot off it. Becasue there is so many different BIOS options out there, I won’t be documenting this. You should be able to Google how to boot off USB for your motherboard manufacture and it will tell you how.
Once you boot off the drive, you should see a screen like this:

Leave it on the default “Install Proxmox VE (Graphical)” and press “Enter”. This will give you the “wizard” install experience.
The system should then run through loading the installer into RAM, this can take a couple minutes to finish. After it’s loaded, you should see the “End User License Agreement (EULA)” screen:
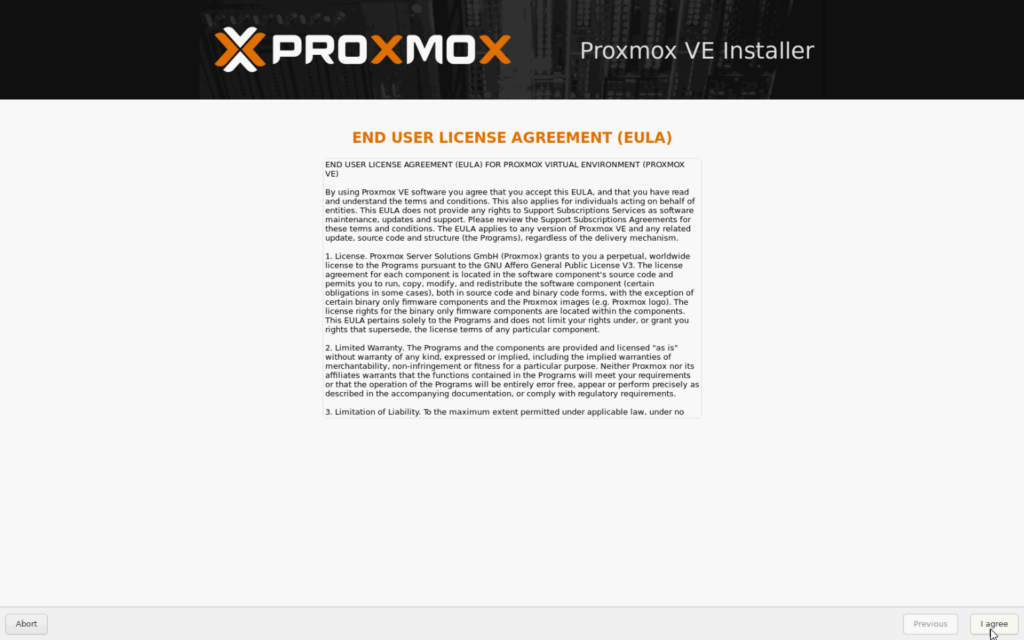
Read through the EULA, like every good IT person always does and click “I agree” in the bottom right corner.
The next screen you should see is the “Target Harddisk” screen:
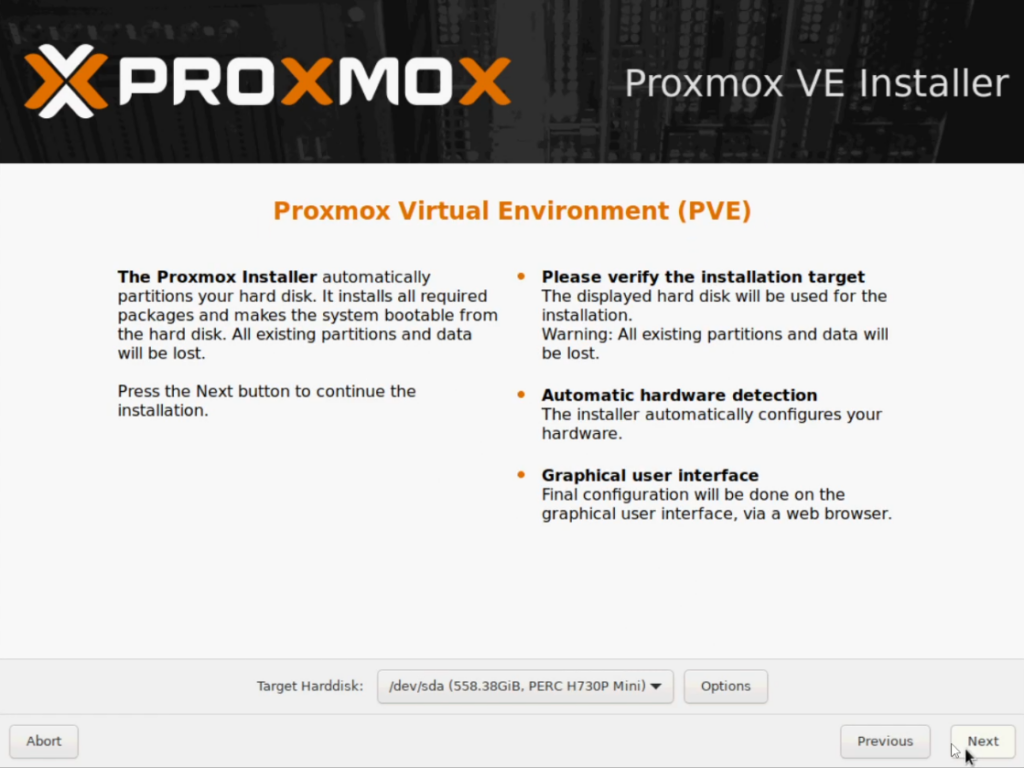
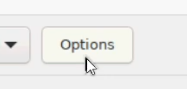
The installer should find any harddisks you have installed so you can select them. In my case, I am using a hardware RAID controller so I setup the redundancy of my drives before starting the install. If you plan to use the built in software RAID functionality, here is how you do that:
Click the “Options” button.
Click the “Filesystem” dropdown menu.
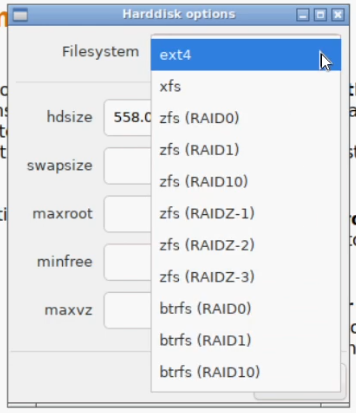
If you are using only 2 drives for the OS, I suggest doing “zfs (RAID1)”. This will mirror the OS volume between both drives so if one fails, your system will still work fine.
If you are only using a single drive for the OS, it’s definitly not suggested since you don’t want to lose everything but in some cases you don’t have another option, or you are using a hardware RAID controller like I am…you can leave it on the default “ext4” for the file system.
When you are done with your configuration, click “Next” in the bottom right corner for the main screen.
The next screen you should see is the “Location and Time Zone selection” screen:
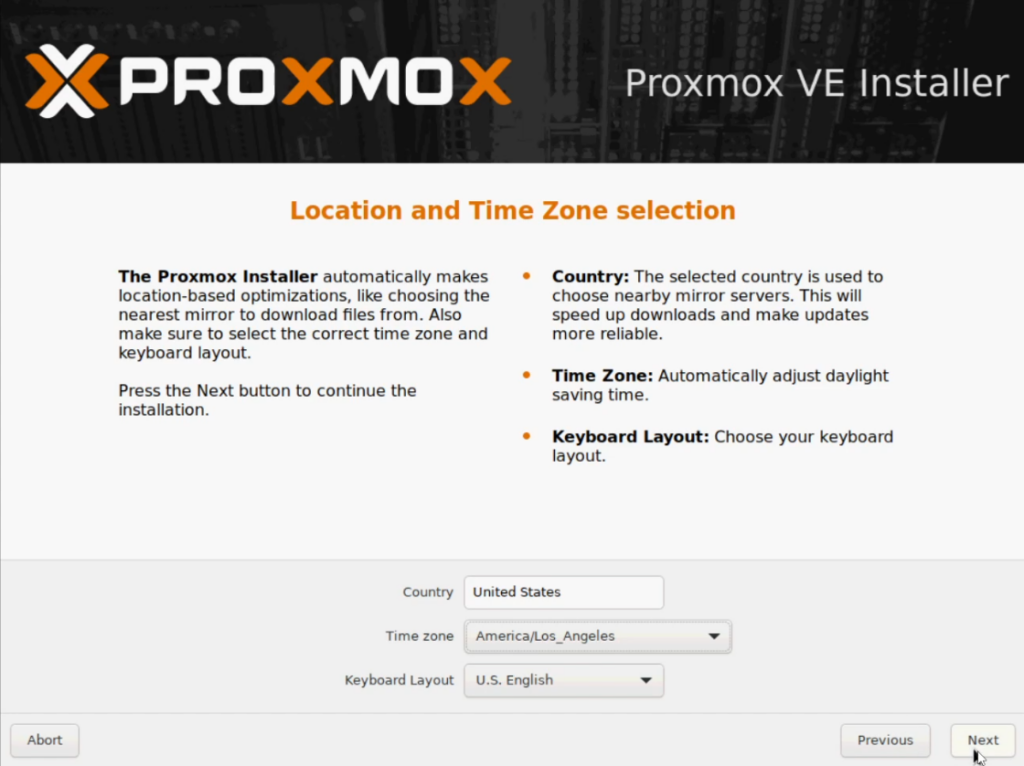
Enter in your “Country” (if you just start typing, it will autofill a list). Select your preferred “Time zone” and change the Keyboard Layout if you like.
When you are done with your configuration, click “Next” in the bottom right corner for the main screen.
The next screen you should see is the “Administration Password and Email Address” screen:
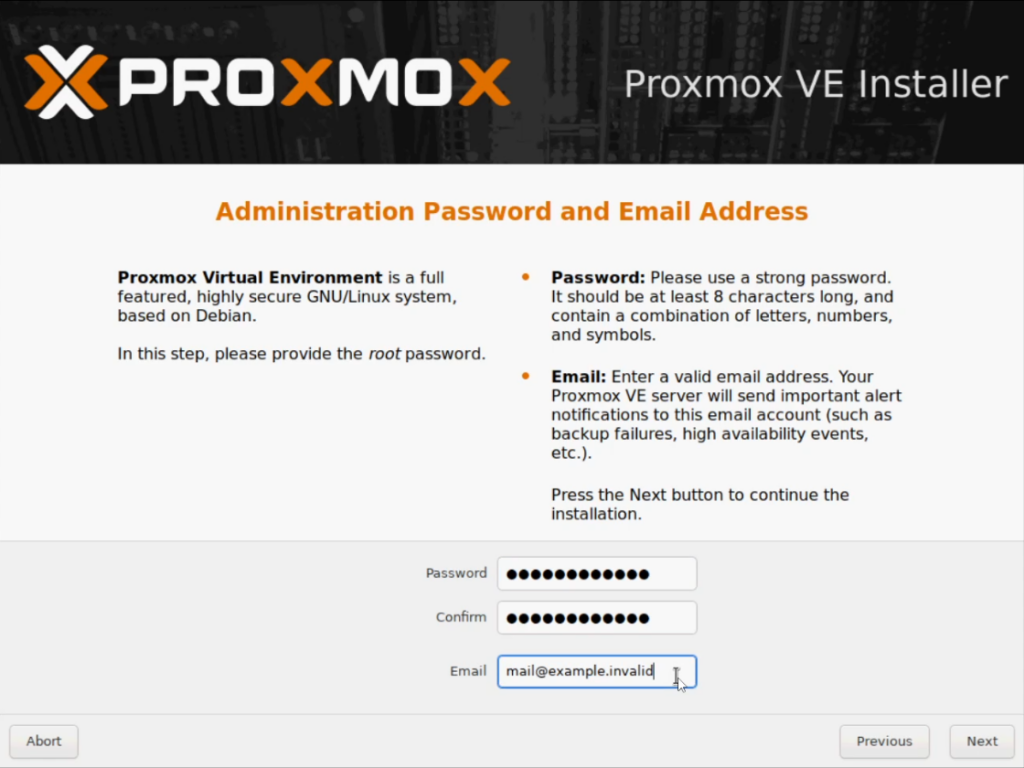
Enter in a valid password. It needs to be a least 8 characters long and contain a combination of letters, numbers, and symbols. You will also need to enter in a valid email address. This is used to send important alert emails and notifications so make sure it’s a valid, accessible email address.
When you are done with your configuration, click “Next” in the bottom right corner for the main screen.
The next screen you should see is the “Management Network Configuration” screen:
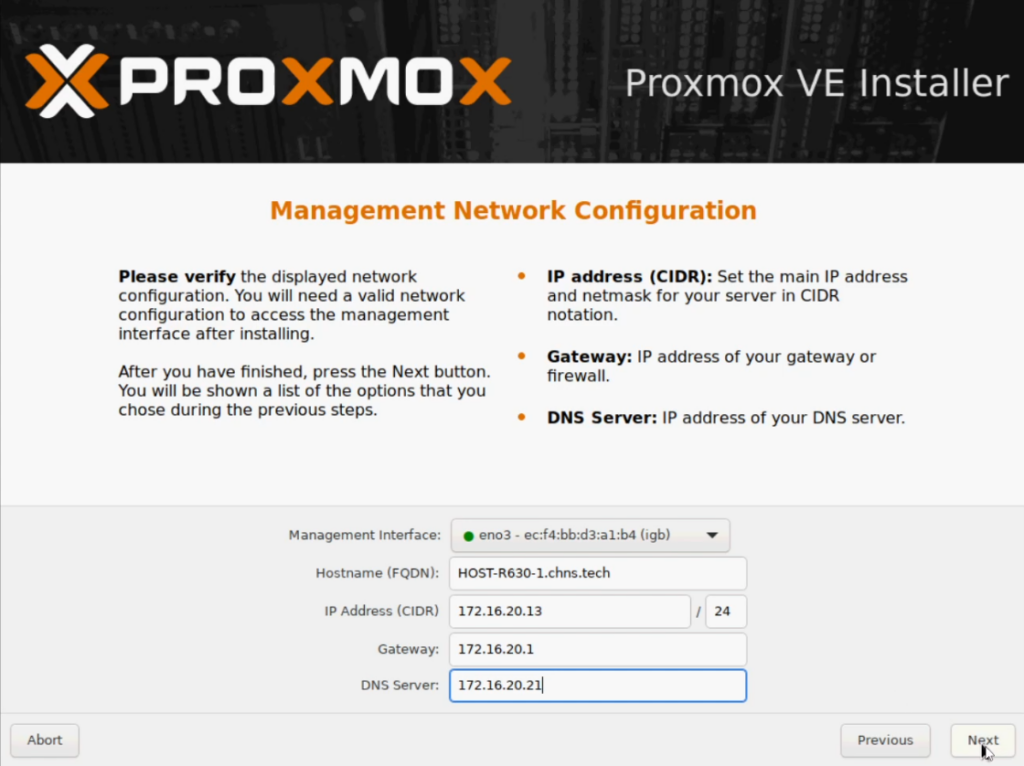
For that “Management Interface”, click on the drop down menu and select the network interface you want to access the web management dashboard from.
Enter a valid Fully Qualified Domain Name (FQDN) for the “Hostname” of the hypervisor. This does need to be a full domain name so if you don’t have one, you should be able to append “.local” or something to the name you want to use.
Enter in the “IP Address” you want to use for your server. This address will obviously need to be on the same network you setup for your Native VLAN/Network. Enter in the “Subnet mask” on the other side of the “/”. If you don’t know what this is for your network, it can be found in your network IP address/DHCP configurations.
Enter in the IP address for your “Gateway”. This can also be found in the network configurations. Almost always the first address in the subnet.
Enter in your networks “DNS Server” address for name resolution. Also can be found in the network configurations.
When you are done with your configuration, click “Next” in the bottom right corner for the main screen.
The next screen you should see is the “Summary” screen:
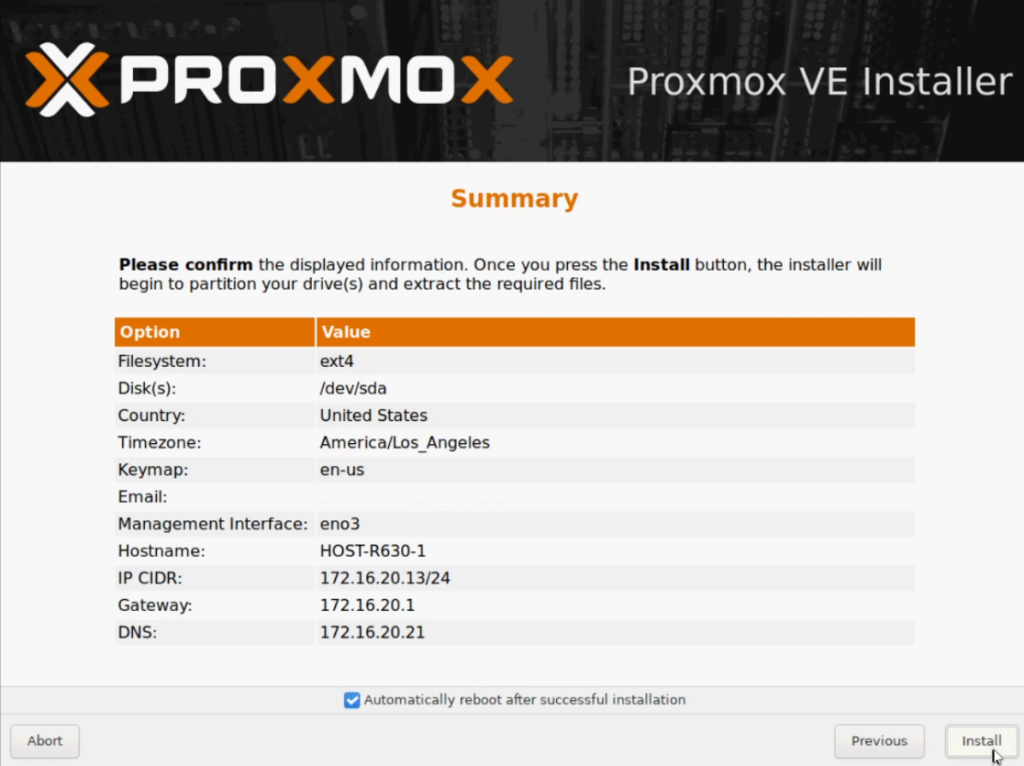
Review the information to make sure everything is correct.
You can uncheck the box to “Automatically reboot after successful installation” however the reboot needs to happen anyways so might as well leave it.
Click “Install” in the bottom right corner to start the install process.
Once the installation is finished, you should see this “Installation Successful!” screen:
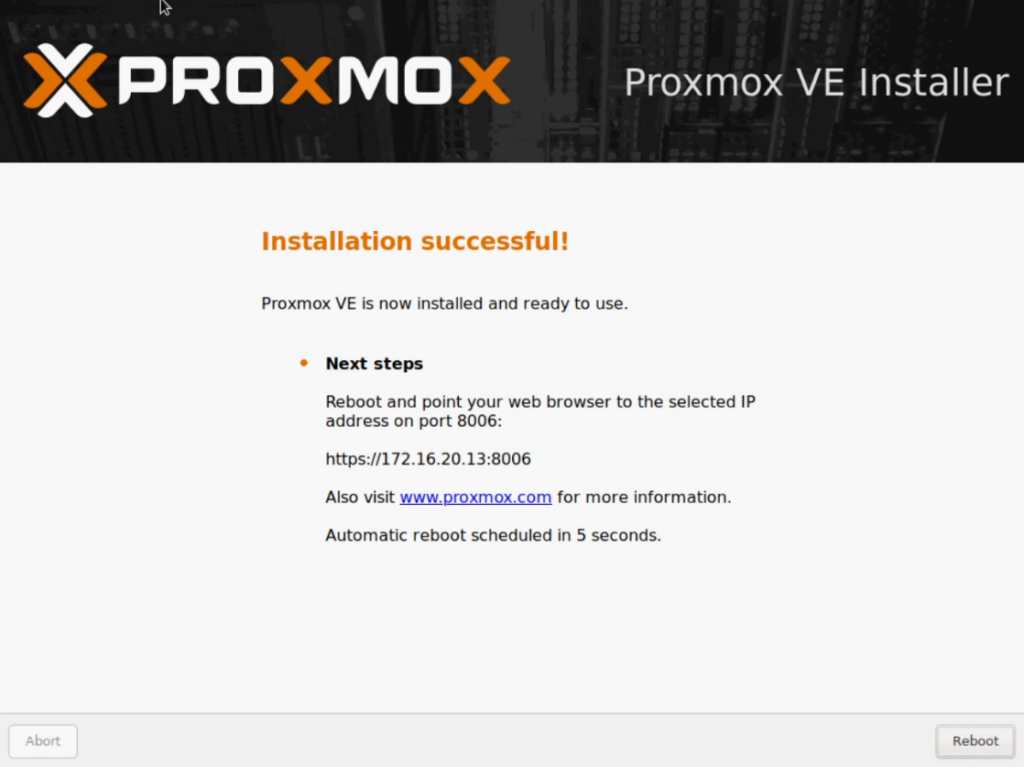
There is a button for you to reboot in the bottom right corner but if you left the check box selected to automatically reboot, it will do so in 5 seconds.
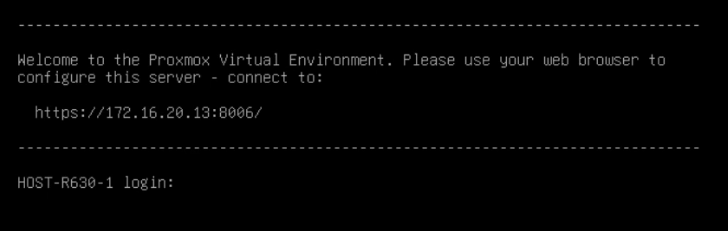
Your server will now perform a full reboot. Remove the USB drive/install media that you used and wait for it to give you this login prompt:
That’s it for the installation, you are now running a linux hypervisor.
Next step, we will be look at logging into the web interface and performing a system update.
Web Management Interface
Now lets dive into logging into your server and configuring it.
Take a note of the login prompt screen, it lets you know the full URL. It will be “https://” followed by the IP address you entered for the server during the installation. Ending with “:8006”, this is the default port that all Proxmox installs use for their web interface.

Going to that URL in your browser of choice, you will get the “Your connection is not private” screen:
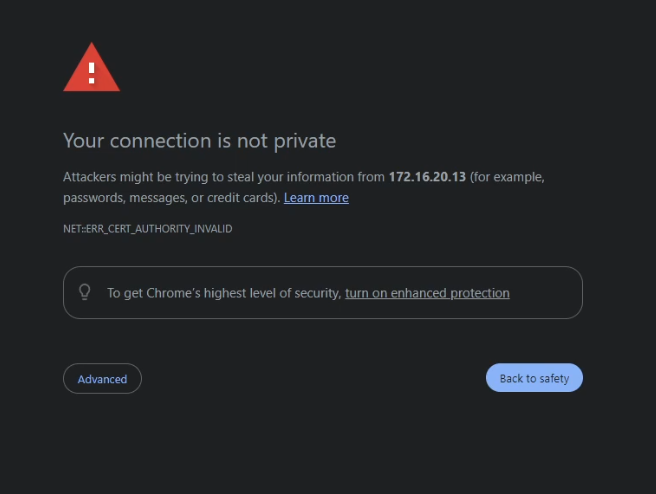
Since this is an internal server only (I don’t recommend making the web interface externally accessible for people to just try to login), this screen is not a big deal. We know it’s secure because you are the one who built it and it’s on an internal network. Simply click the “Advanced” button and then click “Proceed to {url of the server} (unsafe)”.
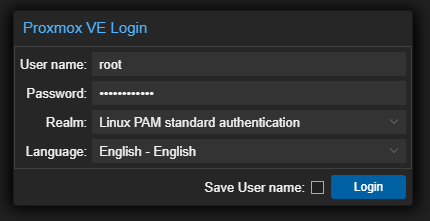
You will then be taken to the login prompt for the web interface. Enter “root” for the username and enter the same password you set during the install process. Then click “Login”.
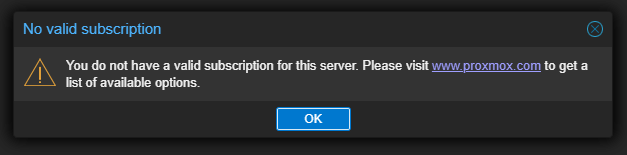
The next popup you will see is the “No valid subscription” notification. Since this is the first time you logged in, that’s not surprising. Don’t let this freak you out, you don’t need a subscription to use the system, but they highly encourage it. For now, just click “Ok”.
That’s it, you are now logged into your hypervisor!
First Update
First thing we will want to do after logging into the web interface is make sure the server is up to date. Even if you just downloaded the ISO file, chances are good there are some updates available.
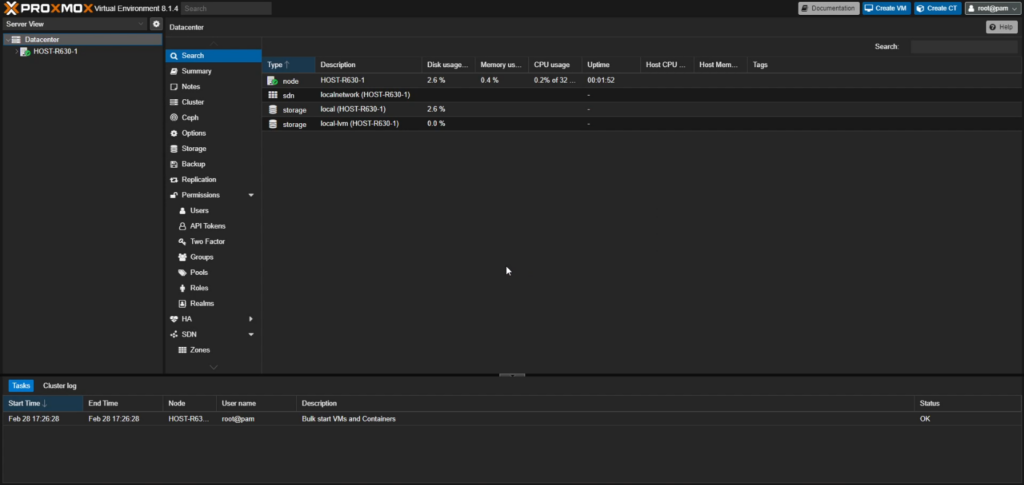
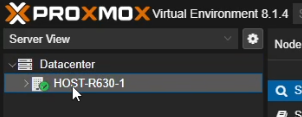
Start by clicking on your servers Hostname under the “Datacenter” in the left panel:
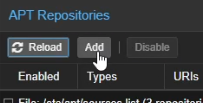
Then in the main panel, click on “Repositories”. Its located right below “Updates”. We will need to make some changes before searching for updates.
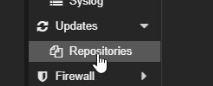
Click the two (2) repositories that have “enterprise” in the URL. Then go to the top and click “Disable”.

Now you want to click the “Add” button, located between “Reload” and “Disable” at the top.
You will get the same “No valid subscription” notification box if you haven’t added a valid subscription key to the server yet. If you have added the key, you don’t need to do these steps, just skip forward to scanning.
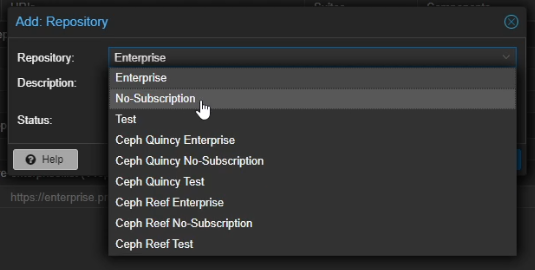
Click the drop down menu where the default is “Enterprise”. Then select the “No-Subscription” repository.
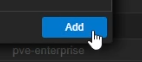
Then just click the “Add” button in the bottom right corner of the Repository screen.
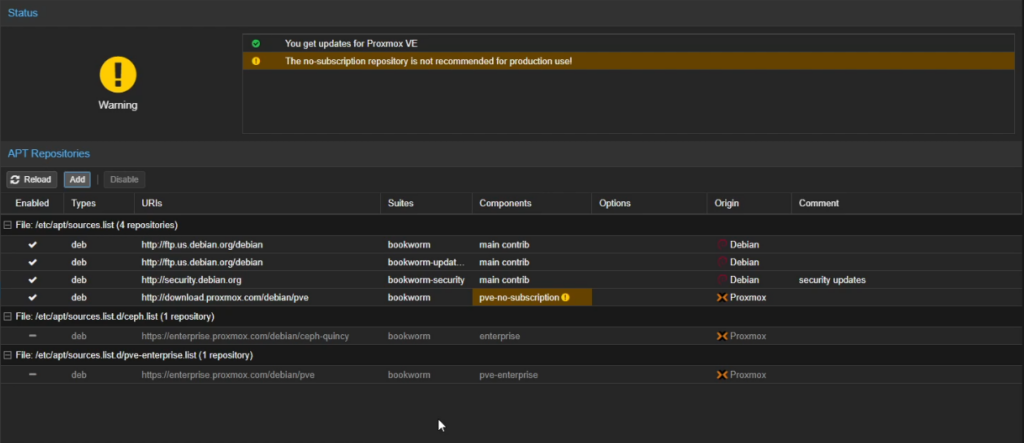
Your “Repositories” screen should now look a little something like this:
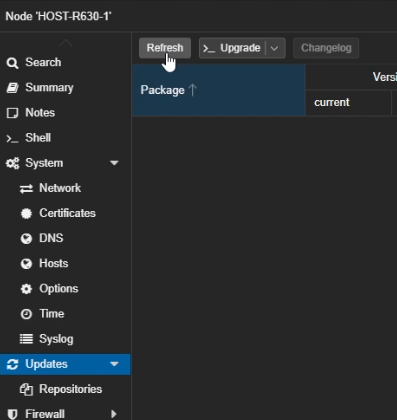
Now you want to go to the “Updates” page.
The list should be empty still. Simply go to the top and click the “Refresh” button.
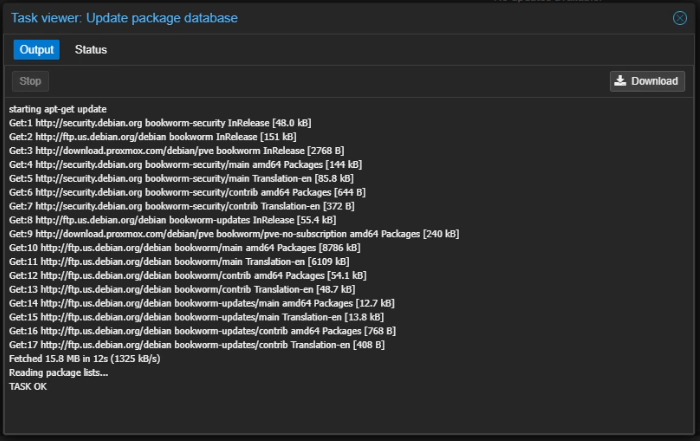
Once again, you will get the “No valid subscription” notification. Just click “Ok”.
Your system should then reach out and update the package database. You will know its finished when it says “TASK OK” for the last line. Click the blue X in the top right corner to close the window.
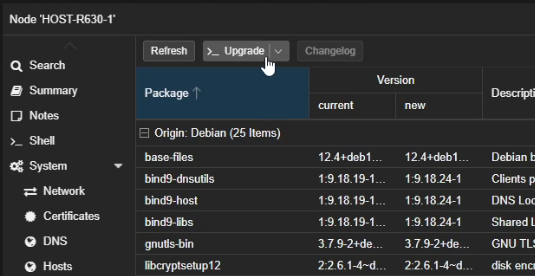
Now you should see a full list of updates ready to be installed. Go to the top and click “Upgrade” to start the process.
A console window should pop up with the start command and a prompt asking “Do you want to continue? (Y/n)” Since the “Y” is capital, this is the default option so just hit “Enter” on your keyboard or enter “Y” and then press it.
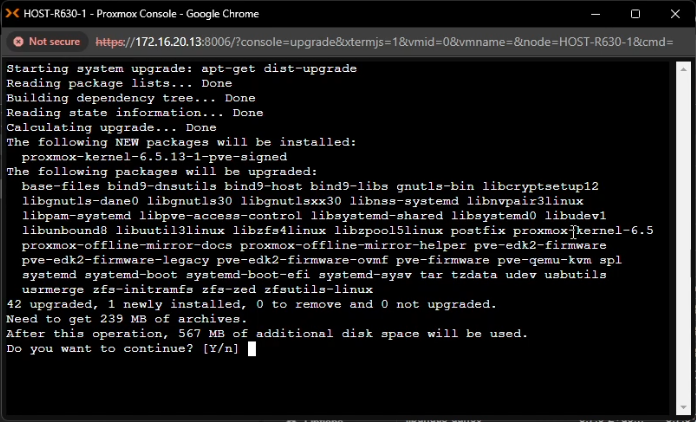
The system will then run through all avalible updates and install them.
You will know that it is finished when you get the root prompt and it should say “Your System is up-to-date”. You will also note that it say “Please consider rebooting this node to activate the new kernel.”. You will want to do this before deploying any workloads onto the server.
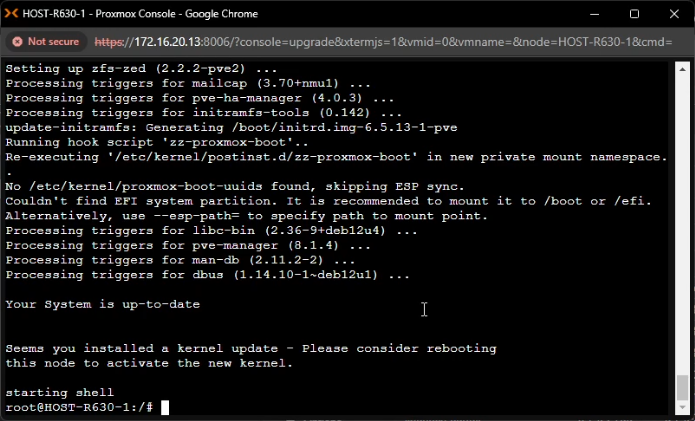
Click the close “X” in the top right corner of the window to close out the console.
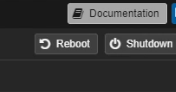
To Reboot the system, simply click the “Reboot” button in the top right corner.
Once the system comes back online, you should be all up-to-date. You will want to check back in on the Updates page from time to time to make sure you have the newest packages installed.
That’s all for this initial look at Proxmox. Over the next month, I plan on doing some deep dives into the software and figuring out how everything works and how it compares to ESXi. I plan on putting out articles on creation of your first VM and some other general management that I am going to do on my servers.
If this was helpful, leave a comment and let me know. I’d love any feedback or suggestions on things to do to my system.