This is a follow up article to the one I published last Sunday, LinkStack - Social Media Link Page. If you haven’t checked it out yet, I recommend setting up that container to simply manage all your social media links and contact information. You don’t need the container deployed to utilize this ID card, it can really be pointed to any publicly accessible URL.
The idea for this article was an original one I had while deploying the LinkStack container for my own information. I really wish I would have come up with it back when I was going out and being social in my younger years but here we are. Hopefully it will add to your process and make communication easier.
The Question
I noticed that after you enter your late 20’s - early 30’s, the times you get asked to see your ID is drastically low. Really its just when you get pulled over by the police, buy controlled substances or getting into an age restricted business like a bar. In all 3 cases, you usually have to take the ID card out of your wallet and give it to the person anyways.
My question was “Then why do we have a special ID card window in every wallet for the card? Could that plastic window be used for something more useful?”. The answer I came up with was very much yes and in more than one way.
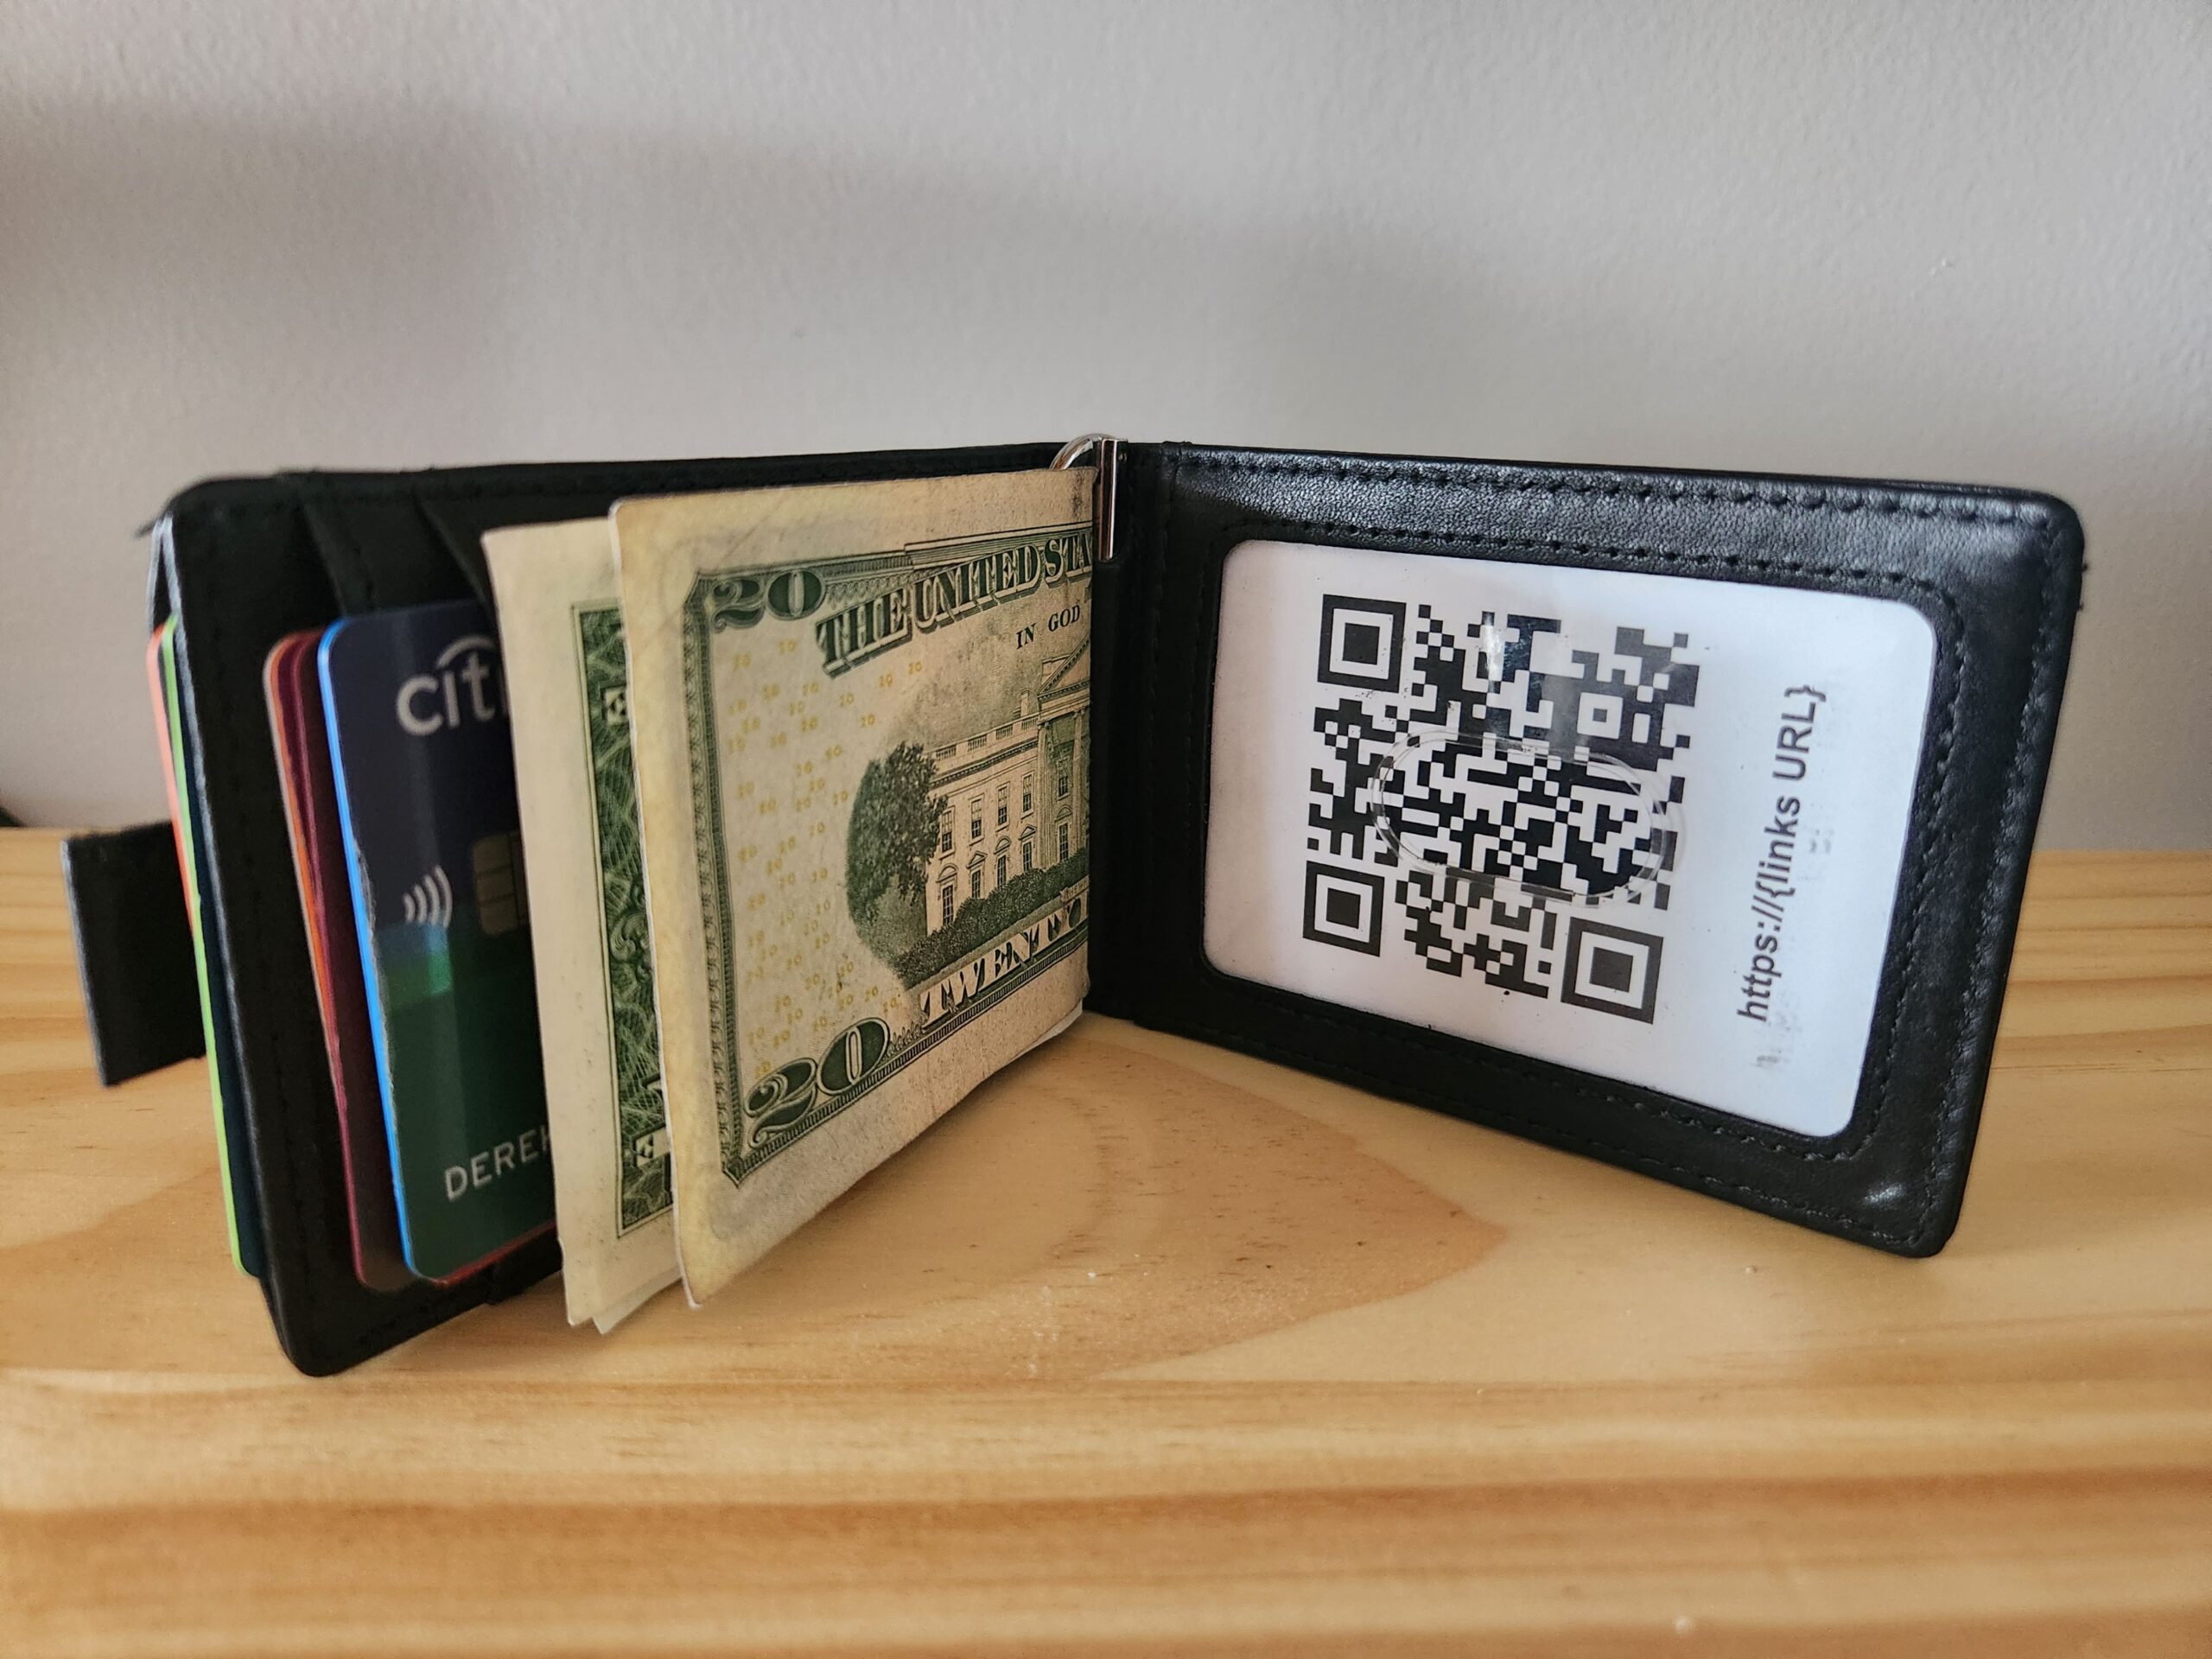
The ID Card
The result of my idea actually fixes 3 different issues:
-
QR Code and URL directing people to all of your social media profiles, websites and content. This make the process of exchanging contact information very easy. Instead of trying to find something to write on or using their phone to add yourself on Instagram, simply flip out your wallet and the person can use their phone to get a link to everything.
-
Emergency Contact list that’s not on your phone which could die at the worst time. This is especially important nowadays when no one remembers other people’s phone numbers. If you ever get into a situation with a dead or broken phone and you need to use a strangers phone to reach out to someone, this could save you.
-
Secret area for information or stashed cash. It’s always a good idea to bring some bigger bills with you just incase of emergency. I once heard an interview with a retired Spy that said something like “We always carry $100 bills on us at all times because there are not many situations where $100 wouldn’t get you out of or into something.”. This card gives you a place to stash some money in-between both sides just incase you need it without it getting in the way of your day to day cash.
How do you make it?
For starts, understand there is no one size fits all template to this card. It took me a lot of test prints to get the card to fit into my wallet and different wallets could have different sizes. There is a general uniformity to state issued ID cards so hopefully my example won’t be too far off.
Here is a link to a Google Docs document that has the general layout you will want. I recommend you make a copy and save it under your own account so you can update the information as things change and don’t have to start over.
Here is the process I recommend you use to make your own card:
-
The area for an ID card is 2 inches by 3 inches. I made my margins half an inch wider on both sides so the card takes up the whole viewing area and doesn’t move around as much.
-
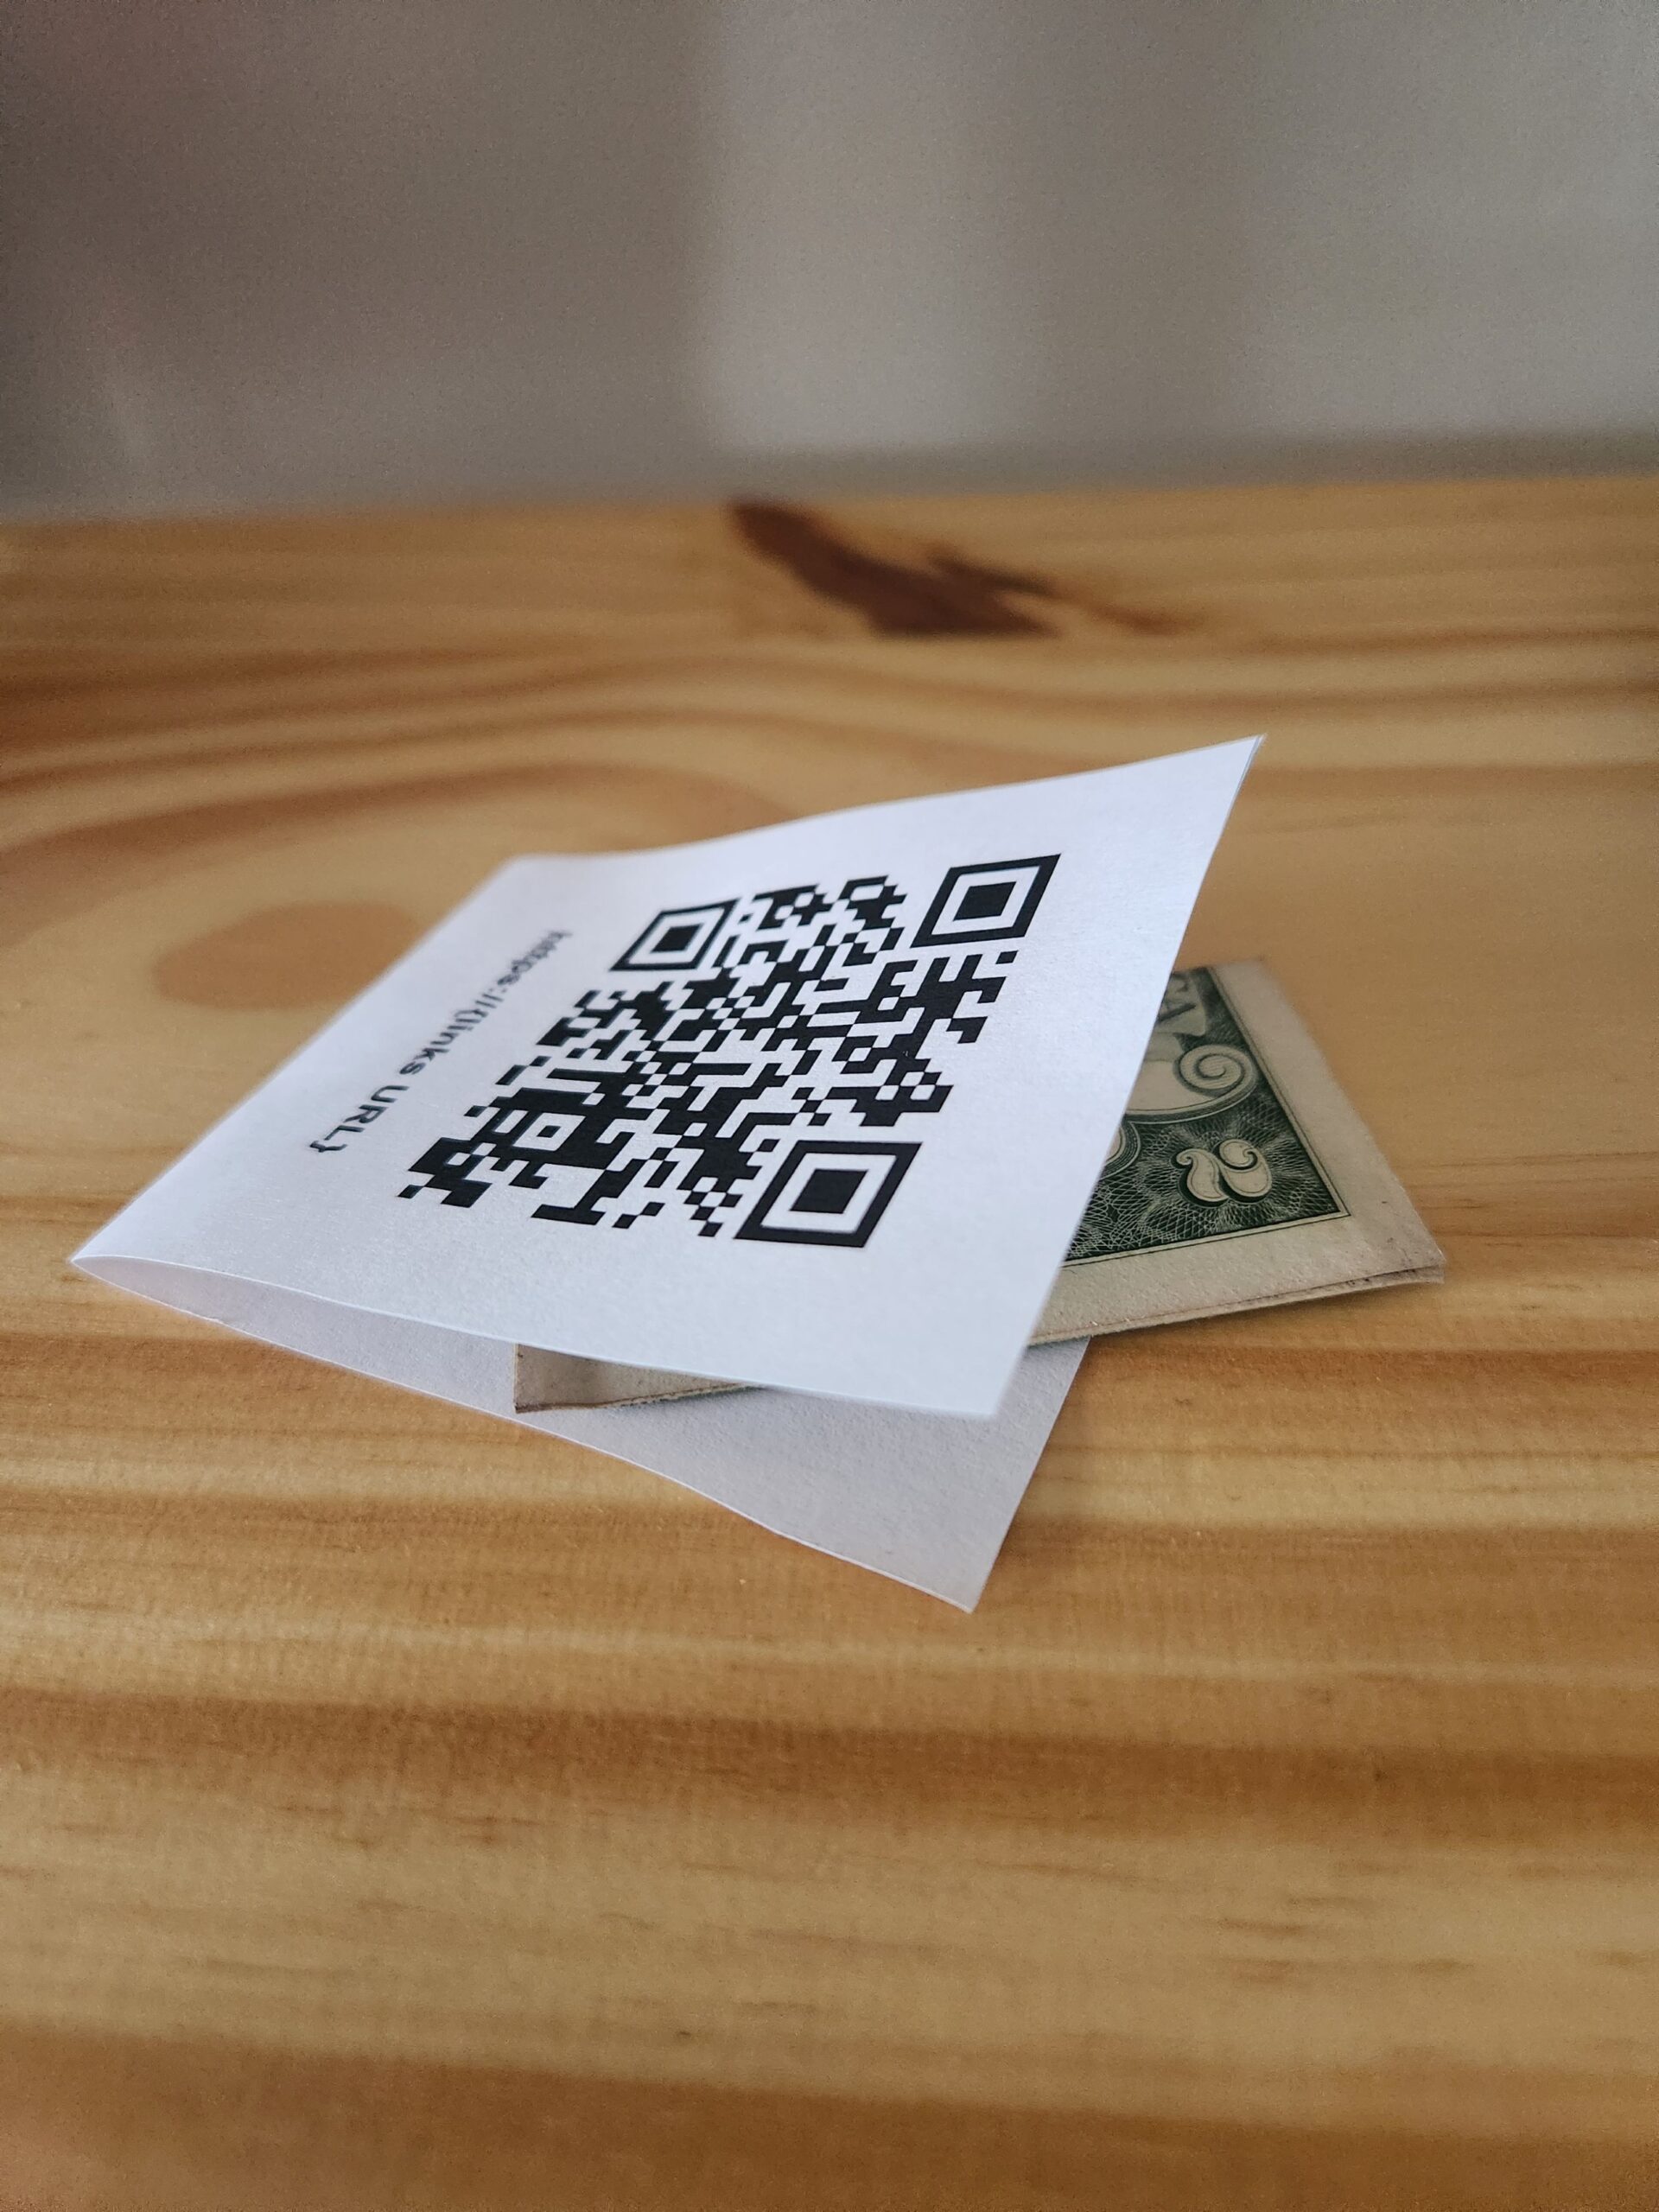
Replace the QR code with one you generate pointing at your own information or site. Here is a link to a QR Code Generator I host if you don’t already have one.
-
I like to add the URL for the site the QR Code is pointed at just so I remember the full address in case you need to tell someone where to go.
-
There is a horizontal line that splits the QR code from the Emergency Contacts. If your spacing is correct, this line should line up are about 3.25 inches from the top line.
-
Update your Emergency Contacts list with your contacts. For mine, I was able to fit 3 different people’s information. You can add as much as you want and play with the font size if you need to add more.
-
After your contacts have been added, the bottom line should be right at 6.5 inches from the top line.
-
Print a test page and hold your wallet up to the lines. Use your judgement to see if everything will fit or make adjustments.
-
Use a straight edge to connect the 3 lines on either side, this will give you two boxes to cut out. Don’t cut the center line, that will be where you fold the card onto itself.
-
I highly recommend covering any printed ink with packing tape before slidding it into the windowed slot. I had version 1 in my wallet for about 2 weeks and when I tried to take it out the QR code stuck to the window plastic, ripped the whole paper and made it very difficult to clean off.
-
Slide it into the slot and make sure everything lines up well and make sure the QR code is able to be scanned.