As I said in my Install Ubuntu Server 22.04 LTS walk through, Ubuntu Server is my Linux server platform of choice. I know not everyone agrees with that but like there are so many distributions of Linux, there are just as many opinions. I like Ubuntu because my first steps into Linux was on Ubuntu Desktop so this was an easy, natural step.
As I was going through my home lab looking at replacing some servers that were getting older and cluttered, I usually go with the LTS (Long Term Support) version of the OS. However, after thinking about it, I never really keep my servers around for more than a year anyways because the majority of what I run is all Docker containers. I decided why not just go with the newest release now knowing I’ll replace the server before it goes EOL (end of life) in a year.
Now this doesn’t work for everything, any servers where I do bare metal installs or install software that is more complex to move to a new system, I stick to the LTS just to be safe. I recommend you do the same since it can save you from having to be forced to get a new server spun up.
Downloading ISO
Here is the direct link to the Download Ubuntu Server website.
To download the ISO file, you will need to scroll down to the “Alternative releases” section and click “Download Ubuntu Server 23.10”

Once downloaded, you will want to mount it to your virtual server’s virtual CD drive or uses a tool like Rufus to make a bootable USB drive to use on physical servers.
Then boot the server onto the install media.
Installing OS
The first screen you should see is the GNU GRUB boot manager. Press “Enter” to select “Try or Install Ubuntu Server” or wait 30 seconds for it to load automatically.
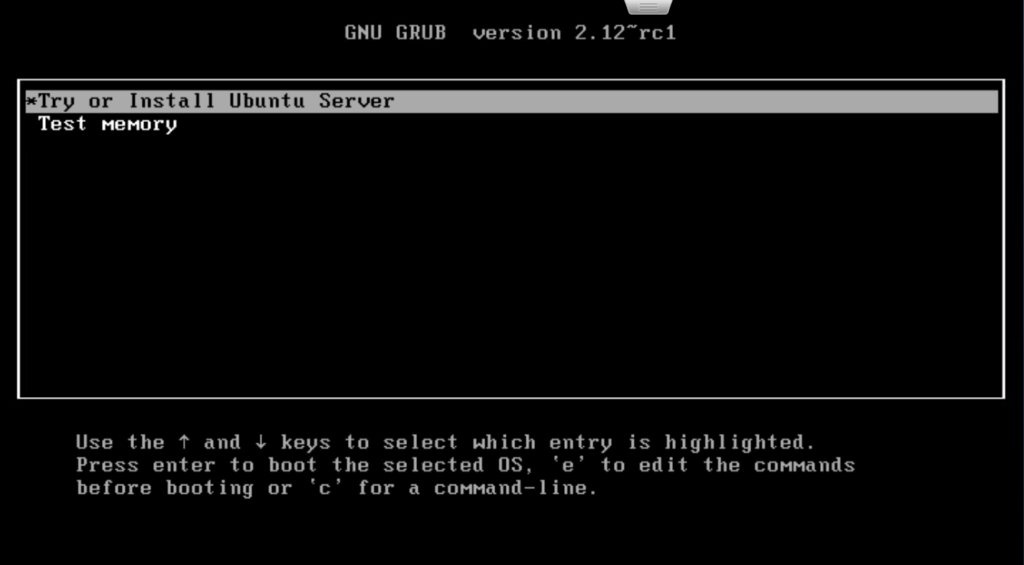
Wait for the server to load all the files into memory and load the install interface.
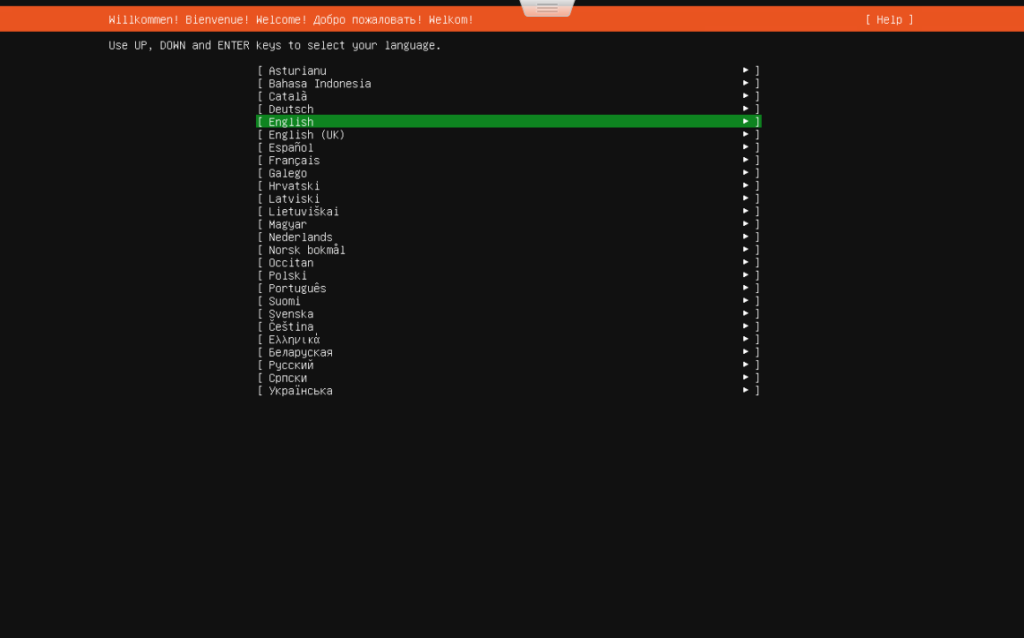
On the “Welcome” screen, select your language if it is something other than English and press “Enter” to proceed.
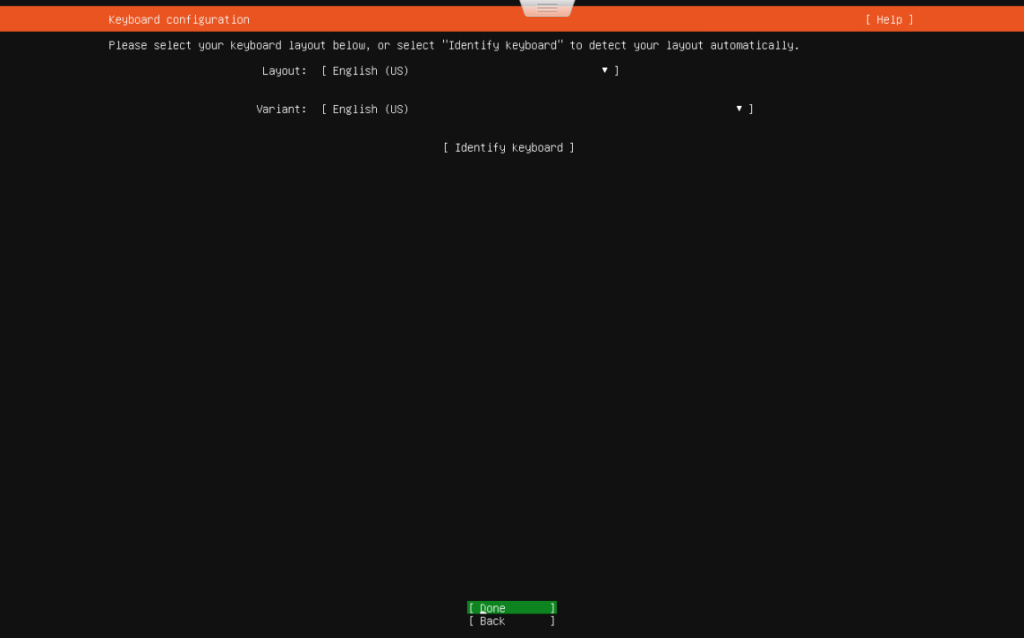
On the “Keyboard configuration” screen, select your keyboard layout if its something other than standard “English (US)”. Arrow down to “Done” and press “Enter” to proceed.
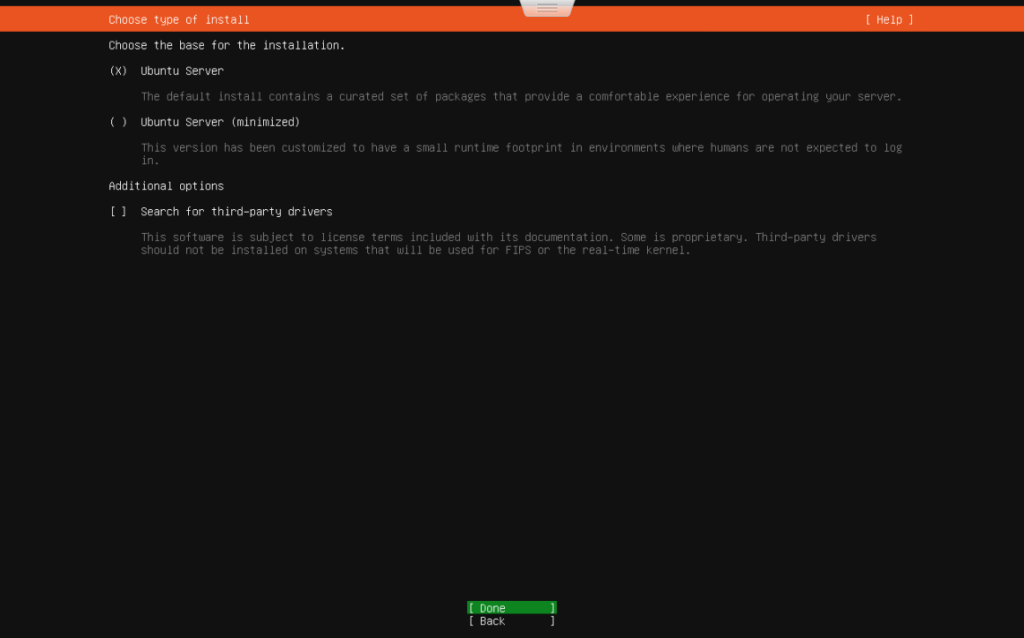
On the “Choose type of install” screen, select either the full install of the OS or you can select the “minimized” version if you know what you are doing and are using this server for a specific task. I recommend just doing the full install. Arrow down to “Done” and press “Enter” to proceed.
New to this version is the “Additional options” section. If you are installing this on bare metal or have hardware that is mapped to the VM that could require you to load drives for it to function, you could check this box to see if it can find those drivers on its own. I don’t need to do this so I leave it unchecked.
On the “Network connections” screen, you will want to setup the network interface with the IP and DNS settings for the server. If you have DHCP setup on the network the server is on, it will pull the information by default. Since this is a server, it is usually recommended to set a static IP address so it doesn’t accedently change and you loose connection.
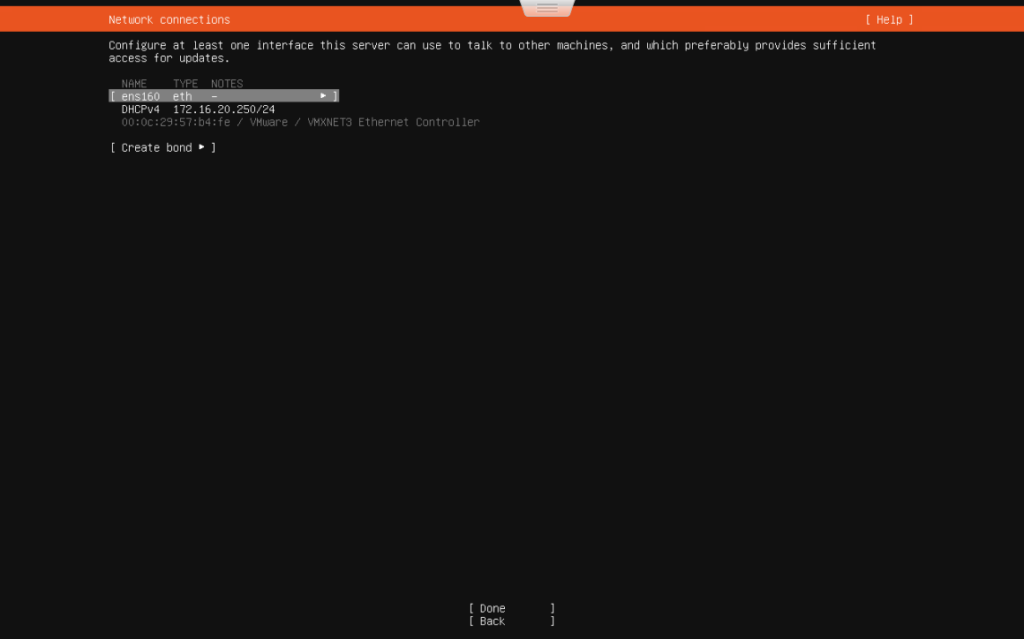
To set a static IP, select the interface you want to edit and arrow down to “Edit IPv4” and press “Enter”.

On the configuration page, enter in the following information based on your network:
- IPv4 Method – change to “Manual”.
- Subnet – Enter the subnet for the network you are connected to. This outlines the whole network so the last number will probably be zero followed by a “/” and the subnet mask for the network. If you need help figuring this out, check your router configuration or search online to find the right mask.
- Address – This will be the exact IP address of the server.
- Gateway – This is the IP address of the router interface for the network the server is connected to.
- Name servers – These will be the IP addresses of the DNS servers you want to use. You can enter more than one DNS server, just separate them with a “,”.
- Search domains – This is optional. If you don’t know what yours is or don’t have one setup, just leave it blank.
Arrow down to “Save” and press “Enter”.


The server will take you back to the “Network connections” screen where you should now see the static IP address you set under the interface name. Arrow down to “Done” and press “Enter” to proceed.
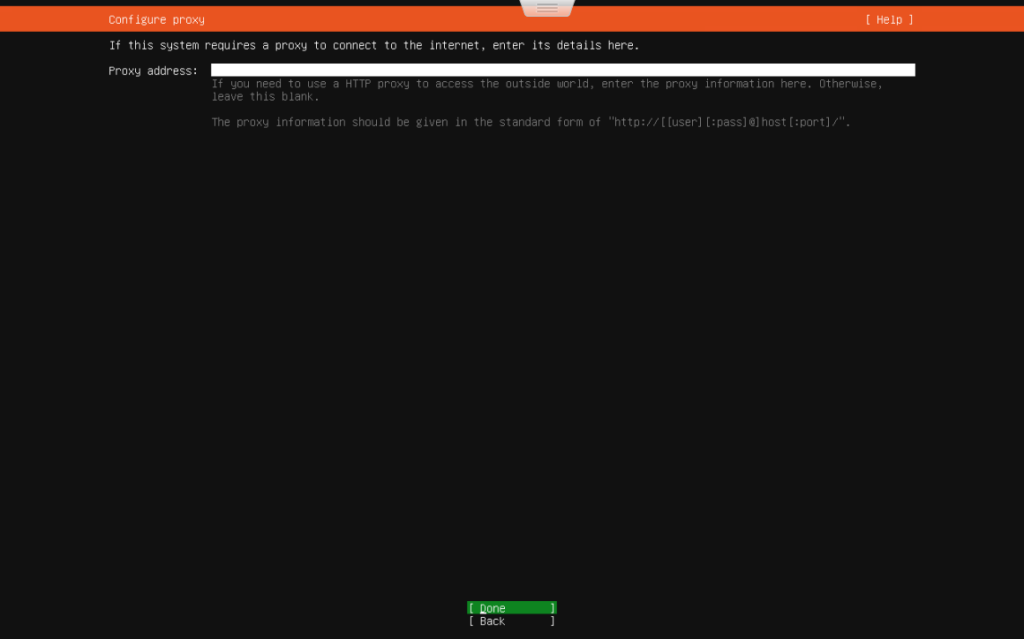
On the “Configure proxy” screen, this is another optional field. If you don’t have one, arrow down to “Done” and press “Enter” to proceed.
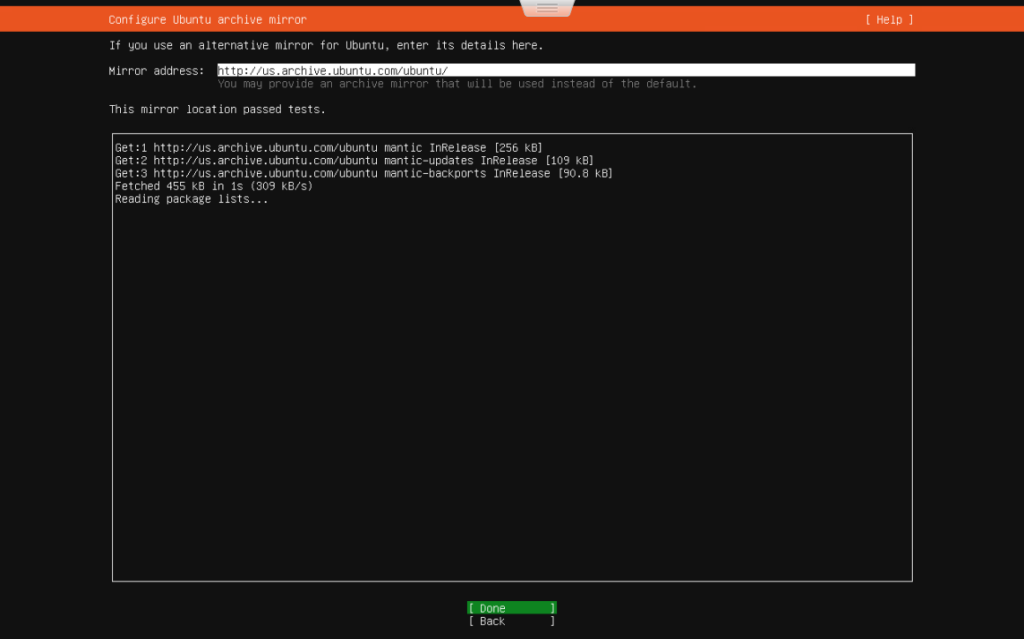
On the “Configure Ubuntu archive mirror” screen, the default URL is fine unless you want to change it to an archive you know and want to use. New to this version, it will do a test of the URL to make sure it can actually resolve the entered address. Wait for it to finish and say “This mirror location passed tests.”
Arrow down to “Done” and press “Enter” to proceed.
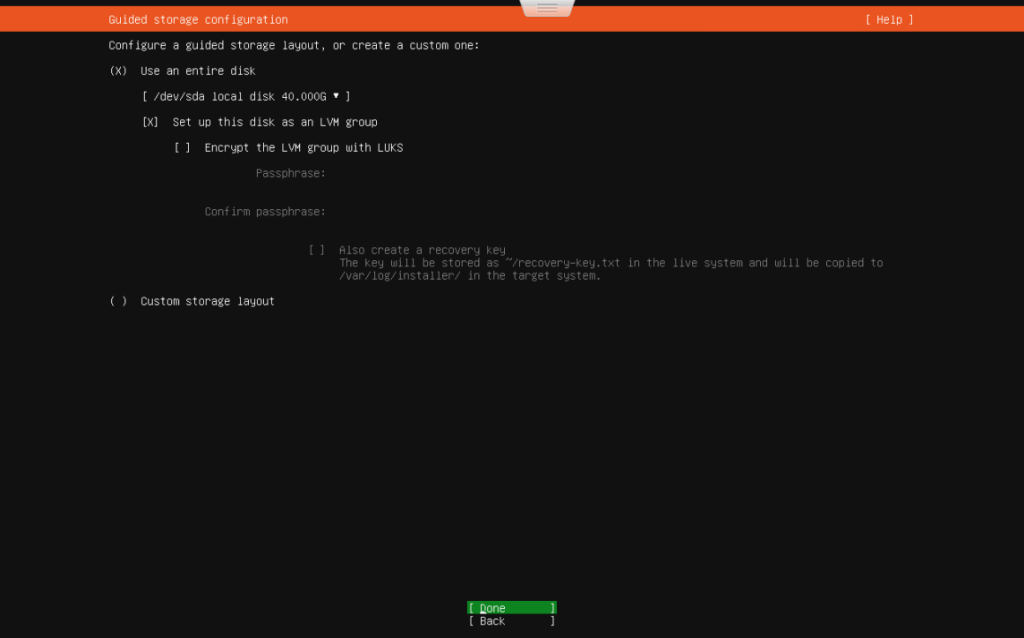
On the “Guided storage configuration” screen, I usually keep “Use an entire disk” selected and set the disk to the drive I want to boot the OS from. Here you can also choose to encrypt the drive if that is a requirement for this server.
Linux disk partitioning can be confusing if you don’t know what you are doing so I recommend just letting the installer make the partitions instead of doing a “Custom storage layout”.
Arrow down to “Done” and press “Enter” to proceed.
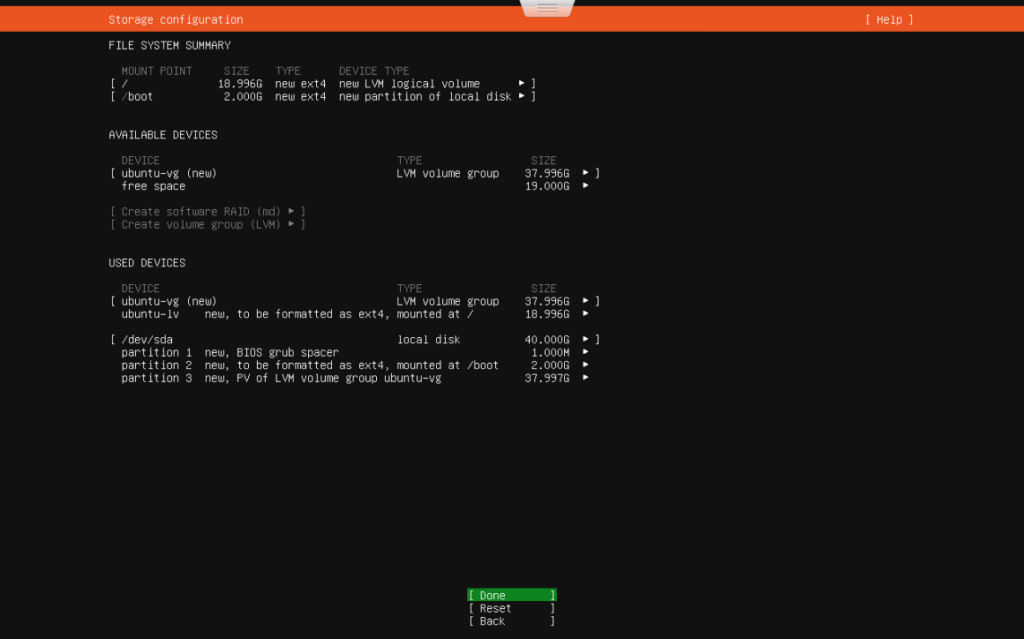
The system will now look at your drive and figure out the best partition layout. Look this screen over and make sure its using your whole drive under the “USED DEVICES” section. Arrow down to “Done” and press “Enter” to proceed.
The installer will now pop up a caution message about destroying all the existing data on the drive. Confirm you want to continue by selecting “Continue”.

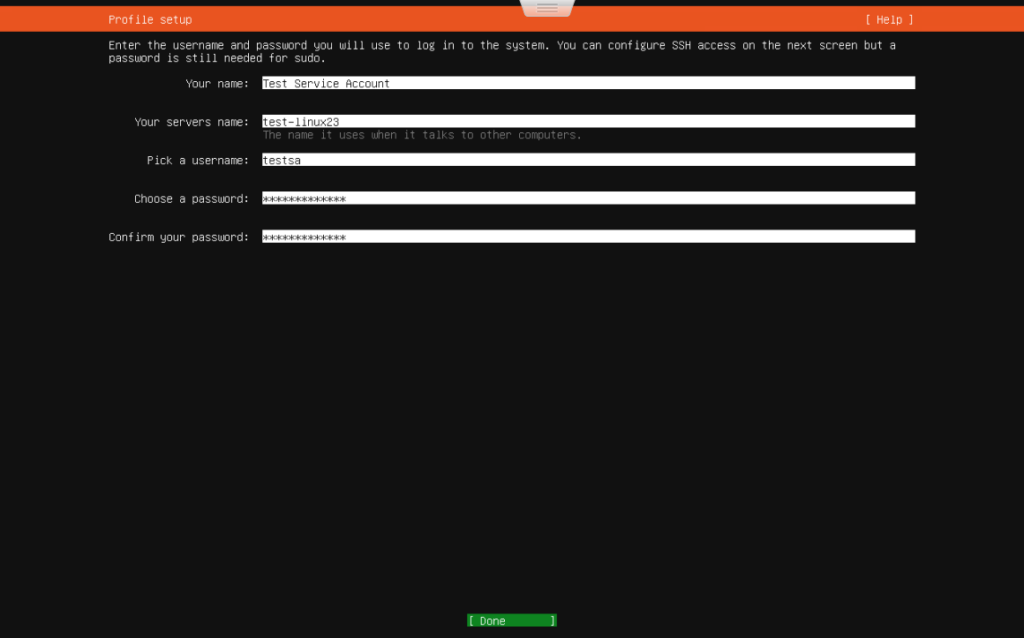
On the “Profile setup” screen, enter the server and user information for logging into the server:
- Your name – this can be anything you want to use to describe this user.
- Your server’s name – this is the name of the server that will be linked with the DNS information for communicating with the server.
- Pick a username – this is the actual username you will enter when logging into the server.
- Choose a password & Confirm your password – enter the password you want for the user account when logging in.
Arrow down to “Done” and press “Enter” to proceed.
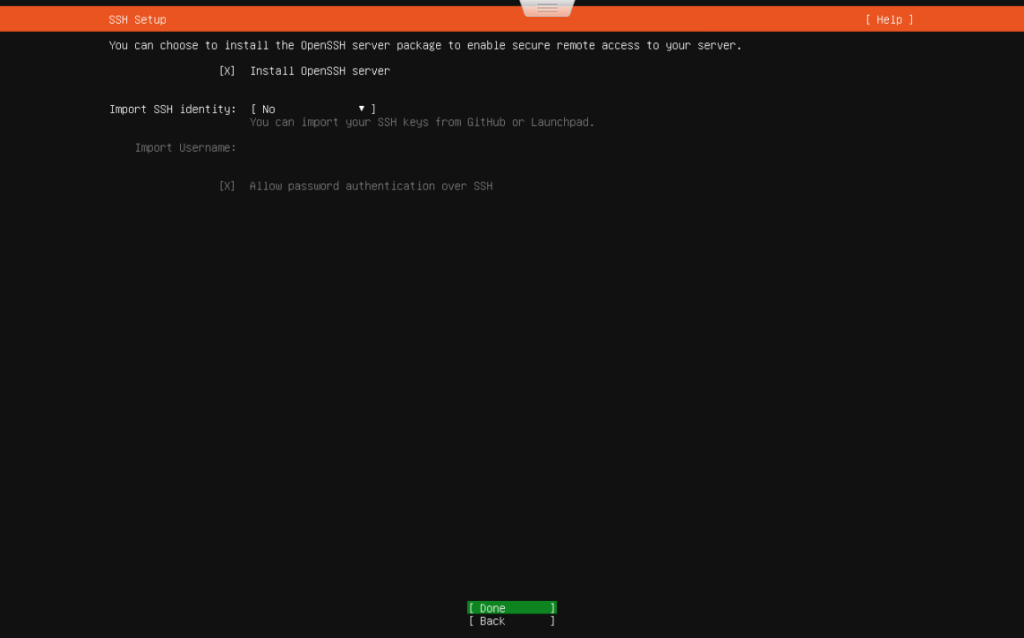
On the “SSH Setup” screen, you can choose to install SSH on this server for remote login. I always do this on new servers because its my preferred way of accessing the server. Also, its a lot easier to install it now then try do it after the fact.
Check the box next to “Install OpenSSH server” and leave the “Import SSH identity” on “No” unless you know what that is and how to load it. Arrow down to “Done” and press “Enter” to proceed.
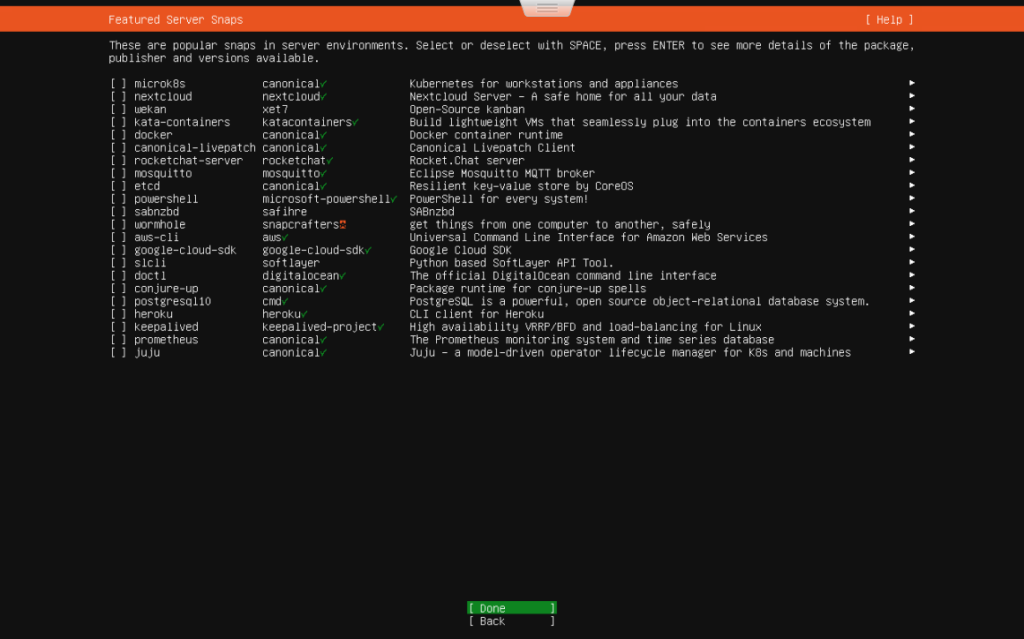
On the “Featured Server Snaps” screen, you can select applications to be installed during the OS install process. I don’t usually use this option even if I’m going to be installing an application listed because I prefer to control the install process. Arrow down to “Done” and press “Enter” to proceed.
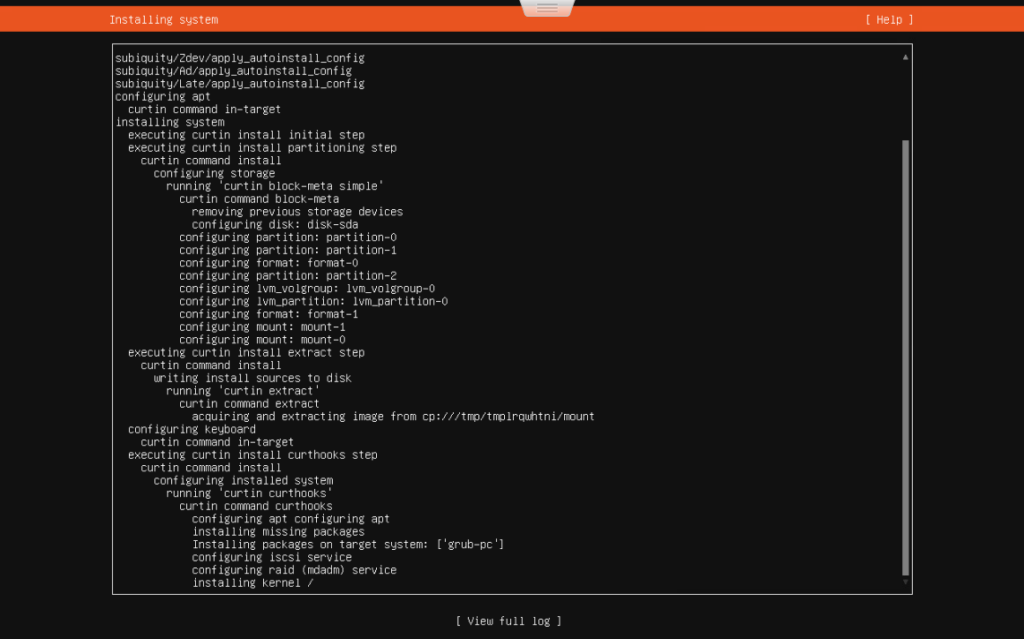
On the “Installing system” screen, you should see a log of the install process. Wait for it to finish installing. You can arrow down and hit “Enter” on “View full log” if you want a verbose log showing everything that the system is installing.
Once the system is done installing, a new option will appear at the bottom of the screen…”Reboot Now”. Arrow down to it and press “Enter” which will start the reboot process.

If you have the ISO mounted on a Virtual Machine, you may get this error when its finished all of its shutdown process. Just go into your machine settings and disconnect the ISO from the machine and then press “Enter” so the machine knows to continue and reboot.

One nice change they made with this version, after the initial boot of the system for the first time, it clears the screen of the SSH configuration and gives you a nice clean prompt to login. Enter the username and password you entered during the setup process.

Once you login, you should see a screen similar to below. Your server is now installed and ready for you to deploy applications, Docker containers, Websites or whatever you want to use it for.

You may notice that even though the server updated during installation, you will still have updates to be installed. You can use the following command to update the package index, install the available upgrades and then reboot the server.
sudo apt update && sudo apt upgrade -y && sudo reboot nowIf you get the “Restart Services” screen, just press “Enter”. Service restarts aren’t a big deal here because the command will restart the whole server.
That is all for this walk through. I have a seperate walk through that takes you through Things I do after installing Ubuntu Server.
Hopefully this helps, leave a comment if you liked it.

