I have been running Unifi products for probably over a decade now, I don’t know when I made my first purchase becasue the Ubiquiti store didn’t have history pre-2021. My first interest with Ubiquiti was their Unifi AP (1st Generation Access Point) and a Gen 1 Cloudkey. I really loved that first setup becasue it gave me access to Enterprise level features that a home user could afford. My opinion, they are still great at this cost to feature model. The WAP would eventually become obsolete and I have since upgrade 2 time and I have grown out my infrastructure to include a UAG and switches, but one thing with my network has always stayed the same…that original Gen 1 Cloudkey.
Well with the recent slow development for the Gen 1 and the device itself slowing down when trying to do common tasks, I thought it was about time I upgrade before it completely dies and I can’t manage my infrastructure. If you have followed my KB, you will know that I have a lot of interest in Docker containers so when it came time to look at buying a Gen 2 key vs. going the software route, I figured why not try it and see if I can get it transitioned. Worst case I end up ordering a new Cloudkey anyways.
I went through the process and ran into some bumps along the way but it was definitly worth it and I’m very happy with the outcome. This article will cover the entire process I had to do to transfer management, hopefully it helps you.
Server Prerequisites
I will be setting this up on Portainer utilizing Docker containers running on Ubuntu 22.04.1. Here are my setup guide for all of those pieces of software:
- Installing Ubuntu Server 22.04 LTS
- Things to do after installing Ubuntu Server
- Install and Configure Docker, Docker Compose, and Portainer on Ubuntu Server
One note here: I built out a brand new virtual server with the main network interface on the same network as my “Native Network” inside Unifi. This is the same network all your Unifi devices should be set to use for their management network. I did this to eliminate any routing issues that could stop the devices from finding the appliance.
Before we do anything with Docker, there are a few folders, files and firewall rules we need to setup.
First, I created a “config” folder (folder for the persistent files to be stored of the application contrainer) and a “database” folder (folder for the persistent files to be stored for the database container).
mkdir config
mkdir database
cd database
mkdir unifi-db
Next, we need to cd into the “unifi-db” folder, create and edit the “init-mongo.js” file using nano or whatever text editor you prefer.
cd unifi-db
nano init-mongo.js
We need to paste this line of information into the file:
db.getSiblingDB("unifi").createUser({user: "database username", pwd: "database password", roles: [{role: "dbOwner", db: "unifi"}, {role: "dbOwner", db: "unifi_stat"}]});
There are two things you will want to change for your own deployemnt:
- database username – change this to something you don’t use anywhere else and is specific to this database.
- database password – change this to something secure. For these database passwords, I usually use a password generator to create something random and long. I also remove special characters just to make sure that doesn’t cause issues.
Next is an optional step. If you followed my server setup guide, we will need to create the ufw rules to allow things to connect through the firewall. Here is a list of all the ports you will need to open:
sudo ufw allow in 8443
sudo ufw allow in 3478/udp
sudo ufw allow in 10001/udp
sudo ufw allow in 8080
sudo ufw allow in 1900/udp
sudo ufw allow in 8843
sudo ufw allow in 8880
sudo ufw allow in 6789
sudo ufw allow in 5514/udp
Old Cloudkey Prerequisites
If you would like to transfer settings and devices to the new system, like I did, you will need to download a backup from your existing Cloudkey. Before you download a backup of the settings, you will want to go into the “System” settings under “Advanced”, enable “Device SSH Authentication” and set a Username and Password. This will come in key if you have issues adopting your devices on the new system.
Now just download a new backup file and save it somewhere on your desktop. Make sure its a New backup after turning on the Device SSH Authentication and not a previous automatic backup.
Once you have your backup file saved, turn off or unplug the old Cloudkey from the network. We don’t want the old system online while the new system tries to go through the adoption process.
Deployment
Here is the Stack I used to deploy the containers on Portainer:
---
version: "2.1"
services:
  unifi-network-application:
    image: lscr.io/linuxserver/unifi-network-application:latest
    container_name: unifi-network-application
    environment:
      - PUID=1000
      - PGID=1000
      - TZ=America/Los_Angeles
      - MONGO_USER={datebase username}
      - MONGO_PASS={databese password}
      - MONGO_HOST=unifi-db
      - MONGO_PORT=27017
      - MONGO_DBNAME=unifi
      - MEM_LIMIT=1024 #optional
      - MEM_STARTUP=1024 #optional
      - MONGO_TLS= #optional
      - MONGO_AUTHSOURCE= #optional
    volumes:
      - /home/{username}/config/unifi-network-application/data:/config
    ports:
      - 8443:8443
      - 3478:3478/udp
      - 10001:10001/udp
      - 8080:8080
      - 1900:1900/udp #optional
      - 8843:8843 #optional
      - 8880:8880 #optional
      - 6789:6789 #optional
      - 5514:5514/udp #optional
    restart: always
  unifi-db:
    image: docker.io/mongo:4.4
    container_name: unifi-db
    volumes:
     - /home/{username}/database/unifi-db/data:/data/db
     - /home/{username}/database/unifi-db/init-mongo.js:/docker-entrypoint-initdb.d/init-mongo.js:ro
    restart: always
Stuff to change for your deployment:
- Version – This is be determined by the version of Docker you are running on your server. You can find this by entering the command “docker -v”. Here is a link to the Compatibility Matrix.
- Image – You can do “latest” and it will pull the current version. I prefer to look up the actual tag for the current version. This adds a little more management to updating however pinning it to a specific version adds reliability. Here is a link to the Unifi Network Application Tag page.
- PUID and PGID – These numbers are specific to the user account you are running the container under. The Root user is “0” for both. You can find this for your user by logging into your server and running the “id” command.
- TZ – Update this to be your Time Zone. Here is a link to a list of all Time Zones.
- Database username – You will want to change this to the username you set in the init-mongo.js file.
- Database password – You will want to change this to the password you set in the init-mongo.js file.
- Volumes – If you followed my instrustions for the folder creation, you will want to update the “username” to the username of the account you used to create the folders.
- Ports – I recommend not changing any of the ports in this deployment since different devices are preset to communicate on specific ports. The one you could update with likely little issue is “8443” since that is the management interface and Docker should translate it correctly.
- Restart – You will want to set this to the way you want docker to handle the restarting of the container. Here is a link to the Restart Policies to choose from. I prefer “always” so if it crashes or the server restarts, it will automatically restart the container.
Configure Unifi Network Application
Now that you have your new container deployed, lets connect to it and restore from the backup file you downloaded.
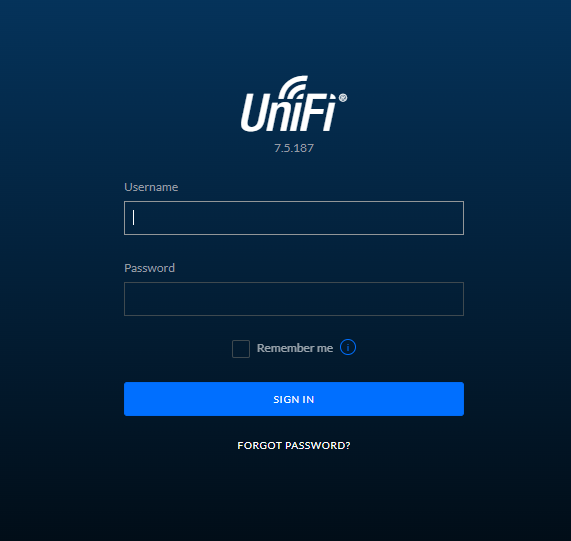
Open your web browser and navigate to “https://{server name or IP}:8443”. When prompted that “Your connection is not private”, click “Advanced” and “Proceed to site”.
You should now see the setup guide screen for your new controller. If you aren’t restoring from backup, feel free to click through the prompt and adopt your devices as if it was a whole new build.
If you did download the file and want to restore it, look at the bottom middle of the screen and you should see a “Restore from Backup” button. Click it and point it at the file you download of your old Cloudkey. The process can take a little bit but then it should automatically take you to the blue login screen. Login here with the same admin credentials that you used on your old key.
Now that we are into the main interface, there is one setting we will need to change to make sure your devices can communicate with the Docker container correctly. Go to the “Settings” page on the bottom left panel. Click on the “System” settings and then click the “Advanced” tab at the top. Scroll down until you find a setting call “Inform Host”. You will want to Override this setting using the check box and set the “Inform URL or IP” to the external IP address of your Docker server. This will make sure when a device broadcasts out and connects on that IP address, Unifi is able to answer.

Now you should be able to go back into the “Unifi Devices” page and see your existing network devices get adopted and come back online. Not all of my devices came back online right away, I did have to manually restart a few of them like my UAG and one Switch. Also, one of my Wireless Access Points failed adoption and gave me the screen below:
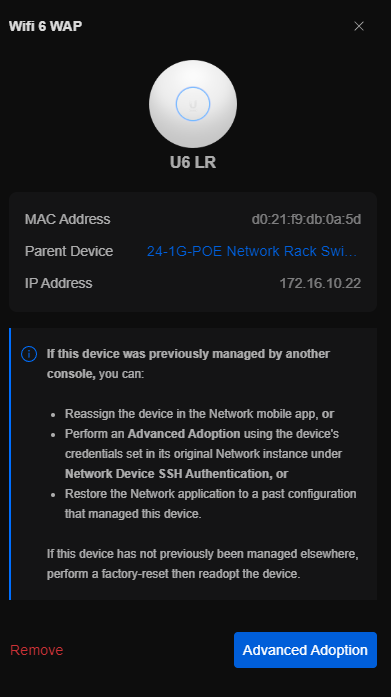
To fix this, I just clicked the “Advanced Adoption” and entered the Device SSH Authentication Username and Password I set on my old Cloudkey.
Conclusion
Thats it for the migration!
It definitly wasn’t a smooth process, I reverted snapshots on my Virtual Machine and went back and forth between the old and the new controller. It would be nice if the Adoption process is made smoother in the future after restoring from a backup. I am going to run this container for a while and will be posting more Unifi content along with walkthroughs on how to upgrade this container in the future.
Hope this helps anyone looking to make the switch!
Unifi | Docker Hub | GitHub