
On my network, I prefer to us Windows File Servers when sharing any files because of my use of it in the past as part of my career and I find it easier then Linux or Synology shares. Also, since I run Windows Active Directory for user management its also easy to map network shares using Group Policy.
This does cause some complexity when trying to use the shares on a Linux server to run services or docker containers. To help with this, I use the CIFS Utilities Package. This allows you to use your Windows credentials to access shares to keep security on your files and mount shares automatically at server startup.
For all my servers, I use Windows Server 2016 for my files servers and for my Linux servers I use Ubuntu Server 20.04 LTS. Some of the commands are different for different distributions of Linux so keep that in mind when executing.
Prerequisites
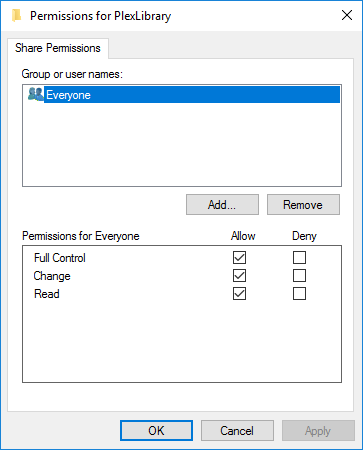
Windows Share – You will need to have your Windows share accessible to your Linux server with proper security. For all my shares, I prefer to set the share permissions to allow “Everyone” and then set the proper security permissions at the folder structure level. This standardizes permissions and makes it easier to manage.
User Credentials – You will need all the user information for the user you set to have proper security on the folder. This includes “Username”, “Password”, and “Domain” or “Hostname” of the server with the share.
Install CIFS on Linux Server
To start the process, we will want to make sure our “apt” libraries are up to date and then run the command to install CIFS.
sudo apt update
sudo apt install cifs-utils
Create a folder to mount the share
It is standard procedure to mount your shared drives in the “/mnt” folder at the root of your Linux folder structure. The blow code is an example of how to create a folder inside the directory. Just replace everything inside the quotations (including the quotations) with the Windows share name.
sudo mkdir /mnt/"windows share"
Create a credentials file to hold user information
Next we will want to create a credential file that holds the user information for accessing the file share. This file will be reference later in the command we will use to mount the share. By including this information in a file instead of in the actual command, it makes it easier to update the information later if you need to change the password. You can then also restrict the permissions to the file so any other users accessing the server can’t view the information and get the password.
We will want to create this file in “/etc” folder which is where the “fstab” file is also stored which we will update later to make the mount happen automatically.
We will want to create a seperate file for each share incase you want to use different shares on the same Linux server which have different Windows security. With the below command, just change the section in quotations to the share name including the quotations.
sudo nano /etc/"windows share"-credentials
Inside the file, enter the following information. Just change the parts in quotations to reflect your share permissions, removing the quotations.
username="username that has access to share"
password="password for username"
domain="domain or the hostname of the share server"
Once you have entered the information, press “Ctrl + X” to exit and then press “Enter” to save the file.
Add to the “fstab” file to automatically mount share
Last, we need to tie everything together with what we have done so far and edit the fstab file to automatically mount the share. Enter the following command to edit the file:
sudo nano /etc/fstab
Inside this file, you will want to leave everything that is already in there alone since its critical to the operation of the server. Enter a new line fill in the following information:
//"windows server ip address"/"windows share" /mnt/"mount folder" cifs credentials=/etc/"credentials file",file_mode=0755,dir_mode=0755 0 0
The “file_mode=0755,dir_mode=0755 0 0” is needed to set permissions on the share. By using the “755” permissions, it sets the permissions to “owner can read/write/execute”.
Test Mounting Share
The following command will execute the mount command we entered into the fstab file. If it returns no errors, go into the /mnt folder and do an “ls” to see if you can view files on the share folder. If it returns an error, go back and check all the information entered at each setup and make sure it lines up or google the error you receive to get more information on how to fix it.
sudo mount /mnt/"windows share"
Conclusion
Now that you have your share mounted, you should be able to restart the server and have it remap automatically. Feel free to use this as a storage location for any services you want to run on your Linux server.