SearXNG is a free internet metasearch engine which aggregates results from more than 70 search services. Here is the Wikipedia page on how metasearch engines work. With SearXNG, users are neither tracked or profiled. It’s similar to SearX and Whoogle. SearXNG development started in the middle of 2021 as a fork of the SearX project.
I originally found out about this project when MariusHosting wrote a post about deploying it to a Synology back in February. Shout out to him and his website for covering some awesome containers.
I have been using this search tool for a few month now and I do like the privacy at the cost of performance. If you run this engine on your home lab, know that it does take a second or 2 to return your search results apposed to sites like Google that return them as soon as you search. That being said, I think the trade off of knowing my information isn’t being profiled with my Google account.
In this article, I’ll go over the deployment of the Docker container, accessing the search engine and some of my preferences. Then I’ll wrap up by walking you through changing your default search engine in Google Chrome.
Prerequisites
I will be setting this up on Portainer utilizing Docker containers running on Ubuntu 24.04. Here are my setup guide for all of those pieces of software:
- Install Ubuntu Server 24.04 LTS
- Things to do after installing Ubuntu Server
- Install and Configure Docker, Docker Compose, and Portainer on Ubuntu Server
Deployment
Copy this code to a new Stack on your Portainer. You can also copy this directly into a Docker Compose yaml file. Update the information for your deployment and deploy the Stack.
---
version: '3.9'
services:
  searxng:
    image: searxng/searxng:latest
    container_name: searxng
    volumes:
      - data:/etc/searxng:rw
    ports:
      - {port number}:8080
    restart: always
volumes:
  data:
Stuff to change for your deployment:
- Version – This is be determined by the version of Docker you are running on your server. You can find this by entering the command “docker -v”. Here is a link to the Compatibility Matrix.
- Image – You can do “latest” and it will pull the current version. I prefer to look up the actual tag for the current version. This adds a little more management to updating however pinning it to a specific version adds reliability. Here is a link to the SearXNG Tag page.
- Ports – You will want to update this to an empty port that works well inside your environment.
- Volumes – I started switching my persistent storage to built-in Docker volumes for some changes I will be making for my file system. Feel free to do what I did in deploying to a Docker volume or you can do a “blind map” directly to the file system on your server (ex. /home/{user name}/docker/kanboard/{folder for each}).
- Restart – You will want to set this to the way you want docker to handle the restarting of the container. Here is a link to the Restart Policies to choose from. I prefer “always” so if it crashes or the server restarts, it will automatically restart the container.
Accessing the Search Engine
Now that we have the docker stack deployed on our server, lets access the web interface and start customizing it.
Open your web browser and navigate to “http://{server name or IP}:{port you configured in the stack}”.
You should see a Search screen that looks like this:

This is the default search engine. It’s no different then going to google.com and searching from the search bar but instead of google tacking your search history, the server uses the metasearch to return your results.
To modify the settings for your browser instance (it saves these setting in your browser cookies, there is no login so if you go to a different browser, the settings won’t persist), click the “Preferences” button in the top right corner.

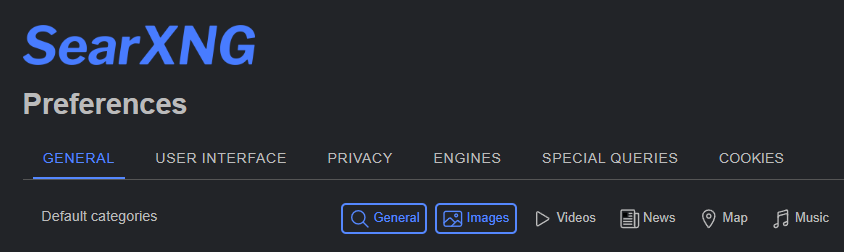
First settings are on the “General” page.
Under “Default categories”, click on “Images”. This will highlight both General and Images. When you search for something, it will return the results for a web search and an image search on the same page. You can add other categories if you want. I did try turning all of them on and when I searched for something it broke the interface so be careful with your performance.
The next thing I enable right below is “Basic Calculator”. This allows you to put a math formula into your search browser and it will return the answer.

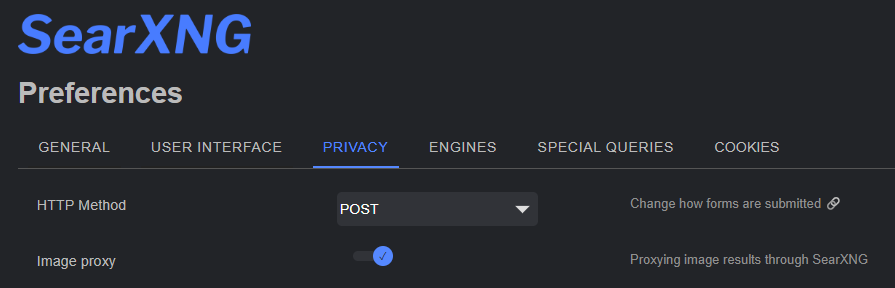
The next setting I like to enable, if you switch to the “PRIVACY” tab, is to enable “Image proxy”. This just makes sure all image searching also go through the server. It can impact your performance but for privacy, I feel like its worth it. Otherwise you might as well just use Google.
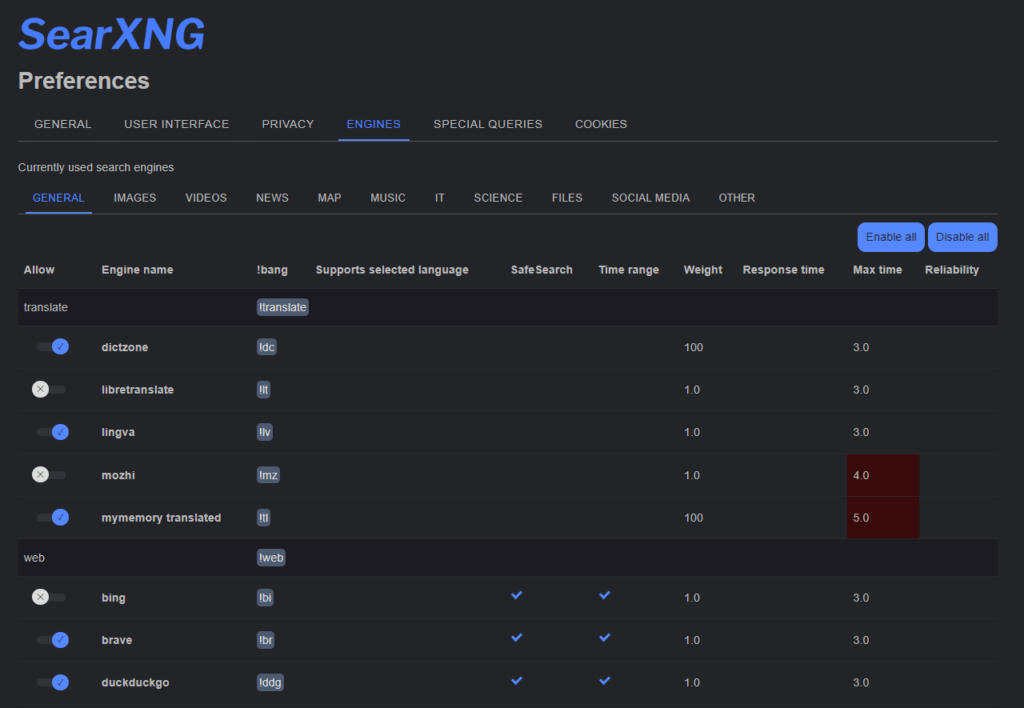
If you want to tell the server which search engines to use for it’s searching, they can be enabled/disabled on the “ENGINES” page. At the top you select the search categories and then see which services it will try to use for this category. It will also give you some cool information like features available (ex. SafeSearch) and the Response time it takes for them to return information.
When you are done editing your preferences, scroll down to the bottom of the page and click the “Save” button.

Backup your settings
Like I said above, SearXNG doesn’t save anything about you in any sort of account login, it does it through cookies in your browser. If you want to save your settings for backup or to transfer them to a different browser/computer, they make a really easy way to do this.
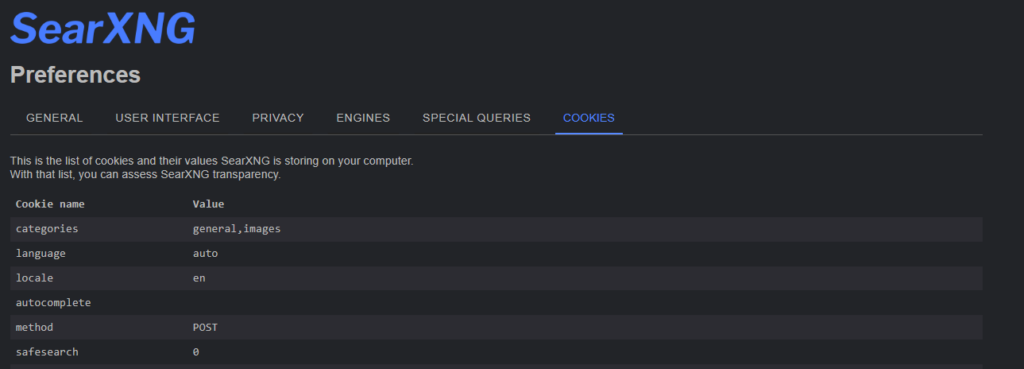
Inside the Preferences menu, on the far right of the settings tabs, you will see “COOKIES”.
Here it will show a full list of all the cookies it has saved in your browser.
If you scroll all the way down to the bottom of this page, you will see “Copy preferences hash”. Copy this hash and paste it in notepad or save it somewhere.

When you want to restore the preferences, simply go back to this page and paste the hash in the area “Insert copied preferences hash (without URL) to restore” and click “Save” at the bottom. This should restore your preferences exactly as you had them set.

Setup as default search engine in Google Chrome
One creature comfort that I really like about this setup is setting my personal search engine as my default engine inside Google Chrome. It took me a little while to figure out how exactly to do this so hopefully this helps people out there just get it setup.
First thing you will want to do is at minimum make a DNS entry for your local network to this server and my recommendation is you make it publicly accessible with external DNS. You wouldn’t want to take your laptop to a coffee shop and your search engine no longer able to search things in your browser. If you are only going to use this on your internal network, IP address will still work just not as clean.
Once you have your form of access figured out and can access the search page in your browser, search for something, doesn’t matter what it is, just need to search so Chrome and find the “=%s” tag.
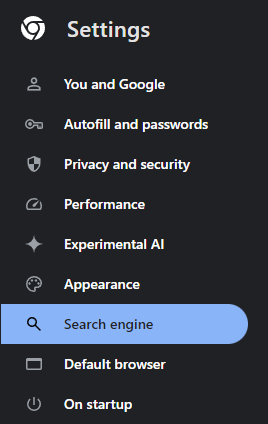
Now go to your Chrome “Settings > Search engine” page.
Click the “Manage search engines and site search” button.

Scroll down to the “Inactive shortcuts” sections. The list is alphabetical so your SearXNG probably won’t be in the list unless you have never used this browser. Click the “Additional inactive sites” to expand the list.
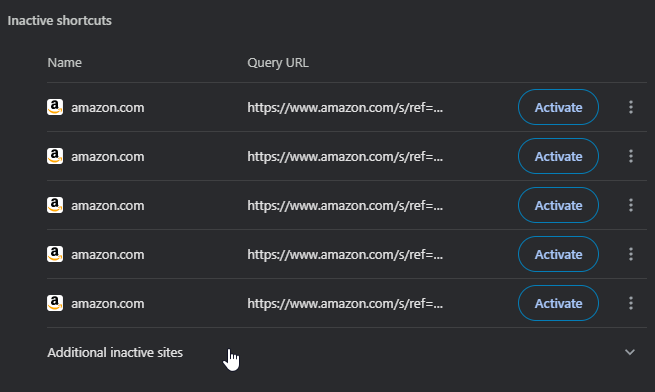
Scroll down through the list until you find your “searxng” server and the correct URL listed. Click “Activate” to enable it for your browser.

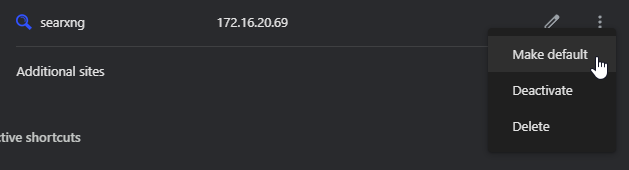
This just adds it to your browser as a searching source and doesn’t set it as Default. To do that, scroll all the way back up to the “Site search” section, click the 3 dots next to the “searxng” and click “Make Default”.
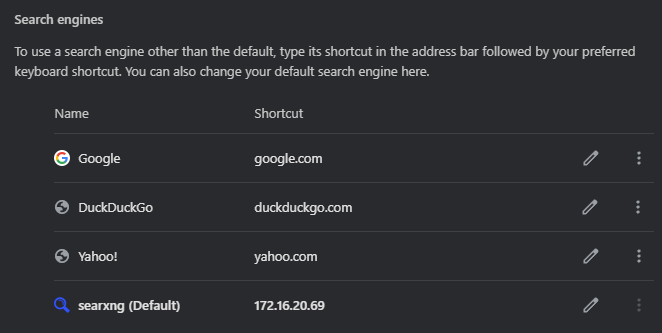
Now when you scroll up to the “Search engines” section, you should see it like this listed as the “Default” engine.
Opening a new tab, you should now see your URL bar using searxng as it’s search engine.

In my quest to self host all the services I use, surprisingly a search engine wasn’t on that list. I didn’t think it would really be possible to have a good consistent experience I get with Google without giving up a ton of performance for it to scrap the whole internet and return bad results. Although you do give up a little performance by self hosting, only taking a few seconds to return a search result is worth it in my opinion for the privacy that comes with it.
If this walk through helped you deploy the system and you want to share your experience, feel free to drop a comment below.