On the road to having a great Proxmox setup, once you start deploying virtual machines the next and most critical step is to setup a Backup system so you can recover from any issues or just restore from a bad update or container push. If you talk to most people that do system administration, the backups are almost more critical then the service itself.
Proxmox has a very simple backup system built into the software that makes sure your data is protected. I’ll cover how to setup a backup routine later in the article. First, I’ll walk you through setting up the NFS service and share on a Synology NAS. It’s critical that you don’t store your backups on the same system and storage as your Proxmox system. I setup and use a older Synology NAS specifically for Backups storage. It’s only job is to store a copy of all my data.
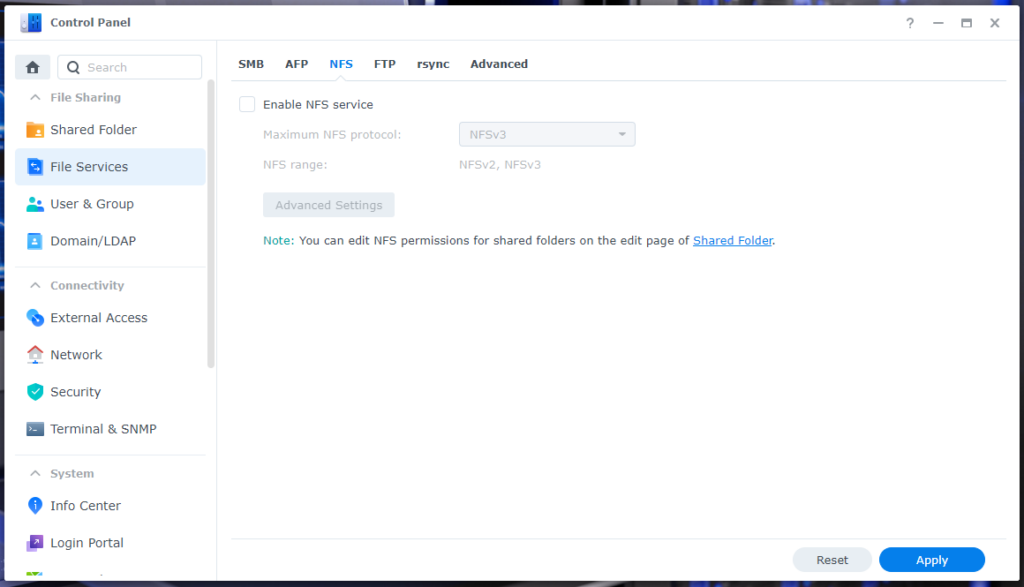
Enable NFS Service
After logging into your Synology NAS, the first thing we need to do is enable the “NFS” service.
Launch the “Control Panel”, then click on “File Services”, then click on the “NFS” tab.
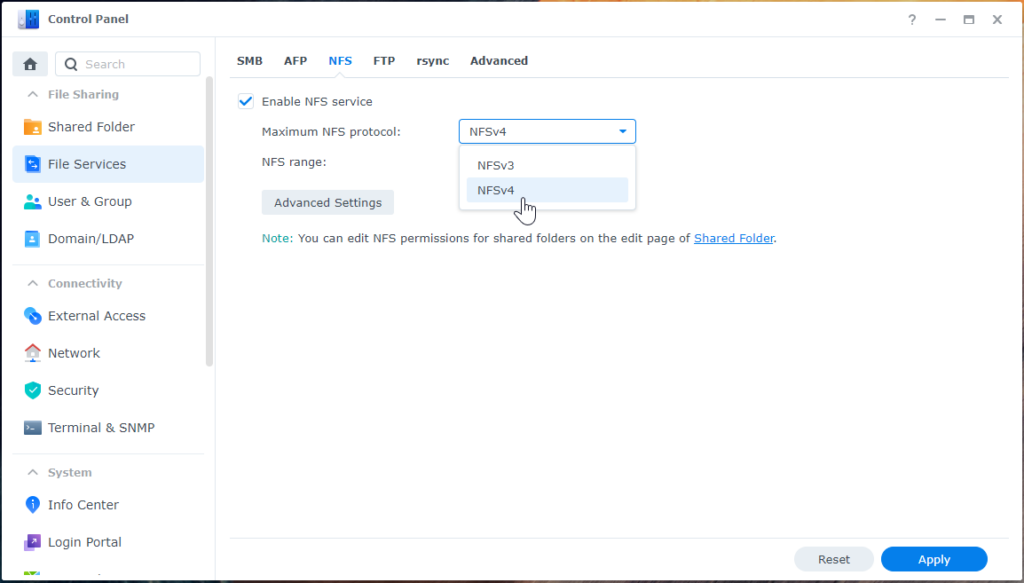
Check the box to “Enable NFS service”. Then click the dropdown and select the highest NFS version available on your system. Since my NAS is a little older, it only has v3 and v4 available.
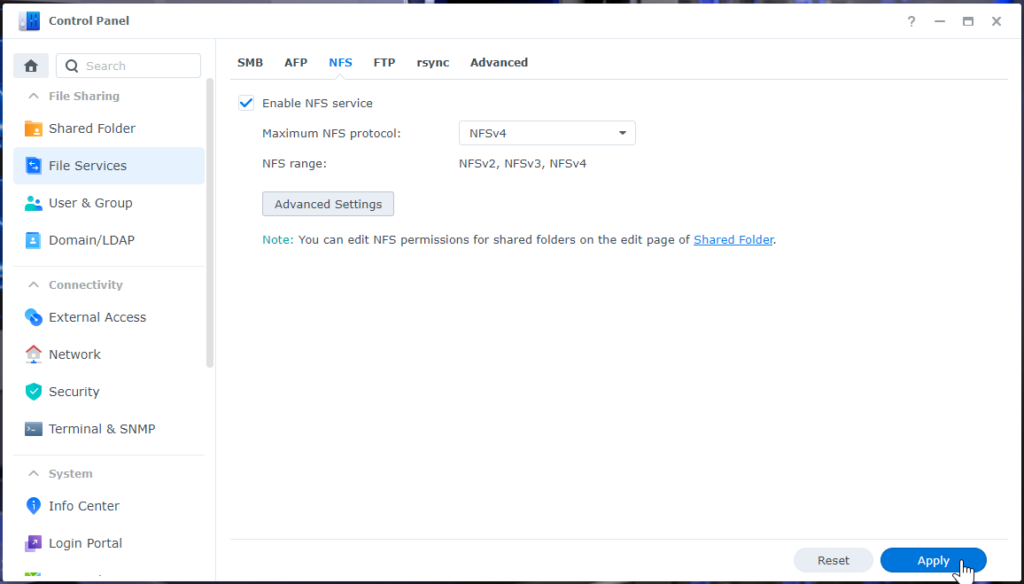
Click “Apply” at the bottom to enable the service.
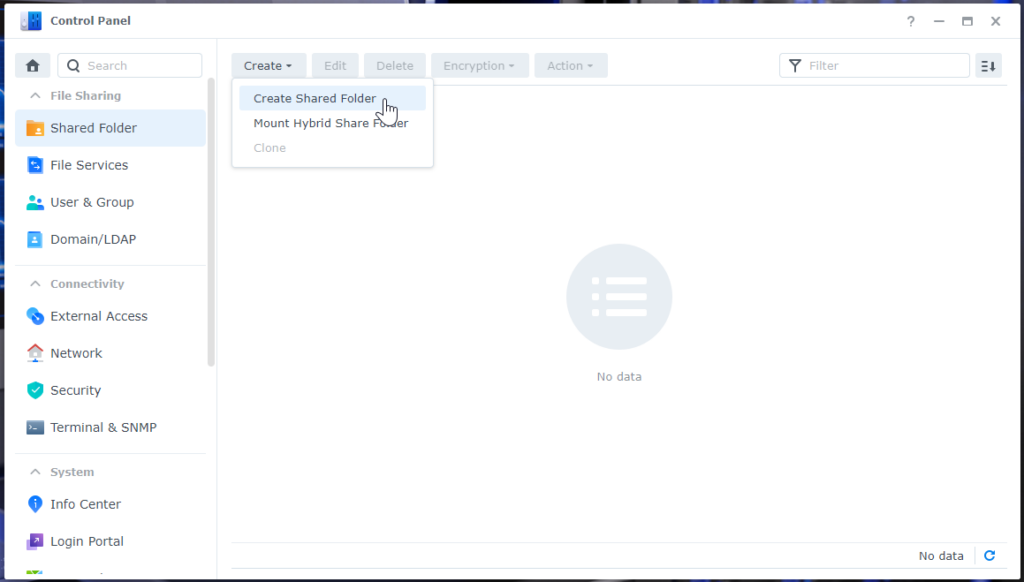
Create a Shared Folder
Next, we need to create a share that Proxmox will use for connecting and storage.
Click on “Shared Folder” on the left side menu, then click “Create” and then “Create Shared Folder”.
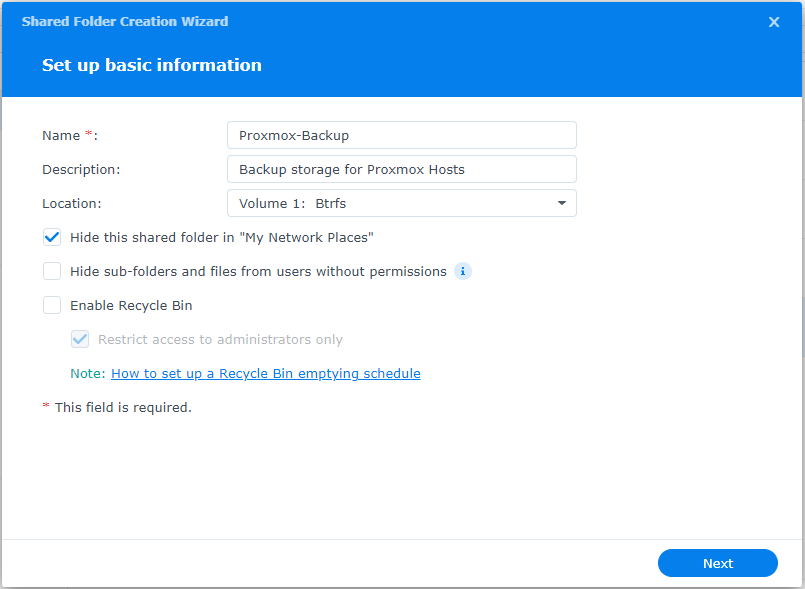
Name your share, I just used “Proxmox-Backup” so I know just by looking at it what it is used for. I check the box next to “Hide this shared folder in “My Network Places””. Since this is going to strictly be used for Proxmox backups, I don’t need to see it on my Windows PC’s. I also uncheck “Enable Recycle Bin”, since we will set it up with rolling backups, I don’t see the point in having a Recycle Bin. Click “Next” at the bottom to continue.
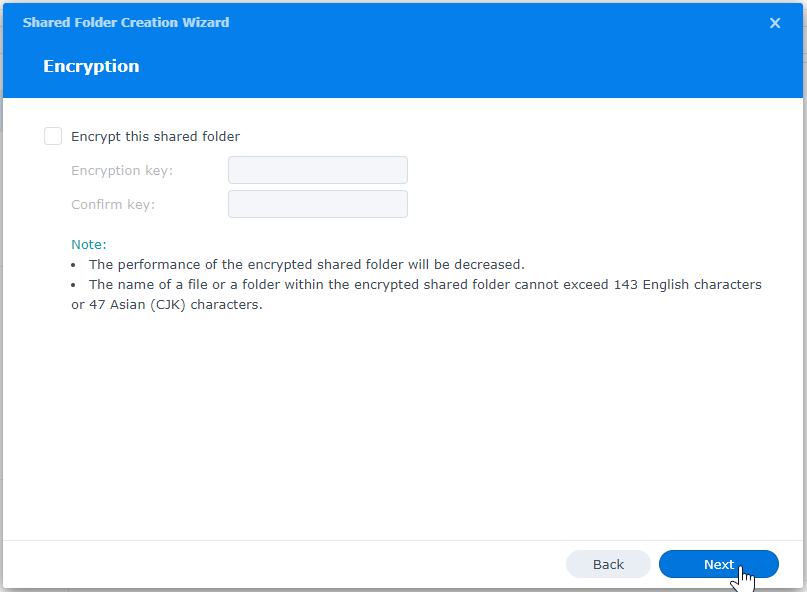
I don’t have a reason to enable Encryption on this storage since it’s a home lab. If you do, you can enable it however just know the performance will decrease since it has to do extra processing when files are created. Click “Next” at the bottom to continue.
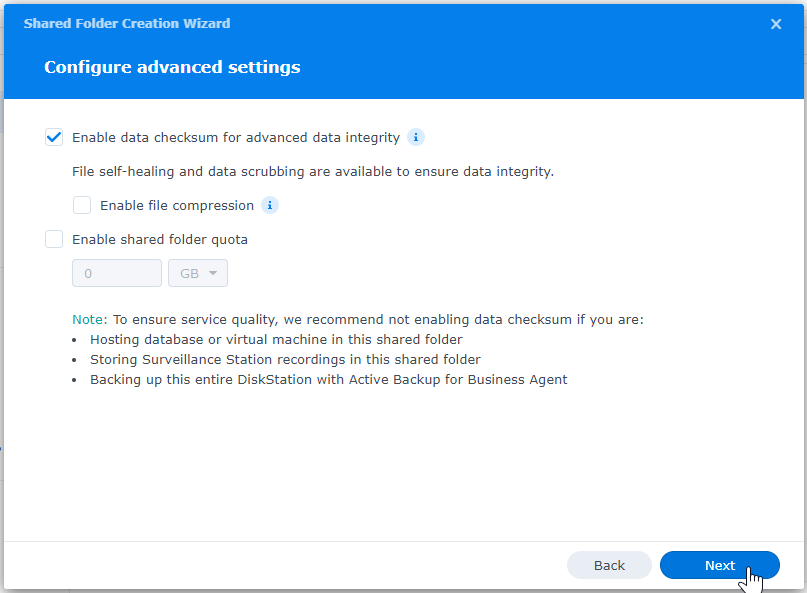
I enabled the “Data Checksum” on this share since it’s not going to be a “High Performance” share. However, I didn’t enable File Compression, I have enough storage on this system and don’t need to compress anything. Click “Next” at the bottom to continue.
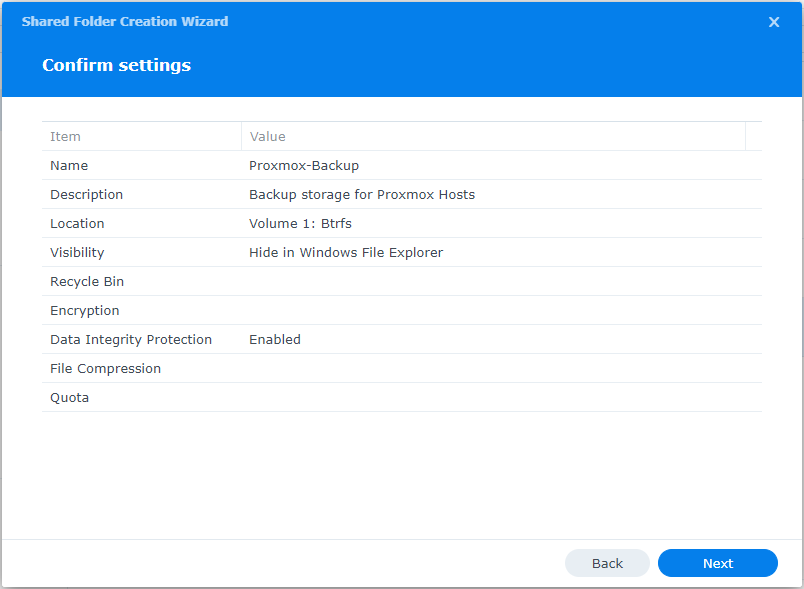
Confirm the settings are the way you want them and click “Next” to confirm and create the share.
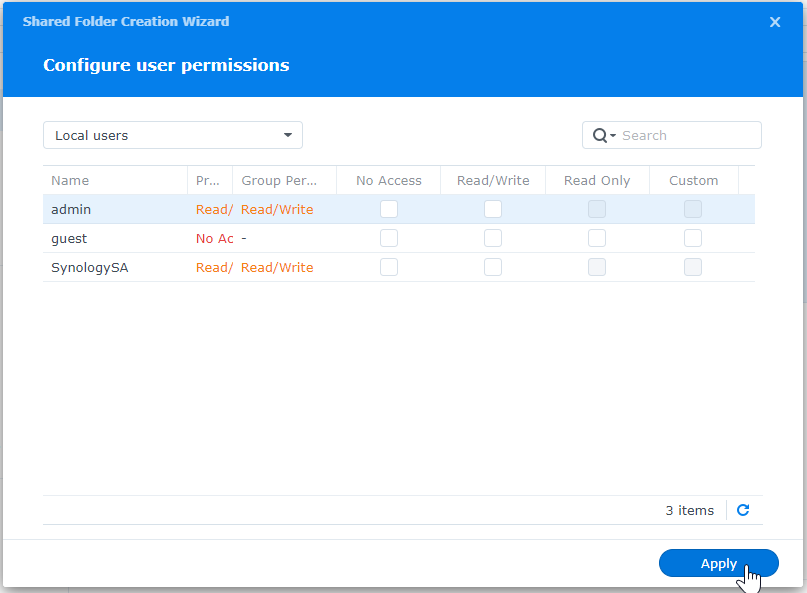
At this point, the share is created. However, Synology prompts you if you want to set permissions for the share for other access. Since we are connecting with an unauthenticated Linux share, we don’t need to change anything we these settings. Click “Apply” at the bottom.
Setup Proxmox Storage
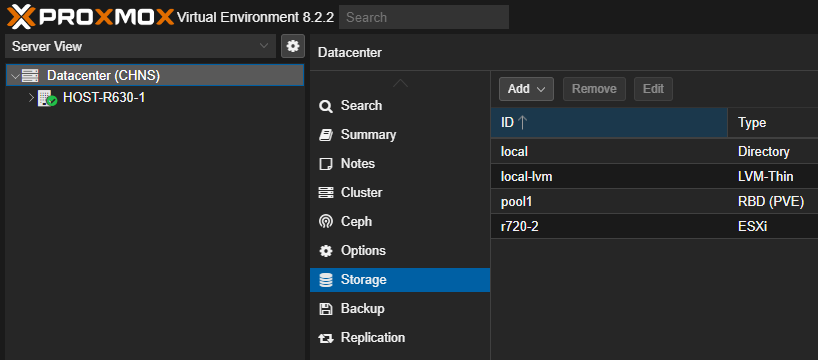
Now that we have the share created, we need to tell Proxmox how to connect to it and what information to store on it.
Login to your Proxmox instance, then select “Datacenter” on the left panel, then click on “Storage” to the right.
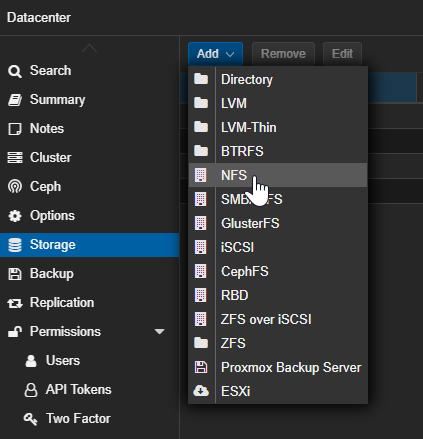
Click the “Add” dropdown and then select “NFS” for the connection type.
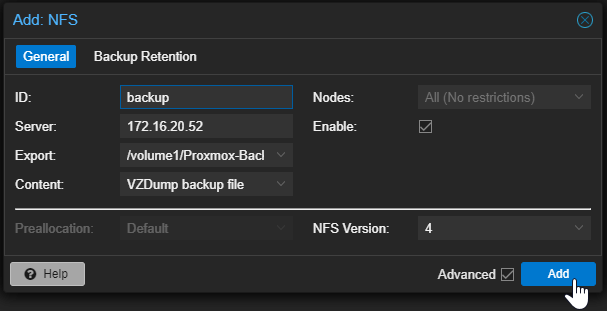
In the “Add: NFS” screen, enter an “ID”. This is just a descriptive name that Proxmox will call the storage. I just called mine “backup” since all backups will be saved to it. Then enter the “Server” address. You can use a FQDN here however I don’t want to depend on DNS to be correct for my backups to work so I just hard set it to the IP Address of the Synology NAS. As long as your Proxmox host can connect to the Synology over the network, you should be able to click the dropdown for “Export” and see your newly created share, select it. For “Content”, if you are building this out like I am for strictly backup storage, you can unselect “Disk Images” and only select “VZDump backup file”. Next is an optional step but I check the “Advanced” box and hard-set the NFS Version to match the version I selected on the Synology. Click “Add” at the bottom to add the share as usable storage.
Configure Backup Routine
Now that we have off system storage setup, we can create a backup routine to backup all our virtual machines.
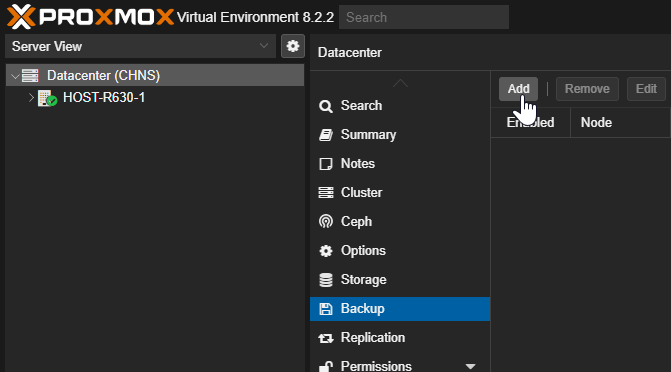
Back on the “Datacenter” menu, select “Backup” on the right panel. Then click “Add”.
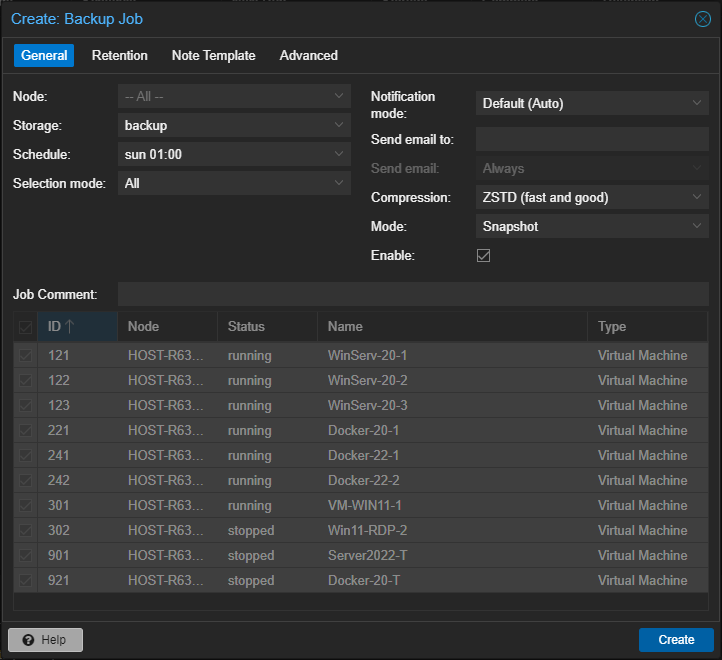
On the “Create: Backup Job” screen, we need to add the information that is needed for how you want your backups to run. These are the settings I decided to use:
- Node – I just selected “All” so it includes any Hosts I add to the Datacenter cluster.
- Storage – select “backup”, this is the storage we configured in the last steps.
- Schedule – I selected “sun 01:00”, this is a constant rolling backup so I just want to make sure all weekly changes are backed up once a week. The job will automatically run at 1am every Sunday.
- Selection mode – I just set it to “All”, this way any VM’s I add to the system will automatically start being backed up with the schedule.
The rest of the settings I just left the defaults on this page.
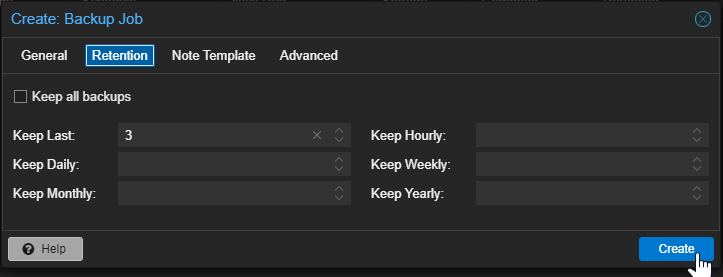
Next, click the “Retention” tab at the top. Since this is a rolling backup job, we only want it to keep a certain number of previous backups and delete them when they fall outside the range we want. For my system, I “Keep Last: 3” backups. This will only keep 3 backups, once a new backup is created, it will delete the oldest. Once you decide how many you want to keep, click “Create” at the bottom.
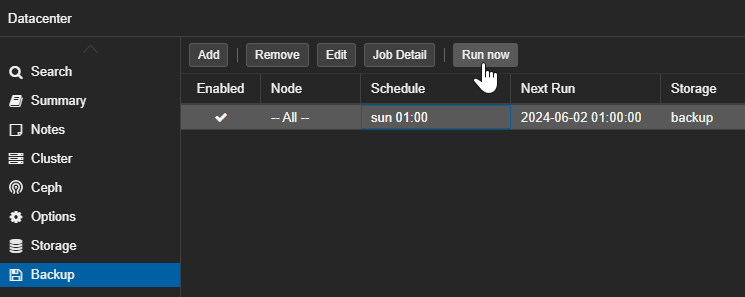
Once your job is created, I recommend manually running the backup job just to confirm everything works correctly and data is able to make it to your Synology NAS. To do this, back on the “Backup” screen, select the job and click “Run now” button at the top.
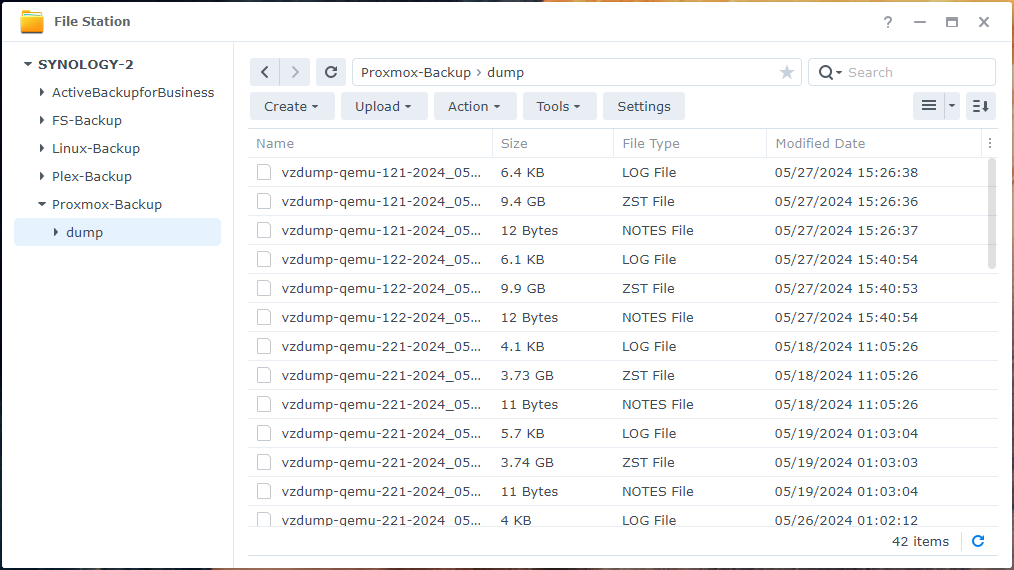
Once the job is finished, you should be able to confirm that the files are saved by logging back into your Synology NAS, going to your share in “File Station” and looking in the “dump” folder. You should see a bunch of “vzdump” files, one for each VM.
That’s all there is to it. You are now protected if your Host crashes or data gets corrupted. Simply go into the “backup” storage and “Restore” the VM.
Hopefully this helps you with your home lab setup. Leave a comment below if you found this useful.