I built a new Desktop during the tailend of COVID. As I was setting everything up and installing all the software I had a thought…“Could I automate this process so on a fresh OS installation, the PC does all this work for me?”. I can’t even count the amount of times I’ve setup desktops with the software I use and the amount of time it takes to track down everything and install it each time. Not even talking about keeping all the software up to date. It’s a lot!
I started with setting up Group Policy on my domain to take care of general OS settings, I will probably do an article about that in the future. After doing some searching online on how to manage application, I came across Chocolatey. It’s a machine-level, command-line package manager and installer for software on Windows, similar to package managers built into Linux. It uses the NuGet packaging infrastructure and PowerShell to simplify the process of downloading and installing software.
As soon as I saw how it works I knew it was the solution. The process I came up with is utilizing PowerShell scripts as startup scripts on PC Organization Units (OU) to automatically install software I wanted on boot and then on every restart of the PC it checks to make sure the applications are up to date.
In this article, I’ll focus on deploying this to a Domain with Group Policy. If you don’t have that setup, don’t worry, you can still utilize this system and add it to a login script on individual machines or combine the scripts and run it manually.
Prerequisites
For my deployment, you will need Active Directory setup and your computers joined to the Domain.
Next, you will need to setup your OU structure so it makes sense for your Domain and you can take advantage of inheritance. I might make an article in the future on my domain structure and how I setup everything on my system, for now you will have to do some searching on the best way to accomplish this. Here is a screenshot of my structure:
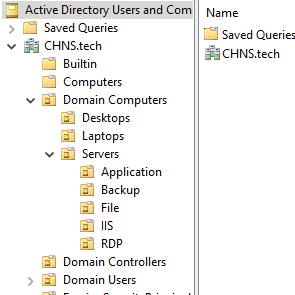
I built out the structure in this way because I have different policy or applications for my Desktops vs Laptops vs Servers.
Install Chocolatey
Once you have your Domain all setup, the next step is to setup a script to automatically install the Chocolatey agent. Chocolatey provides a PowerShell command to install the agent, we can take that and add it to some “if” statements to check if its already installed. If it’s not installed, install it. If it is installed, upgrade it (if there is any updates available). Here is the script I use to accomplish this:
if (-not (Test-Path C:\ProgramData\chocolatey\choco.exe)) {
Set-ExecutionPolicy Bypass -Scope Process -Force; [System.Net.ServicePointManager]::SecurityProtocol = [System.Net.ServicePointManager]::SecurityProtocol -bor 3072; iex ((New-Object System.Net.WebClient).DownloadString('https://chocolatey.org/install.ps1'))
}

if (Test-Path C:\ProgramData\chocolatey\choco.exe) {
choco upgrade chocolatey -y
}
Copy this script and save it as a “.ps1” file.
Next we need to deploy this as a Computer Startup script through Group Policy.
If you followed my Domain OU sctructure, we want to deploy this to the top level OU for all your “Domain Computers” so every computer in your Domain gets it installed. Create a new Group Policy Object (GPO) and name it descriptive like “Install Chocolatey”.
Edit the GPO and navigate down to these settings:
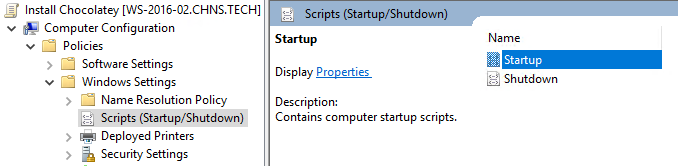
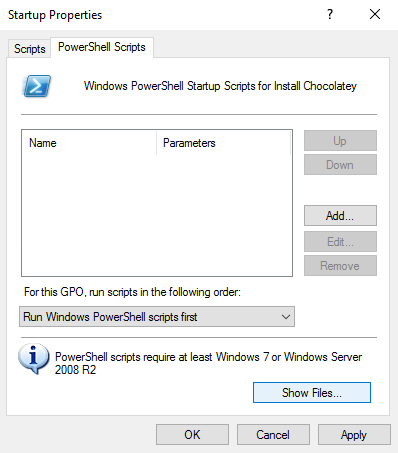
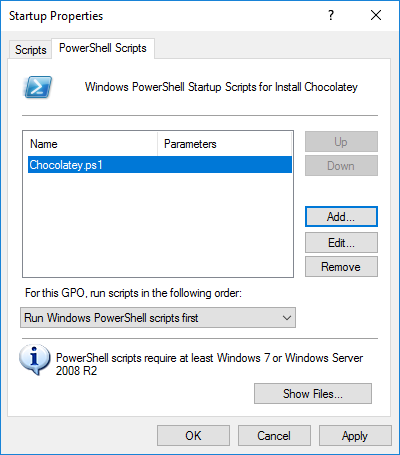
Double click on “Startup” to open the Properties menu. Then click on the “PowerShell Scripts” tab. At the bottom of that screen, click on “Show Files…”.
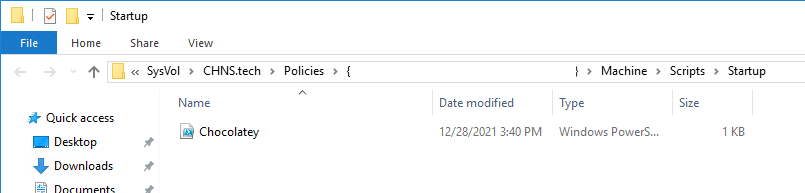
We want to move our script into this folder so the Domain Controller has access to it. The alternative you could do is drop all your scripts on a file share somewhere that all domain computers has access to read and execute.
Close the File Explorer window. Back on the Startup Properties window, click the “Add…” button on the right.
Click “Browse…” and you should see the script you moved to the folder. If you put the script on a share, navigate to it and select it.
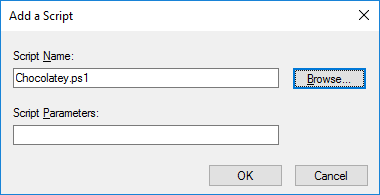
Click “Ok” to add the script and then click “Apply” to set the script to run at Startup of your PC’s.
Make sure your PC’s are joined to the Domain and their objects are in one of the OU’s under the OU you applied the GPO. Restart the Computers to automatically install the Agent.
Setup and Installing Applications
Now that we have the Agent installed and auto updating, we need to setup “Packages” (applications) to be installed.
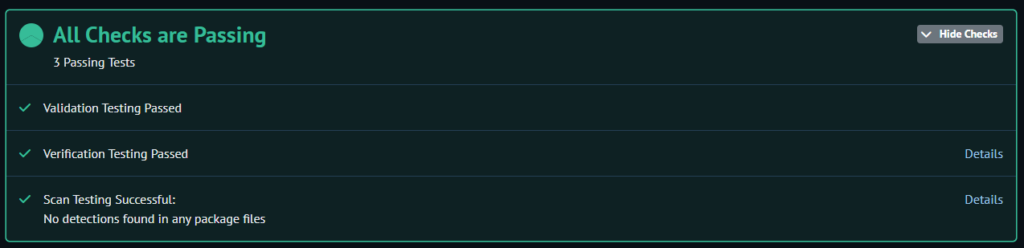
First, lets decide on an application to install. Here is a link to the packages available to Chocolatey. You will get a warning first time you visit the site making you sure you know these packages are managed by the community so install at your own risk. As long as you install well known applications that are used by a broad range of users, you should be pretty safe. Each package gets tested to some degree and it shows you at the top of the package page how trusted it is:
Search for the application you want to install. I am going to use Adobe Reader for this example since almost everyone uses it for .pdf’s and it updates a Lot! It was one of the first packages I setup on my system.
The main thing we need to find to get this deployed is figuring out the “Package Name”. Once you find the package you want, look for the command to install it using the “choco” command line tool. The name of the package will be everything after “install”:

For the first install of a package, I actually recommend executing this command manually on your system. There is two reasons for this: First, you confirm it will execute correctly on your system and actually install. Second, for the scripts I will use to work properly, we need the full path to a file/exe in the application to determine if the package is already installed. This will dictate if its an install or an upgrade.
You can do this by simply coping the command and pasting it into a PowerShell prompt where the Chocolatey agent is installed already. Once it’s installed, find the main exe or a file we can trigger off. For Adobe Reader, I use “C:\Program Files\Adobe\Acrobat DC\Acrobat\Acrobat.exe”. Copy this path to a notepad or somewhere you can reference it later.
We now have all the parts we need to get the script setup. Start by following the same instructions to install the agent above. Create a new GPO with a descript name under an OU where the Computer Account lives that you want to install it on. Edit the GPO and navigate to the Startup Scripts:

Click on the “Powershell Scripts” tab, then on “Show Files…” at the bottom. Inside this folder, or on the share if you are going that route, create a “.ps1” file with the name of the application.
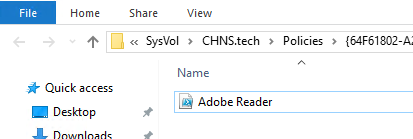
Edit the “.ps1” file and copy/paste the following code into the script:
if (-not (Test-Path "C:\Program Files\Adobe\Acrobat DC\Acrobat\Acrobat.exe")) {
choco install adobereader -y
}

if (Test-Path "C:\Program Files\Adobe\Acrobat DC\Acrobat\Acrobat.exe") {
choco upgrade adobereader -y
}
You will want to update the “Test-Path” value with the path you found earlier for this specific application. Then update the package name next to “choco install” and “choco upgrade”. You might have noticed when you did the manual install that it prompted you to confirm the install by entering “Y”. The “-y” at the end of the command will automatically approve the install since this will happen in the background to the user at PC startup.
Save the script and close the PowerShell window and File Explorer.
Now you just need to click that “Add…” button on the right side of the Startup Properties window and add the script you created to the GPO:
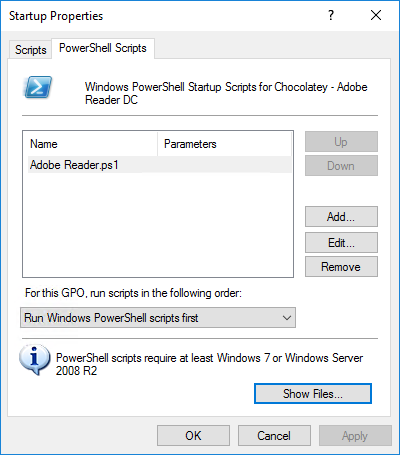
Click “Apply” to save the settings and close everything out. Now every time your PC restarts, this application should either be installed or upgraded if needed.
That’s it, simply repeat these steps for each and every application you want to be installed on your systems. I am currently using this for 18 different applications that I now don’t have to manage or update which is awesome for clean installs.
I have found a few applications that don’t have packages or don’t have enough installs for me to feel confortable using the package on my system for safety reasons but that is a very small number.
Hopefully this helps you with your application deployment. Let me know in the comments below if you used this or if you would change anything to make it better.