Manyfold is an open source, web application for managing your collection of 3D modeling file, particularly focused on 3D Printing models.
Backstory time, a few months ago, I finally purchased a 3D Printer for myself. I quickly found myself on Thingiverse and Printables downloading all kinds of things to print and found a problem that everyone I know runs into with their model file…how do you organize all these model files!? I started by just using a folder on my laptop and tried to do some basic organization. Then I moved that folder structure to a file server on my network so all my devices could access them. That worked well for a little while but then I ran into another issue…knowing what files are for which model based on the name.
Since I started self hosting containers and server, I thought there has to be a docker container that makes this easier. After doing a little searching around online, I came across DB Tech’s Video on Manyfold he made 2 years ago. After watching his video I knew this was the solution to all my problems. Not only does it organize your models into Libraries and make them searchable, it also has a built-in render which allows you to see what the model looks like before downloading it and opening it in your slicer application.
In this article, I’ll go over the Deployment through a Portainer Stack. Then I’ll go over the basic’s of how to use the web application and upload your model files.
Prerequisites
I will be setting this up on Portainer utilizing Docker containers running on Ubuntu 22.04.1. Here are my setup guide for all of those pieces of software:
- Installing Ubuntu Server 22.04 LTS
- Things to do after installing Ubuntu Server
- Install and Configure Docker, Docker Compose, and Portainer on Ubuntu Server
Deployment
---
version: "3.8"
services:
  app:
    image: ghcr.io/manyfold3d/manyfold:latest
    ports:
      - 8040:3214
    volumes:
      - /home/{username}/docker/manyfold/libraries:/libraries
    environment:
      DATABASE_URL: postgresql://manyfold:{database password}@db/manyfold?pool=5
      SECRET_KEY_BASE: {Database Key}
      REDIS_URL: redis://redis:6379/1

    depends_on:
      - db
      - redis
    networks:
      - manyfold
    links:
      - db
      - redis
    restart: always

  db:
    image: postgres:15
    volumes:
      - db_data:/var/lib/postgresql/data
    environment:
      POSTGRES_USER: manyfold
      POSTGRES_PASSWORD: {Database Password}
    restart: always
    networks:
      - manyfold

  redis:
    image: redis:7
    restart: always
    networks:
      - manyfold

volumes:
  db_data:

networks:
  manyfold:
Stuff to change for your deployment:
- Version – This is be determined by the version of Docker you are running on your server. You can find this by entering the command “docker -v”. Here is a link to the Compatibility Matrix.
- Ports – You will want to update this to a port that works well inside your environment. It will be the port that you connect to the web interface of the container.
- Volumes – This is where all the persistant configuration files for the Manyfold container will be stored. Update the information with your username or change the location before the “:” to a location of your choosing.
- DATABASE_URL – Update the {Database Password} with a really long, strong password. We will set this password later in the stack.
- SECRET_KEY_BASE – Update this with a really long random key to be used by the system.
- Restart – I had issues changing this to anything other then “Always”. If you want to change it to something else, just keep in mind if the container has an error, it might not start up again correctly. Here is a link to the Restart Policies to choose from.
- POSTGRES_PASSWORD – Set this to the same password you entered for the “Database Password” earlier in the stack.
One last note on the deployment of the stack: It took a full 2 minutes for it to fully deploy so don’t be surprised if it takes longer then other containers. As long as you don’t get an error and your containers show Healthy, you are good to go.
Configure Manyfold
Now that your Manyfold container is deployed, let’s connect to it and go through the setup process.
Open your web browser and navigate to “http://{server name or IP}:{port you configured in the stack}”.
You should see a Setup screen that looks like this:
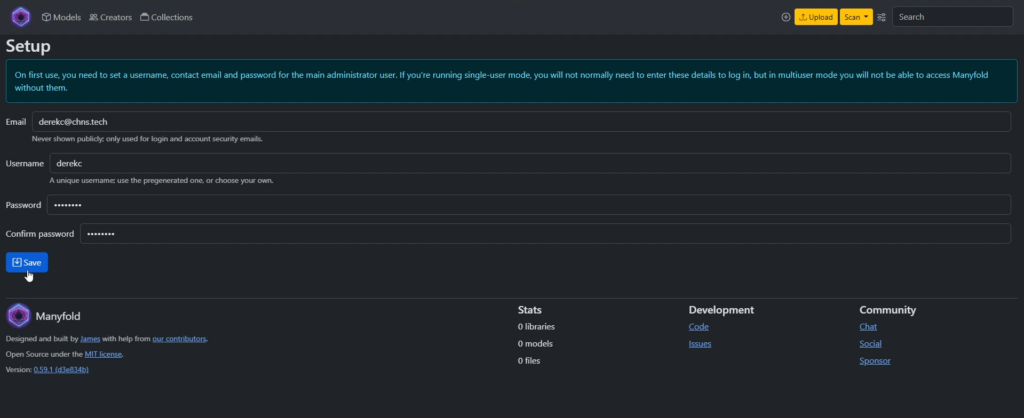
Enter in an Email address you want to use to login to the web application.
Enter a Username (display name) for that account.
Enter and Confirm a Password for that account. Make sure it meets the minimum password standards.
Click “Save” at the bottom to continue.
On the next screen, you will see the “New Library” setup:
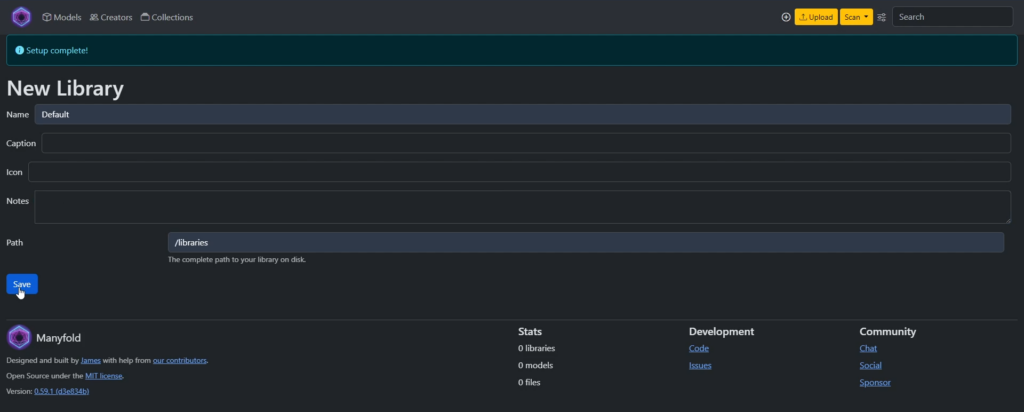
Enter in a Name for your first main library. I just use “Default” since I keep everything in one library.
Enter “/libraries” for the Path. This will need to be the exact same as the folder name to the right of the colon (:) in the volume configuration. This will save your files in the correct location to persist through container restarts.
Click “Save” at the bottom to continue.
The next screen you will see is the main Models page for the application:
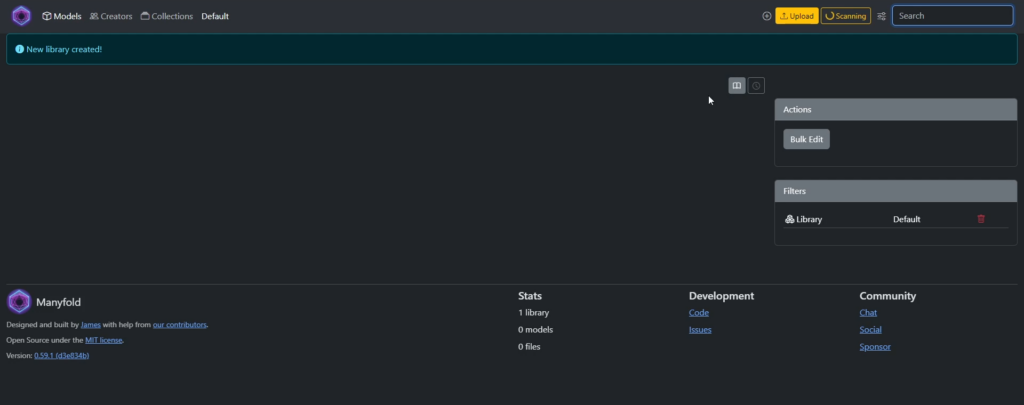
One thing you will notice is the “Scanning” button in the top right corner. If you pointed your path in volumes at a folder that already had a previous instance with model files, this will automatically load them.
If you haven’t already done a deployment, don’t worry about this.
Uploading a Model
Now that we have the system up and running, let’s upload a model to store on it.
Start by figuring out which model you already have that you want to upload or download a new model from one of the model sites. You will want it in the .zip compressed files that you download it as from those sites. If you just try to upload the .stl file, it will error out.
Click the “Upload” button next to the Scan button in the top right corner.

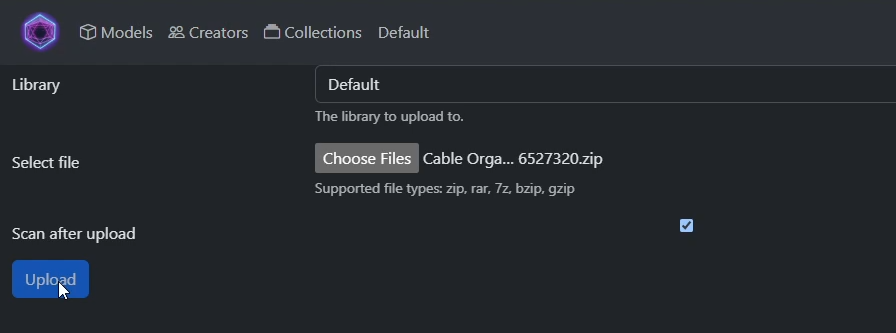
Select the Library you want it to be in and click the “Choose Files” button.
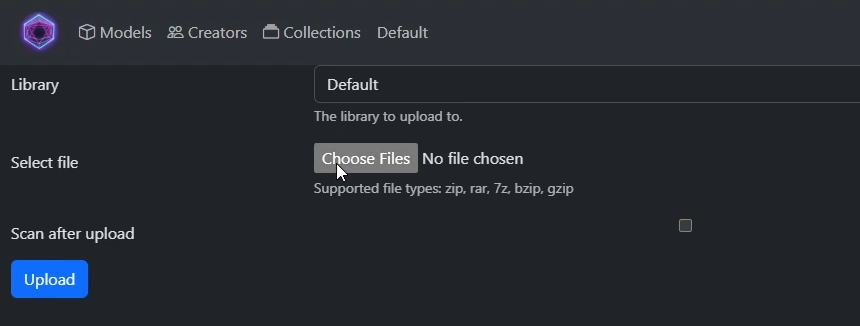
Navigate to the .zip file you want to upload, select it and click “Open”.
Check the box to “Scan after upload” and then click “Upload”.
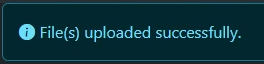
Once the file is uploaded, you should get a pop-up letting you know the “File(s) uploaded successfully.” and it will start scanning the library.
It might take a few seconds to finish the scan so give it a few and then refresh the page. Your new model should show up, probably with one of the stock .png files as the preview (we’ll set this to a better file next).
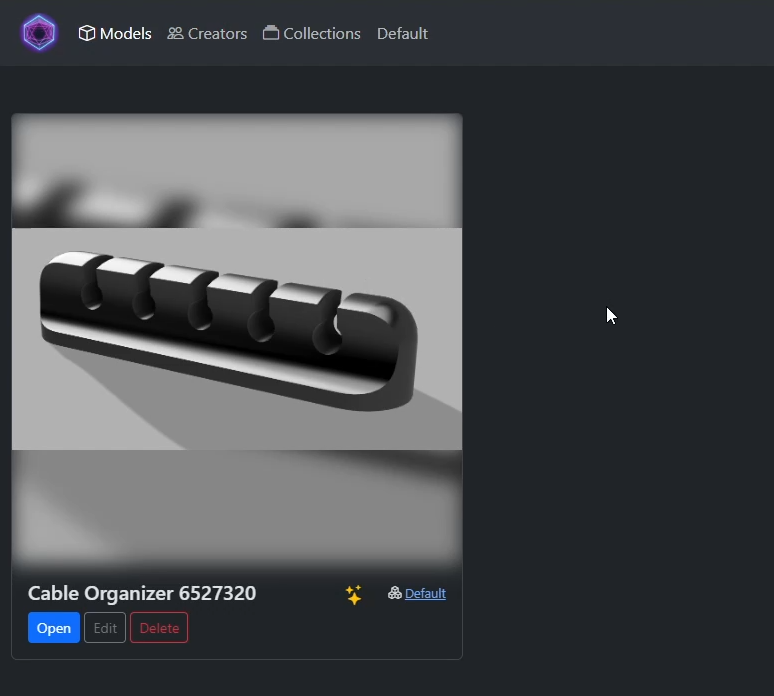
Clicking “Open” on the model will take you to the models main page where you can see all the images, files and information documented for that model.
Click “Edit” under the Model Details section on the right side of the screen. Here you can edit all the details for the model to make organization and searching better:
- Name – by default it adds the model name and then appends the model reference number at the end.
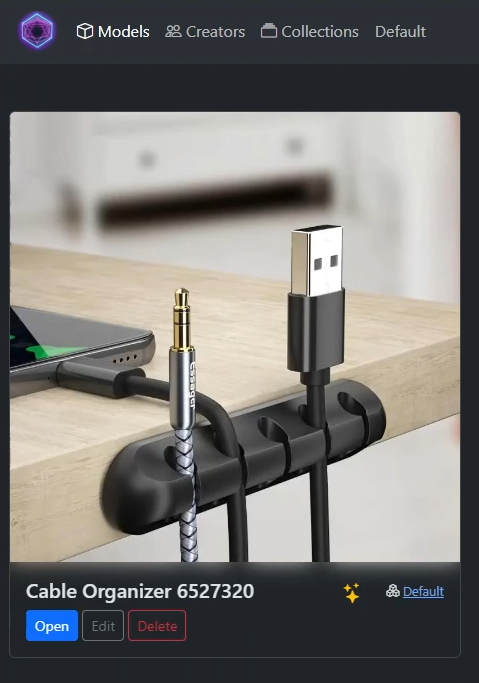
- Preview File – here you select the image file you want to use for the thumbnail for the model. I recommend setting it to a real world image so you know what the model looks like while searching.
- Creator – you can enter the name of the person that originally created and uploaded the model. This is nice for organizing models of each creator you follow.
- Library – this is the Library you have it set to live in.
- Tags – you can add any custom tags you want that make sense to you for organization. By default, all newly uploaded models get the “!new” tag.
- Collection – similar to Creator, you can create custom collections for like models that fit your organization style.
- Link – I like to paste in the direct link to the model where I originally found it online. This way if there is any issues with the files or if they update the version, I can quickly find it and re-download it.
- Notes – self explanatory I think, you can add your personal notes on the model. I recommend coming back here and adding notes base on what printer settings you used to get the best print result.
- License – Change this information if you want to document if you paid for it or if it is free use or whatever it might be.
Click “Save” at the bottom to save all changes.
Back on the main page, I then like to go through all the images and files and clean up anything that isn’t one real world image of the model (which I set as the Preview File in the settings) and the model file itself (the .stl file).
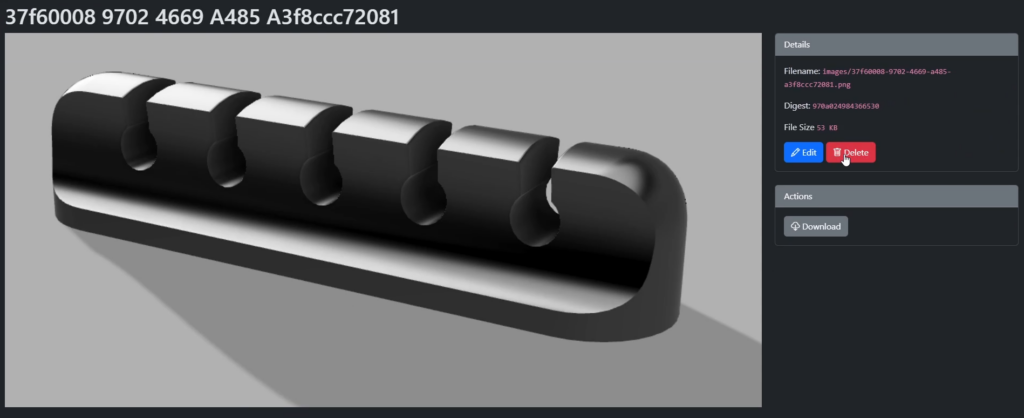
Clicking “Open” on the files, you should see in the Details area to the right that it’s a “.png” file. Click the “Delete” button and confirm.
Repeat this for every file you wish to remove.
When you come across a file that is the “.stl” file, these are the actual files with the code to print the object. Assuming your server is setup correctly, you should be able to click on it and move the model around on the screen to get a better look at it. Very cool feature!
Once you are all done, click back to the main “Models” page at the top to see your newly upload model added to your Library.
Repeat these steps for each model you want to save and organize.
I really like this container and just in the last little bit that I have been using it in my home lab, they have released some big changes that make the system more and more functional. This is definitly one I have and will continue to recommend to any of my Maker friends out there.
Thanks for making it through this article, hopefully it helped you deploy your own system. Drop a comment below if it helped you or if you have any changes you think would work better.


Thanks for the writeup!